31 July 2010

Skapetti, all grown up

Sometimes I think I should have been Italian. Pasta has always been one of my favorite meals - even when I was a little thing downing huge plates of "skapetti". In recent years, I don't think I've ever gone more than a week without eating pasta, and I'd often be happy eating it every day. When it's too warm for soup, pasta is my favorite way to use up leftover vegetables - nearly everything goes well cooked up with onions and garlic (and often tomatoes) and tossed with pasta. However, ever since last December I have rejected my typical tomato-based sauces and have instead found a new go-to dish: Spaghetti al Mascarpone.

Creamy sauces may not be very summery, but living near the beach, we get cool breezes even on the warmest summer evenings, and it is a rare day that I wouldn't be happy to make this my dinner. This dish is as simple as they come - everything can be prepared in the amount of time it takes the water to boil, leaving time to make a green salad to go alongside. Mascarpone, Parmigiano, and an egg yolk are mixed with a little of the pasta cooking water to make a smooth, velvety sauce, which is then tossed with the hot pasta to cook the egg and thicken into a creamy sauce.


Spaghetti is the traditional pasta for this sort of sauce, but linguine or any other long stringy pasta works fine as well. This time I used fettuccine because, well, it was the only long pasta in my house. (We won't discuss whether that was due to a rapid consumption of pasta al marscarpone.) Whatever shape you use, just make sure it's good quality pasta and cooked al dente, because the flavor will really come through the light sauce.

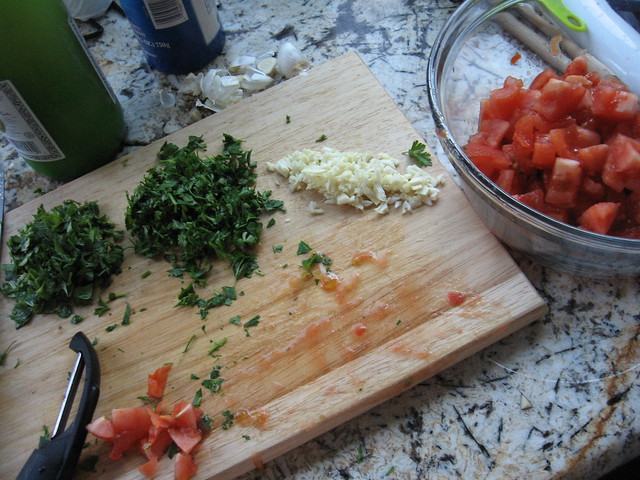
I tend to keep it simple and unadorned, like a grown-up mac and cheese, but try adding halved cherry tomatoes (they will wilt a little bit under the hot pasta much like Checca), or toss in a couple ounces of prosciutto, thinly sliced, to the cheese mixture like the original recipe instructs. I can imagine it would be great with barely cooked green peas, too.

Spaghetti al Mascarpone
Adapted from Giuliano Hazan's "Thirty Minute Pasta"

8 oz spaghetti - or, in this case, fettuccine
4 T mascarpone
3 T grated Parmigiano-Reggiano cheese (about 1/2 oz), plus additional
1 egg yolk*
salt
pepper

Fill a large pot with water and bring to a boil.

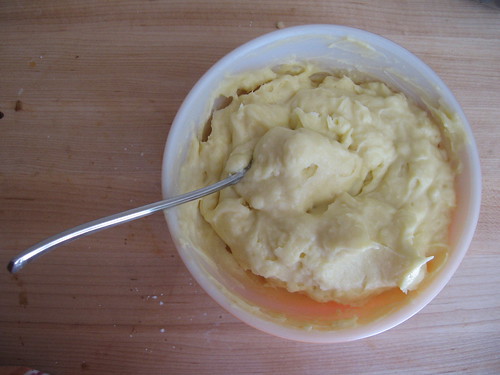
Meanwhile, stir together the mascarpone, Parmigiano-Reggiano cheese, and egg yolk in a large bowl. Sprinkle with a little salt and pepper and set aside.

When the water is boiling, salt liberally and add the pasta. When the pasta is almost cooked, add about 1 T cooking water to the cheese mixture and mix well. Drain the pasta when just al dente, reserving a bit of cooking water.

Toss the hot pasta with the cheese mixture to coat. If the sauce is very thick, add a little more of the water.

Top the pasta with additional Parmigiano-Reggiano and freshly ground pepper, if desired

*I've been a raw egg eater since I was a little kid and have never had any problems with sickness, from mayonnaise to cookie dough to homemade egg nog in Egypt. The yolks will cook in the hot pasta, but probably not to USDA standards, so if you're squeamish about yolks or immunocompromised, you may want to use pasteurized eggs or try using the yolk of a soft-boiled egg or something.

Serves 2 as a main course, 3-4 as a light primo or side dish

26 July 2010

Cheesecake - FAIL

I made cheesecake yesterday, and I was very excited to share the recipe with you.

cheesecake

Pretty, isn't it? Well, I don't have a recipe for you.

I'm not holding out on you, I promise. This is a recipe that I tweaked and adapted from multiple recipes, and the last time I made it (at least a year ago; I guess I haven't been in the mood for cheesecake), I declared it perfect.

I was wrong.

I didn't spend a couple hours, a bunch of dirty dishes, and two pounds of cream cheese only to feed the garbage bin, because it is edible. It's actually pretty tasty, but it is not the perfect cheesecake I remembered.

One of the keys to good cheesecake is baking time - if it looks done when you take it out of the oven, it's probably overcooked. In my case, I was waiting to put cornbread in the oven for dinner, and I'm afraid I hustled the cheesecake out a little too fast.

soft cheesecake

Of course, I also wanted to be able to eat dessert before I went to bed, so I compounded the issue by putting it in the refrigerator too soon and making a crack in the middle. There's nothing wrong with a cracked cheesecake, to be sure, but I've always prided this recipe on being crack-proof ... so there you go.

Suffice it to say that I will be doing some cheesecake experiments in the coming weeks before I can truly proclaim this cheesecake to be foolproof, crack-free, or perfect.

But I can tell you right now, even an undercooked, cracked, imperfect cheesecake is pretty good drizzled with spiced cherry syrup.

23 July 2010

In defense of ugly food

I've been having a real love affair with ugly food these days. I love pretty food: a perfect plum; caramel colored, herby roasted chicken; slender, dainty grilled asparagus. However, I seem to find the most comfort in the ugly foods: panzanella, although sinfully delicious, is a real mess to look at, and curried potatoes and bell peppers are shy in front of the camera. Last night, I made what might be the ugliest dish that I love, but I decided to share it anyway.

I first tasted chilaquiles not long after moving to L.A., when a coworker brought them to a potluck. They are classic Mexican comfort food, more often found in mamá's kitchen than in a restaurant - and they are the perfect way to use up those stale corn tortillas that I always have in the back of the fridge.
tortillas

This dish is almost an enchilada hash: tortillas are cut into wedges or strips and fried until golden, then mixed with a salsa or mole until tender. Some families use storebought tortilla chips instead of frying them at home, but I like the control I have over salt levels. It is often served with scrambled eggs, and almost always with refried beans. I like some thinly sliced cabbage for crunch, as well.

Feel free to adjust amounts to your taste: if you want it less spicy, use a milder chile or more tomatoes; if you prefer green salsas, replace the dried chiles with roasted jalapeños or serranos and the tomatoes with tomatillos (just remove the husks and boil them until just cooked through, 5-7 minutes).
guajillo chiles

I prefer my chilaquiles with cotija or a similar Mexican cheese, but Monterey Jack or Pepper Jack work just fine when you don't want to go to the store before dinner. My cousin puts olives in hers, and the first time I tried it I was hooked. I love all olives, from a briny Niçoise to a spicy marinated green olive, but I have always had a weakness for the big, mild, California olives of my youth. A note, though: buy whole large olives and slice them yourself; it takes but a minute, and the flavor will be much better.

Also, it gives you lots of chances to snack on them while you slice ...
you can even put them on your fingers first if you want.

chilaquiles

Chilaquiles
Serve these with scrambled eggs and frijoles for a savory, filling brunch or lunch. Accompany with guacamole, crema mexicana*, salsa, and thinly sliced cabbage.

12 corn tortillas, preferably stale, cut into 1 inch strips or large wedges
mild oil for frying

6-8 dried guajillo chiles
2 large roma tomatoes
3 cloves garlic, peeled and smashed
1 sprig fresh or 1 pinch dried oregano
additional fresh hot chiles, if desired
Tomato salsa or additional tomatoes, if desired

2 T oil
1/2 large onion, sliced
1 C large black olives, sliced
1 C Monterey Jack or Pepperjack cheese, shredded
OR
1 C cotija or other aged Mexican cheese, crumbled
salt

If you are deep frying, heat the oil to about 350; if not, pour oil about 1/4 inch deep in a large, heavy-bottomed pot and heat on medium-high heat. Fry the tortillas in batches until golden brown (4-6 minutes per batch). Drain on paper towels and set aside.

Meanwhile, toast the chiles on a grill or dry pan until fragrant and beginning to blacken, 3-5 minutes. Put them in a small saucepan with water to cover and bring to a boil. Remove from the heat, add the tomatoes, and cover for 15 minutes. Remove the chiles and tomatoes from the saucepan, reserving the cooking liquid.


Peel the tomatoes and seed the chiles and place in a blender or food processor; add the garlic, oregano, and a little splash of the chile cooking water. Pulse until well blended (be careful if everything is still hot!). Taste and adjust as needed; add additional hot chiles, tomato salsa, or additional peeled tomatoes and pulse until well blended. For this batch, I added 2 Thai bird chiles and a few tablespoons of tomato salsa. Set aside.

Add the 2 tablespoons oil to a large, heavy-bottomed pot and heat on medium-high heat. Add the onions and cook, stirring regularly, until onions are translucent but not brown, about 6 minutes. Pour in the chile mixture and stir quickly, then add about two thirds of the tortilla strips. Gently turn the tortillas until wilted and coated with salsa. Add remaining tortillas and repeat.

Cook, adding water or reserved cooking liquid by quarter cups and stirring gently, until the tortillas are heated and no longer crunchy and the sauce is very thick, 5-10 minutes. Remove from the heat and gently stir in olives, cheese, and salt to taste.

Sprinkle with chopped cilantro before serving.

*If you can't find crema mexicana, fake it by stirring sour cream with water until it's still thick but pours easily.

Serves 4 (as a main dish) to 8

20 July 2010

So much better than the Twilight Saga...

It seems that when something really popular comes along, the real thing, once experienced, is a major letdown (um, Twilight?). It's much better - if bittersweet - to discover something years late, hopelessly out of fashion, only to learn that it's just as good as you hoped.

Maybe you met someone once, in passing, only to forge a great friendship in a different time and place; maybe you discovered a beloved author only to learn that she has a half-dozen books already published; maybe you learned that you can make macarons at home, and don't have to long for the day you can return to Paris.

Well, I don't know how I missed David Lebovitz's post on
Caramelized White Chocolate from last June, but I can't believe the universe cheated me out of the last year. Cruel, cruel fate, to leave me with white chocolate languishing in my cupboard all this time. I know that there are a lot of white chocolate haters out there, but I have only one thing to say to you: shut up, eat some of this, and bow down to the power of the Maillard reaction.

caramelized white chocolate!

I'm not a "white chocolate person," whatever that means, but I've always liked its rich creaminess and subtle flavor. Slowly cooked to a light toffee color, with a sprinkle of salt added to finish, the oven transforms it into something like dulce de leche, complex and nothing like white chocolate. After licking the spatula clean I poured it into a jar and hid it away in my pantry cupboard. Even untempered and slightly crumbly, we were diving in for a spoonful here, a pinch there, and I was hard pressed to save enough of it to make the recipe below.

caramelized white chocolate & cherry gelato

I adapted the White Chocolate Ice Cream recipe from The Perfect Scoop, but I wanted to make gelato instead. I increased the milk:cream ratio and used a relatively small number of egg yolks; I really wanted the chocolate flavor to take center stage. I also drained and chopped some of the candied cherries I made the other day and mixed them into half of the gelato. It was good (it's already gone), and I'll probably try some more mix-ins, but honestly, this gelato is perfect without fanfare or accompaniments. I normally share my desserts with friends and coworkers, but this one is going straight from my freezer to my belly.

caramelized white chocolate gelato

Caramelized White Chocolate Gelato
adapted from
The Perfect Scoop

I recommend transferring the chilled custard to the freezer for about 25 minutes before churning; gelato benefits from fast freezing and the very small ice crystals this creates, and making sure the custard is very, very cold helps the process. Set your timer so that you don't forget about it!

9 oz
caramelized white chocolate
3 C whole milk
2/3 C sugar
pinch salt
4 large egg yolks
1 C heavy cream
1-2 C candied cherries, well drained and chopped (optional)

Crumble/break the chocolate into chunks and place in a large bowl. Set a mesh strainer on the bowl.

Heat the milk, sugar, and salt in a medium heavy-bottomed saucepan. Whisk together the egg yolks and temper with some of the hot milk. Add the egg yolks to the milk mixture, whisking constantly to combine.

Stir custard over medium heat, scraping the bottom of the pot, until the custard thickens - it won't get quite as thick as your typical ice cream custard. Pour the mixture through the sieve over the chocolate. Stir until the chocolate is completely melted, then stir in the cream. Set the custard bowl in an ice bath and stir occasionally until cool.

Chill thoroughly in the refrigerator until about 25 minutes before you are ready to churn, then transfer to the freezer. After 25 minutes, freeze the mixture in your ice cream maker.

If desired, mix in spoonfuls of chopped, drained candied cherries as you are transferring the mixture out of the ice cream maker.

Note: I stirred the softly-set gelato after removing from the ice cream freezer in an attempt to reduce the amount of overrun (air whipped in during churning). I don't know if it made a difference or not, but the final result is more gelato-like than any of my other attempts.

Soften for 25-30 minutes in the refrigerator before serving.

Yield: About 1 1/2 quarts. Serves 1 (over a week or so), unless you remember your sharing lessons from kindergarten better than I.

19 July 2010

Spiced cherry un-jam

I lied the other day when I said that I threw out all of my cherries. True, I had bought seven pounds for the express purpose of making spiced cherry jam, but I had a secret stash in my refrigerator; two pounds of absurdly-expensive cherries that I had purchased at the farmer's market that Saturday morning.

The more perfect, unblemished half of those cherries was set aside for the clafoutis, but what to do with the others - the ugly ones, the misshapen, the wallflowers of the bunch? I was still bitter about the loss of my jam cherries - there won't be any jam until next summer - and I wanted to do something special with the few I had left. Spiced cherries were invading my imagination at every moment, haunting my dreams and whispering to me whenever I opened the spice cupboard, so the remaining victims were sacrificed to the jam spirits on my stove.

spiced cherries

And what a sacrifice! Cherries dream of this sort of afterlife, snuggled in a syrupy bed of star anise, cloves, and sugar. I picked at them gingerly for a few days, slurping their juices from a spoon or stirring a few into yoghurt, but I was saving them for something special. Something I've been thinking about fondly, hopefully,
obsessively, ever since I saw this.

White chocolate, be warned.

spiced candied cherries

Spiced Candied Cherries
Adapted from
The Perfect Scoop

I recommend, from personal experience, that you tie up the spices in a little square of cheesecloth rather than picking them out one by one.

1 lb sweet cherries
1 C water
3/4 C sugar
4 cloves
1 star anise pod
2 t lemon juice

Stem and pit the cherries. Mix with the remaining ingredients in a medium heavy-bottomed saucepan and bring to a boil. Lower the heat and cook the cherries for about 30 minutes, stirring regularly, until the syrup is reduced and the cherries are very tender.

Remove the spices and let the cherries cool completely.

Yield: about 2 cups (including syrup)

15 July 2010

Armed with powdered sugar and a fork

Once the East Coast, Pacific Northwest, and Western Europe were all crying out about the heat waves, Los Angeles finally sat up and took notice. We finally have some sunny warm weather; it's supposed to be in the mid-nineties by the weekend. Welcome, summer! You've been missed.

What better way to celebrate than with cherries baked into a clafoutis? Firm, sweet custard; tender, juicy cherries; a hot oven; and me, armed with powdered sugar and a fork.

sugared cherries

If you've completely missed the hype of the past few years (and I did, for a while), let me tell you that clafoutis is a dish of fruit, traditionally unpitted cherries, baked in an eggy, custard-like batter. The final result is a little bit like flan, with a touch of soufflé and a dash of Dutch Baby. As it bakes, it puffs up and browns lightly under the heat of the oven, then settles down, its fruit descending into jammy pockets. It is delicious eaten warm, room temperature, or cold - I like it cold from the fridge for breakfast - with nothing more than a sprinkling of confectioners' sugar.

Although cherries are traditional, my favorite clafoutis is blackberry and I also love apricot. I've been told that any clafoutis without cherries is actually a
flognarde, but I've also heard that in France the two terms are interchangeable. You can call it cherry flan if you like, and I guarantee that your guests will enjoy it.

clafoutis for breakfast

I've experimented with many different recipes for clafoutis over the past year or so; finding the right proportions to is up to personal preferencel, both the baker's and the fruit's. The amount of flour called for varies from recipe to recipe, providing wildly different results; the proportions of eggs, milk, and sugar also change, sometimes making what tastes like a cherry frittata or a sickly sweet pancake, like the french toast from a brunch buffet.

This recipe was tweaked from the entry in my trusty
Larousse Gastronomique, and it has the right ratios for me. The custard base is not too sweet and not too eggy, and the flour makes it nice and sturdy - the perfect foil for delicious fruit.

Cherry Clafoutis
adapted from the Larousse Gastronomique

Some recipes recommend cooking the cherries with a little bit of sugar before putting them in the pie dish; I think that would have resulted in overcooked cherries, but it might be necessary if your cherries are not nice and sweet. Also, feel free to pit your cherries if you prefer; do your best to keep the fruit whole.

Finally, you may want to adjust sugar levels if you are using a different fruit: apricots, unless they are very sweet, may require more, but perfect plums will need less. With softer fruits, I would put all the sugar into the batter instead of dividing it.

14 oz fresh sweet cherries, unpitted
1/2 C granulated sugar, divided
1 T unsalted butter, room temperature
3/4 C unbleached flour
pinch salt
3 eggs
1 C whole milk
1 t vanilla extract
Confectioners' sugar

Wash the cherries, remove the stems and toss with 1/4 C of the sugar; set aside for 30 minutes.

Preheat the oven to 350ºF. Butter a 9" pie dish and add the cherries, arranging evenly. Whisk the remaining sugar, flour, and salt; whisk in the eggs. Add the milk and vanilla extract and whisk until well-blended. Pour the batter gently over the cherries; they will probably get pushed around, so gently spread them back out if necessary.

Bake 40-50 minutes, or until puffed, lightly browned, and set in the center. Let cool on rack until lukewarm; dust with powdered sugar.

(the flour amount has been updated - I had mislaid my notes and was working off memory when I posted this!)
Serves 6-8

13 July 2010

A day for berry-picking and purple-stained hands

With all the talk about heat waves these days, I'm starting to long for the summer we expect in Los Angeles. We had a warm Saturday in downtown, where the haze burned off early and the temperature got up into the low eighties, but by the time we got home the fog was marching inexorably back over the hill and blocking out the sun. My lettuce is still flourishing, mushrooms are daring to grow in my damp herb pots, and I'm wearing socks in the house all day.

I'm not usually one to complain about gloomy, foggy, or downright wet weather. While my neighbors and coworkers are glaring up at the steely grey skies, I am thrown back to my childhood, where 68˚F and cloudy would be nothing to complain about; not when 55˚F and raining was a likely alternative. Yesterday was a day for berry picking.

blueberries!

Every summer, usually after we returned from vacation, the thickets of blueberries that surrounded our house would be heavy with sweet, plump, purple-blue-black fruit. Our property also played host to the occasional huckleberry and an inpenetrable thicket of salmonberries, with which my father would occasionally go to battle, hoping to free our driveway from its clutches.

On sunny or otherwise not-raining mornings, my sister and I would venture outside with buckets, mosquito repellent, and our retriever-wolf-husky mix dog, Fosdick - the most reliable bear detector we had. We would clamber over mossy tree trunks and rain-slicked rocks, one purple-stained hand plucking berries and the other alternately slapping at insects and throwing a muddy tennis ball for the dog. As I recall, my sister would admit defeat before I would, leaving me to strip as many berries as I could before my bucket was filled. A fair few would pass my lips before I got inside, sweet and juicy, even though a long soak would later reveal that some of the berries played host to miniscule caterpillars.

I don't think we ever made blueberry pie when I was a child; the berries were most often put into service as syrup for pancakes and waffles, still one of my favourite ways to prepare them. However, several years ago I discovered a recipe for blueberry-almond pie in a summer issue of Bon Appétit, and I was hooked. (As an aside, the
triple-cherry pie from the same issue is also out of this world.)

blueberry-almond crumble pie

The key to this pie is the top crust - a crumble that contains four full ounces of almond paste. By itself, it is delicious, lighter than marzipan but with all the almond flavor; with a bite of the blueberry filling, it is sublime and delicate. The quality of your almond paste is paramount here; I love the Premium Almond Paste from
Mandelin (and hey, it comes in 10.5 pound pails - stop me now!)

As another bonus, this pie, unlike so many other berry pies, works with frozen berries, so when you hit that point of winter when you are sick of spiced apples and poached pears, you can dig some frozen blueberries out of the freezer and have a splash of something new.

blueberry-almond crumble pie
Blueberry-Almond Crumble Pie
adapted from
Jeanne Thiel Kelley's recipe

1 disk of your favorite pie crust dough (I'll get mine on here eventually;
Pim's new method looks easy and delicious)

3/4 C sugar, plus more if needed
1/4 C cornstarch
1/4 t cinnamon
2 lbs fresh blueberries, picked over
1 1/2 T lemon juice

scant 2/3 C unbleached flour
4 oz premium almond paste, roughly crumbled
1/4 C chilled unsalted butter, cut into pieces
scant 1/2 t salt

Roll out crust and transfer to a 9 inch pie dish. Trim crust 1/2" from edge of dish, turn under and crimp. Return crust to refrigerator.

Whisk sugar, cornstarch, and cinnamon in 3 or 4 quart heavy pot until combined. Stir in blueberries and lemon juice. Stirring to prevent scorching, cook on medium until the mixture simmers thickly and the blueberries are tender, 10-20 minutes. Cool to room temperature, about one hour.

For the topping, combine flour, almond paste, butter, and salt in a food processor or sturdy blender and pulse until clumped together. Chill 30 minutes.

Place rack in lower part of oven and preheat to 400˚F. Pour filling into chilled crust and crumble topping over the top. Bake on a sheet of aluminum foil or baking sheet until topping is golden and filling is bubbling thickly (and often, over the edge), 45-55 minutes. Transfer to rack and cool.

Serve warm or room temperature with whipped cream, vanilla ice cream, or au naturel. I think it would be fantastic with cinnamon ice cream, but I've never actually tried it.

Serves 6-8, depending on how much you ate for dinner.

Note: are you one of those crazy people who throws away pie crust scraps? My love of pie was born of pie crust cookies in my grandma's house: cut the trimmed crust edges into manageable pieces and arrange on a cookie sheet. Sprinkle with cinnamon-sugar and place into the freezer or refrigerator until ready to bake pie. Place the baking sheet under your pie and bake until golden brown and crisp, about 10 minutes. Remove to cooling rack (you can return the sheet to the oven to catch drips if needed), then eat warm or at room temperature.

11 July 2010

Things that make me happy

I was originally going to post about what should have been a lovely Saturday. I bought seven pounds of fantastically cheap cherries (2 pounds for a dollar!), and took them home with plans for spiced cherry jam to share with you. I couldn't examine the cherries, as they were tightly wrapped - and though I expected to find some dross, I didn't expect to find 2/3 of the fruit rotten and the other third overripe. After picking through the first bag and a half, dispirited, I gave up and threw them all out.

cherries FAIL

(Don't be deceived by their lovely "come-hither" color or their fresh glow. They lied.)

Thus foiled, I decided to share some of the things in my kitchen that make me happy. This is not a comprehensive list - my kitchen in general makes me happy - but a few things that I use regularly and would hate to be without.

As the urge hits me, I may follow up with "things that I hardly use but couldn't live without" and "things that I completely wasted my money on," but later: these are some of the things that make me happy.

Thai granite mortar & pestle

I use this heavy mortar and pestle quite regularly. From grinding spices to pounding dried shrimp to smashing garlic into paste, it never leaves my counter top.

I love the Thai mortar because of the weight, the smoothness, and the relatively odor-proof granite. I can make pesto one evening and grind spices for rice porridge the next morning with no problem. It isn't a huge mortar - about seven inches across, but it is ample enough for most of my uses.

paring knife

This is a J.A. Henckels 4" paring knife. It is permanently dull, has an odd balance, and is the only one of my knives that is not a Wüstof Classic (much preferred). However, this little Henckels was by my side in Morocco for a year, and it was the only knife I had that actually cut things. We used this knife for everything from chopping tomatoes to slicing cabbage, and although it never truly recovered from the beating it got from a year doing the work of a chef's knife, it earned its spot in my knife block.

rösle tongs

Have you ever struggled with a pair of so-called self-locking tongs? If so, run, don't walk, to your nearest kitchen supply store and buy these. I admired the R
ösle silicone locking tongs from afar - Rösle products aren't cheap - until the first time I tried the locking mechanism. For months afterward, each time I went shopping, I would walk up to the display, clicking them open and closed, muttering "it actually works" to myself. I finally gave in and bought them when I received a gift card, and I'm thrilled with the purchase each time I use them. If you want them locked, you hold the tips upward (around 10º past horizontal seems to be enough) and squeeze them together. To unlock them, squeeze when the tips are pointed down. They are one handed, they don't require shaking or strange dances to engage the lock ... and I can't even figure out how they work. After holding them over my head several times, squinting between the arms, I've settled on magic.

popcorn by hand

This old-fashioned popcorn popper is at least 25 years old, and is has freed me from the waste and the unknown ingredients of microwave popcorn. A little drizzle of oil in the bottom of the battered pan is all that's needed to make a quick snack - my only complaint would be that I have to wash the pan afterward. It also makes great kettle corn with the addition of a few tablespoons of sugar when the corn goes in.

I became addicted to kettle corn as a cheap-and-easy snack when I lived in Egypt - we didn't have a popcorn popper or a microwave, but I learned that if I heated oil in a big pot, I could add sugar and popping corn, hold on the lid with a kitchen towel, and shake it over the stove for all I was worth. It made decent kettle corn, and the fear of burning the sugar made it a great arm workout. Suffice it to say, this hand-cranked gadget makes the entire process much easier.

After several years in makeshift kitchens with minimal dishes, utensils, and appliances, I don't have an endless supply of random gadgets in my kitchen - I try to avoid anything that only has one purpose, and I've found simple ways to avoid purchasing things that I wouldn't often use (cherry pitter, I'm looking at you). Things that don't get used in my kitchen tend to languish at the back of a cupboard until they are finally donated to another lucky home.

As for food - I want to tell you about panzanella, and clafoutis, and blueberry pie, and I wish you could come and share with me! Summer has arrived (sort of - we have a sort of sickly sun right now), and I will be celebrating the season.

09 July 2010

Patriotism through food

We spent Independence Day at our cousins' house last weekend. They have a fantastic house, and it's a great venue for fireworks, with views of two different displays. We had a true Southern California barbeque - with a barbeque of carne asada with all the fixings. There were also burgers, hot dogs, rice, frijoles, a cheese platter, and some great potato salad, but those were afterthoughts for me. Truly, there is little that can stand between me and a taco (or three).

As the designated dessert-maker for our family gatherings, I put together this quick berry tart. The crust is taken almost exactly from
Baking: From My Home to Yours - I use the pâte sablée with ground almonds, and I think I fiddle with it somehow, but I can't remember how. I filled it with a vanilla pastry cream and then topped it with fresh berries.

spangled berry tart

Tarts are one of my favorite desserts. There are endless possibilities for crusts and fillings - I am partial to the almond crust whenever it will fit with the filling - and I love the way such a simple dessert can look so impressive.

07 July 2010

Sweet & spiced summertime

I feel for everyone over on the East Coast, but we haven't had much summer yet here in Los Angeles. We didn't have much spring, either: we had a full month of May Grey, followed by 30 days of June Gloom. Now we're fully a week into July ... Cry?

Growing up in Southeast Alaska, I truly don't mind oodles of foggy mornings and endless cloudy afternoons - I'm the freak who is asking for some actual rain once or twice a week. However, I feel like I deserve the fruits (literally) of living in the land of supposed perpetual sun.

Shortly after writing my previous post, I bought some truly fabulous apricots at the farmer's market. The farmer warned me that he only expects to have them through this coming weekend, so after a taste - the best I've had all year - I snatched four pounds of them. I poached one pound right away, with the unlucky specimens that had gotten a little battered on the way home. With the rest of them, I decided to bottle up a little bit of summer.

spiced apricot-almond preserves

I've been hearing about Christine Ferber for months, and I think I understand the appeal. I particularly like her method, which I've seen in one or two recipes, of macerating the fruit with sugar overnight, then cooking the syrup alone. The fruit is added for a few minutes at the end, and this keeps the fruit from being limp and overcooked like so many no-pectin jams.

I used that method for these preserves, which are infused with some whole spices and spiked with a bit of almond extract - I was going to use the noyaux, but I am so in the habit of tossing pits that they were in the trash bin before I could think. The result is complex without being identifiable - the almond flavor mingles with the fruit, and there is a slight spiciness from the cinnamon and a lingering touch of nutmeg that I wouldn't be able to name if I hadn't put it in the pot myself.

the first bite

If I were to change anything, it would be to cook the fruit just one or two minutes more; the preserves are softly set and spreadable, but the apricot skin is just a bit fibrous at times. Also, the temperature is approximate; everyone likes their preserves set differently - also, my digital thermometer broke, and my analog is unreliable at best.

Finally, it's up to you whether or not to process the cans in a boiling water bath. I used to use it more often, but don't always, in part because my mom and grandma never did and in part because the rack in my canning pot is too large for small jars. When I made this batch, all but one of the jars sealed on their own after filling.


good to the the last bite

Spiced Apricot-Almond Preserves
inspired by Christine Ferber

3 lbs ripe, fragrant apricots (net)
600 g granulated sugar
2 T lemon juice (I used bottled)
1 large cinnamon stick
1 nutmeg seed, crushed into three or four pieces with a mallet, pestle, or knife handle
1/2 t pure almond extract (optional)

Halve and pit the apricots, then quarter the halves. Mix with the sugar, cinnamon stick, and nutmeg in a large bowl. Cover and let macerate overnight.

Drain the syrup through a mesh sieve into a large, heavy-bottomed pot; add the nutmeg pieces and cinnamon, and set aside the fruit. Heat the syrup over medium-high heat, stirring occasionally - lower the heat if it starts to scorch. Heat to about 210ºF, or until it is bubbling almost like caramel and it just sheets from a spoon.

Place a small bowl or saucer in the freezer to chill. Add the fruit to the syrup, mix well, and return to a boil. Taste now - if the spices are strong enough, you may want to remove them. Boil the fruit for 5-10 minutes, until cooked through and set to your taste. Remove pot from the heat and stir in the almond extract, if using. Skim and ladle into hot, freshly cleaned jars.

Seal jars in a boiling water bath, if desired.

Yield: approximately 5 half-pint jars.

The taste of summer

I love stone fruits. I think the prevalence of summer fruit is one of my favorite things about living in Los Angeles, and I generally spend the springtime months in a post-holiday baking lull, trying to fully appreciate the last of the tangerines and the first of the truly good asparagus. All the while, in my heart I long for firm, crunchy nectarines, sweet, juicy plums, and my old nemesis, the apricot.

IMG_1156

In recent years, I have spent early summer on a constant quest for the perfect apricot. In theory, I love nothing more than eating them in the kitchen, leaning over the sink. In practice, I have found apricots to a fickle fruit. One bite will be delicately sweet and almost floral; the next will be jarring and acidic. Sometimes the texture is grainy or fibrous. It doesn't help that as soon as they appear at the farmer's market in May, I start compulsively buying any apricot that beckons. The best varieties aren't likely to be in season until July, but still I try them, a half dozen from this stall, five from the next one, hoping to find my perfect fruit.

Until then, I must satisfy myself with baking them. It's not a bad runner up, as apricot consumption goes - the oven really works wonders with the tartest or grainiest fruit, gently urging them into sweet, jammy mouthfuls.

I have recently made several of
Orangette's Almond Tortes with Sugared Apricots, but the other night I decided to mix it up (well, a little bit) and make a French Yoghurt Cake with Apricots. Gâteaux au Yaourt have become all the rage in recent years, and it's not hard to see why: they have a perfectly moist, tight crumb, they are endlessly adaptable, and they have that maddening, simple elegance that the French seem to have perfected.

I've made a few different yoghurt cakes from different places, but I generally follow the same basic framework and adjust as needed. This may be the only baked good that I have memorized, to be honest!

Another benefit (as if you needed one)? It only uses one bowl and one spoon ... and, well, a measuring cup and a cake pan. So simple!


Yoghurt Cake with Apricots
Adapted from Dorie Greenspan,
Orangette, Chocolate & Zucchini and others

1/2 C plain yoghurt (I use whole milk from Trader Joe's)
1 C granulated sugar
3 large eggs
1/4 t almond extract
1 C unbleached all-purpose flour
1/2 C finely ground almonds
2 t baking powder
pinch salt
1/2 C canola oil (or other bland cooking oil)
4 small, ripe apricots, pitted and cut into sixths

Preheat oven to 350°F. Butter an 8" round cake pan and set aside. Mix the yoghurt, sugar, eggs, and almond extract in a large bowl until smooth. Add the flour, almonds, baking powder and salt and stir until just combined.

Dump in the oil and stir until it stops being gross and turns into a smooth, glossy mixture.

Pour about half of the mixture into the cake pan, then arrange the apricots in a single layer - they'll get covered up and pushed around, so don't bother to be neat. Gently pour the remaining batter over the fruit.

Bake 40-50 minutes, or until a tester comes out clean. Let cool for at least 10 minutes before unmolding.

Keeps at room temperature, wrapped in plastic or foil, for 3-4 days (if it lasts that long)
Serves 6-8

04 July 2010

Happy Birthday, Rube Goldberg!

Raspberries

raspberries

Pastry Cream (in reality smooth and luscious, not weird and lumpy like the photo)

pastry cream

Blueberries

blueberries

Almond
pâte sablée

almond pâte sablée

Red white and blue for one holiday ... switch them around, and I suppose this tart could be celebrating the beginning of the
Tour de France.

I'm driving somewhere with this tart, so a photo of the final product will be forthcoming.

Happy Birthday,
United States & Rube Goldberg!

02 July 2010

From Morocco with love

Over six years ago now, I was lucky enough to receive a Fulbright fellowship after graduating from college, and I spent the ensuing year living in Fès, Morocco.

While I may no longer be studying political science and nationalist movements, rarely a day goes by that the sights, smells, and flavors of Morocco don't invade my memories. A rarely-seen moped; the diesel belch of a semi truck; the sound of meat hitting a hot grill - countless moments, sometimes not at all remembered, take me back, and what I miss most, and find most difficult to replace, is the food.


Authentic Moroccan food is hard to find in the United States. I see countless restaurants serving couscous, or calling any old stew a tajine, or mixing meat with dried fruit and thinking that it makes a meal "Moroccan". I'm no expert, I'm sure, but adding dates or couscous doesn't make a meal Moroccan any more than beans & rice make a dish Mexican. The flavors of Morocco are about the spice, the herbs, and the fresh, seasonal vegetables brought into market every day. The quintessential Moroccan dishes, to me, were the salads available at nearly any major meal.

Moroccan salads are similar to meze or tapas: served warm or cold, usually at least three or four at a table. A normal selection would include puréed spiced vegetables; lentils or beans (sometimes puréed); and some sort of vegetable, often starchy, in a Moroccan vinaigrette. The salads are scooped up and gobbled with a warm flatbread called "khubz" (just "bread"), although most of them are just fine with fingers or a spoon.


My favorite salad, and the dish that I most often crave now, is Zaalouq. Zaalouq is a puréed, spiced blend of eggplant and tomato, perfect for scooping up with bread of any kind. It also goes well with many things; I can see it fitting in nicely with an Indian meal, and we served it yesterday with simple sautéed zucchini with salt, pepper, and garlic, and oven-warmed naan for scooping.

The key to this dish is the herb-and-spice trifecta of Moroccan cuisine: cumin, parsley, and cilantro.


When I went to the marché, my veggie man (as I called him) would always throw in parsley, cilantro, and a couple lemons for free. Every time, I'd say I just needed a bit - and I would get a giant bunch of each herb. In Fès, nearly every dish contains or is topped with a mixture of the two herbs, and the concept of eating meals without them is kind of bizarre. Because they always came together, I became completely incapable of remembering the Arabic words for them, as well - I always mixed them up, and he would re-teach me every single time:

"Hada al-ma'adnous" (This is Parsley)

"W'hada al-kasbour" (And this is cilantro)

The next time I came by he would hold up a bunch of parsley.

"Shnou hada?" (What is this?)

"Um... kasbour?"

And on and on... for a year. Half a decade later, I've finally sorted them out.

zaalouq

Zaalouq

1 lb eggplant
1 lb fresh tomatoes
4 t salt, divided
5 cloves garlic
1/4 cup cilantro, chopped
1/4 cup parsley, chopped
olive oil
1 T ground cumin
1/2 t paprika
pinch cayenne
1/4 t ground pepper
2 t lemon juice

Peel eggplant, if desired (I usually peel half), cut into about 1" cubes and toss with 1 T salt in a large colander. Set aside for 15-20 minutes.

Meanwhile, bring a pot of water to boil and blanch the tomatoes. Peel, chop, and set aside with their juices. Peel and chop the garlic and set aside.

Heat a pot or large skillet on medium high heat and pour in a glug of olive oil. Drain the eggplant and press out excess moisture. Cook for a few minutes in the skillet until hot, then add 1/4 C water, cover, and cook until just softened, about 10 minutes. Uncover and add the garlic, tomatoes, cumin, paprika, cayenne, pepper, half of each of the herbs, and the remaining salt.

Cook uncovered, mashing from time to time, until it's soft and looks kind of like camp cafeteria food, 10-15 minutes. A couple minutes before it's done, taste and adjust salt level as needed, and add remaining herbs if desired. Add the lemon juice to taste.

Serve hot, warm, room temperature, or cold, with bread for dipping - I like it best just barely warm.
Serves 3-6, depending on what else is on your table

01 July 2010

It's entirely possible that I have a problem

I decided on Monday, just for kicks, to take stock of my spice cupboard. I'm kind of a spice whore - I have a few dried herbs, for emergencies when I can't find fresh; I have a whole section of spices commonly used in Indian food; half a shelf is devoted to baking spices, whole and ground of many varieties; at last count, seven different kinds of salt; and then, there are the chillies.

Chiles, as I usually call them - it just looks and sounds right, especially after so many years in Los Angeles - are an important part of most of my meals. I like my stir fries fiery, my salsa eye-watering, and my curries cough-inducing. I don't really know how I came to love spicy food so much. My mom is generally happy with one jalapeño in a batch of salsa, and I think a pinch of paprika would take my dad out. My maternal grandparents, however, have always been lovers of spice - I remember making salsa with my grandma, and I was perfectly content to eat it with tortilla chips every summer morning for breakfast.

chile powders

In the photo above, you see an assortment of my dried chiles: chipotle powder, Aleppo, crushed red pepper, Spanish pimentón, chili powder, half-sharp paprika, sweet paprika, smoked pimentón, cayenne, chiles piquín, and a bag of Thai (or maybe Vietnamese?) dried chiles.

This doesn't include the whole dried pasilla and guajillo peppers that I use for salsa and enchiladas.

chile sauces

Behold the hot sauces! I love chiles in liquid forms - I use them for everything from fried egg sandwiches to stir-fried cabbage and tofu. Here we have sweet chilli sauce, Afghan sweet jalapeño jelly, sambal oelek, green habañero sauce, Tabasco, salsa El Pato, Secret Aardvark Sauce, Tapatío, Tabasco Chipotle. This doesn't take into account the fact that I'm currently out of Sriracha, chilli garlic paste (although I usually alternate that with sambal oelek, for the sake of space), and chipotles in adobo.

I use all of these ... and yet I still want more. I can't stop myself when I see a new pepper or sauce - I want to try them all.

Next on my list: dried Cascabel peppers, which I've never tried but are said to have a deep, nutty flavor. I might add them to potato tacos or use them for a chile marinade for chicken or pork.