28 November 2010

Make way for crostata

Having Thanksgiving dinner at another house means many things. It means there will be exponentially fewer dishes to wash, but more importantly, it tells me that I will have fewer leftovers. That may sometimes be beneficial—there's only so much stuffing two people can eat—but it also means no pie.

Pumpkin pie is good, but it's never been my favorite; I tend to prefer it piled with mountains of softly whipped cream. I'm generally more likely to eat apple pie, or pear-cranberry crisp, or perhaps a pumpkin cheesecake with caramel sauce.

This year, I took advantage of the Daring Bakers' Challenge for November and made a few crostate.

pear-almond crostata

The 2010 November Daring Bakers’ challenge was hosted by Simona of briciole. She chose to challenge Daring Bakers’ to make pasta frolla for a crostata. She used her own experience as a source, as well as information from Pellegrino Artusi’s Science in the Kitchen and the Art of Eating Well.

Crostata is simply an Italian tart, traditionally filled with pastry cream, preserves, fresh fruit, or any number of other delicious things.

My first crostata was only half a success. The pasta frolla (crust) was spread with a layer of almond cream, then covered in a layer of sliced poached pears before baking. The almond cream—adapted from a recipe to accommodate my ingredients—was a bit too sweet, and I wished that I had used fresh pears to counteract that sweetness. Still, it was a big hit with the others.

poached pears and almond cream

A few days later, I pulled out my baking supplies and the last of my butter to make another crostata, and I wanted to use preserves. I still hadn't figured out what I wanted to do with my damson plum preserves, and a tart seemed to be the perfect choice. A few adjustments to the pasta frolla recipe, and an ideal dessert was born.

plum preserve crostata

The pasta frolla recipe provided for the challenge calls for either lemon zest or vanilla sugar. However, since the plum preserves are quite tart and already studded with vanilla seeds, I decided to leave out both and keep the crust simple. The buttery, crumbly crust provides an ideal base for the sweet-tart filling; perhaps adding a dollop of whipped cream is gilding the lily, but it made for a delicious dessert-cum-dinner last night.

crostata alla conserva di prugne

24 November 2010

Falling further behind

I had plans for a week of Thanksgiving preparations here.

Cranberry sauce? Certainly! Brussels Sprouts? You bet! Stuffing with Sausage and Apples? Sure!

Unfortunately, life intervened. As a peace offering, I bring you soup.

soup with bread

To be precise, Butternut Squash-Apple Soup, and the perfect answer to a cool fall day. We eat this all winter long—even Mike, who claims to not like soup, has proclaimed that he would happily eat this every week.

Puréed vegetable soups are ideal for winter; the kind of food that makes you dream about climbing down into your mug for a warm, velvety soak.

Also, puréed soups are deceptively easy to make; onions and apples are softened in some butter, then mixed with roasted butternut squash purée, stock, and some minimal seasonings. After simmering, it is blended and reheated with a bit of cream. The sweetness of the squash is tempered by the onions and the slightly tart apples (I like to use an eating apple like Gala or a tart Granny Smith or Pippin), and the cream adds just enough body and richness to bring it all together.

The first few times I made this soup, I forced the purée through a sieve before adding the cream, which resulted in a perfect, even-textured soup. Until I have enough room for a chinois or a food mill, though, I don't think it's worth the effort; a good blender will leave a lovely texture and remove any possible stringiness from the squash.

butternut squash-apple soup

This would be an ideal first course at a fancy Thanksgiving meal, but is equally welcome in a big mug with a slice of crusty bread, eaten while wrapped in a blanket on the couch.

For those of you who celebrate Thanksgiving tomorrow, have a lovely day filled with food, laughter, and friends.


Butternut Squash-Apple Soup
I find that 4 pounds of squash will yield about 3 pounds of purée—I usually leave the leftovers for another use or for a small batch of soup later in the week, but this will scale up just fine.

2 pounds butternut squash flesh(see below)
2 tablespoons unsalted butter
1 medium yellow onion, thinly sliced
2 medium sweet-tart or tart apples (I prefer Gala), peeled, cored & thinly sliced
2 ½ cups mild vegetable or chicken stock, plus more if needed
1 large bay leaf
1 ½ teaspoons salt
½ cup heavy cream
black pepper

To prepare the squash, preheat the oven to 400˚ F. Cut the squash in half lengthwise with a heavy knife, then scoop out the seeds and pulp. Place the squash on a large baking sheet, cut side down, and roast until they are quite tender when pierced with a knife or skewer, 30-60 minutes depending on size. Set on a rack until cool enough to handle. Scoop out the flesh from the skin with a spoon.

Place the butter in a large, heavy pan on medium heat. Add the onions and apples to the hot pan and cook, stirring occasionally, until just softened, 5-10 minutes.

Add the squash, bay leaf, salt, and 2 ½ cups stock and bring to a boil. Reduce heat and let simmer about 30 minutes uncovered, stirring occasionally.

Transfer to a blender and let cool slightly, then carefully purée, working in batches if needed. If preferred, blend in the pot with an immersion blender (this will generally lead to a coarser purée). Transfer to a clean pot or, if desired, force the purée through a fine sieve. Set over medium heat and stir in the cream. Heat just to a boil, then season to taste with salt and pepper and serve.

Serves 4 as a main dish

20 November 2010

Sacrificing hipness for comfort food

We all have some dish that instantly transports us to our childhood. For some, it might be a chocolate milkshake that was a regular bedtime snack; for others a lemony roast chicken. Most of us, in fact, probably have multiple memory-filled meals, each one as comfortable as an old sweater.

stroganoff with green peas

For me, my standby is stroganoff: sliced or ground beef cooked with mushrooms and onions in a sour cream sauce. Stroganoff is an intensely uncool dish, the sort of thing that was featured on the back of a Campbell's soup can in 1973. It's the sort of thing that most people associate with a hospital cafeteria rather than a home-cooked dish of comfort food. But hey, even Thomas Keller has good things to say about it, so it must be good!

I grew up eating Stroganoff, blissfully unaware of my future uncoolness. Despite the frozen peas that were always served with the dish, it was always one of my favorite beef dishes. We made ours with ground beef and concentrated Cream of Mushroom soup, and served it always on a bed of egg noodles. I would always complain about the peas that my mom would pile on top, and they would always end up on my plate anyway. In recent years, I have discovered a love of just-warmed-up peas, and I pile them up on my plate without complaint.

beef stroganoff

Since moving out on my own, the recipe has changed: I add gobs of thickly sliced mushrooms and ample amounts of browned onions. Throughout our years of non-meat-eating, we would brown vegetarian steak strips, which was all right, given that I hadn't had it any other way for years. Economical skirt steak, however, fills out the meal and adds deep, beefy flavor. Skirt can get tough easily, so it's best to sear it at the beginning, then let the slices cook at a simmer until just done. Sirloin or ground chuck would make fine substitutes if you preferred.

browned onions

If you're in a hurry with this meal, you can cook beef, onions, and mushrooms at the same time in different pans, but I generally prefer more cooking time over more dirty dishes.


Beef Stroganoff

Serve over egg noodles or rice; this would also be great with roasted potatoes, and I can see it pairing well with a parsnip purée, too.

Dried porcini mushroom flour can be found at various gourmet food stores, and it adds some rich flavor to the sauce; alternatively, you could finely chop/blend another cup or so of mushrooms and cook those in the pan before making the roux.

3 tablespoons butter, divided
about 12 ounces skirt steak (or other beef as desired)
salt and pepper
1 large onion, halved and sliced
250 grams white or cremini mushrooms, thickly sliced (about 3 cups sliced)
1 tablespoon flour
½ cup milk
½ cup heavy cream
2 sprigs fresh thyme
pinch nutmeg
1 ½ teaspoons mushroom powder (optional)
6 tablespoons (or more) sour cream

Egg noodles: 1 to 1 ½ cups dry per person
Frozen peas (optional)

Heat a very large skillet over medium-high heat. Season the beef well with salt and lots of black pepper. When the pan is quite hot, add a knob of the butter (about ½ tablespoon) and the steaks. Cook, turning after a minute or two, until golden brown on both sides and still rare in the middle, about 5 minutes. Transfer to a plate and set aside.

Add about 1 tablespoon butter to the hot pan and add the sliced onions. Season with a bit of salt, reduce the heat slightly if needed, and cook, stirring regularly, until golden brown and almost completely softened, 8-10 minutes. Transfer to a plate or bowl.

Note: if you are serving this over egg noodles, this is a good time to put the water on to boil.

Add about ½ tablespoon butter to the pan (you should have one tablespoon of butter left) and add the mushrooms in one layer; cook in two batches if necessary. Cook without stirring until golden brown, then flip and finish cooking the second side. Transfer to the bowl with the onions.

While the mushrooms are cooking, take the mostly-cooled steak and slice it thinly across the grain; reserve any juices and transfer to the bowl with the onions.

Add the last of the butter to the pan and reduce heat to medium. Add the flour and cook the roux until medium blonde, 2-3 minutes, scraping the bottom of the pan with your spoon to loosen up the cooked bits of meat. Add the milk, cream, thyme, nutmeg, and mushroom powder if you have it, and stir briskly to combine.

Add the reserved vegetables, beef, and juices and stir well to combine. Bring to a boil, reduce heat to simmer and cook until thickened and the beef is cooked through, about 5 minutes more.

Stir in the sour cream, bring back up to heat, and taste to adjust seasonings.

Serve with egg noodles and green peas, if desired.

Serves about 4

15 November 2010

Free for the taking

There's much to be said about metropolises like Chicago, New York, and Seattle, but if Los Angeles has anything on them, it's the bounty of free-range fruit.

Foraging is second-nature for many, and isn't limited to food—we have dozens of tools in our garage, from ratchets to a whole hammer, that Mike has picked up from the gutter while riding his bike. Many of us may have fond memories from childhood: from blueberries in Alaska to blackberries in Oregon, rhubarb in Michigan to crabapples in New England. While urban foraging is becoming more popular all over the country, I've never seen a bounty like L.A.'s.

If this is starting to sound like an ill-fated expedition to the dumpsters behind the local grocery store, fear not! Countless houses have yards bursting with heavily laden, often un-harvested fruit trees—the lucky ones hang over sidewalks or alley walls for easy, legal, and no-permission-needed picking. (Please note that laws may differ outside of California.) Herbs and fruit trees are used as ornamental plants; kale is sold at garden shops between the azaleas and the snapdragons.

While one must always be concerned with contaminated water, ground pollutants from traffic and animals, and pesticides used by zealous landscapers, there's a steady supply of interesting foods, particularly fruit, throughout the year.

Imagine my excitement, the first winter that I lived in my current home, when I went on a walk and discovered that the attractive, broad-leafed trees lining the blocks around my house were heavily laden with pale orange, fuzzy fruit—loquats! Without stepping off of public property, a stroll around my neighborhood reveals pomelos, lemons, tangerines and oranges ripening before my eyes. My eyes dart from one tree to the next as I look for a reliable source of kumquats this winter, and this summer I spied a few days too late an apricot tree that dropped nearly all of its fruit uneaten.

In the very alley where we drive to park our car, a gnarled old pomegranate tree is beginning to drop its fruit. The fruit is baseball-sized and beginning to split on the tree, revealing deep garnet seeds (or arils, botanically speaking).

pomegranite granita

I couldn't let them go to waste. Lacking a sturdy ladder at the moment, we steered our car below its boughs. After a spry leap to the roof of the car, Mike stretched and contorted and gathered up nearly a dozen big beauties. There was a moment of excitement when one fine specimen slipped and exploded onto the windshield, but no permanent damage was done, and the car needed a rinse anyway.

I made a horrible mess of my kitchen extracting the arils before I read the suggestions from the can't-be-improved Chez Panisse Fruit: Alice Waters recommends filling a large bowl with water (I'd do it in the sink, just to be safe), and plunging the pomegranate pieces into the water before expelling the seeds. Any bits of membrane will float and the seeds will sink; the membrane and peel are very bitter and tannic, and this method makes them easy to remove. I seeded mine directly into the blender, and my kitchen looked like a murder scene; I ended up with pomegranate juice in my eyes, on the backsplash, and on my white carpet (it did come up, wonder of wonders).

pomegranate carnage

But what to do with 8 cups of pomegranate arils? Certainly, pomegranate has its place in salads, and it can't do wrong as a marinade or sauce for roast lamb, but I wanted something simple, something pure, something I could make in my pajamas on a Sunday afternoon.

"What about a granita?"

Mike to the rescue again. He may not care deeply for food, but when it comes to a frozen fruit dessert, he will always be first in line.

granita

I wanted to make a white chocolate mousse to nestle under this, but someone ate the last of my white chocolate ... perhaps next time. Lightly sweetened whipped cream provided an adequate foil for the highly acidic, slightly bitter fruit.


Pomegranate Granita
This would probably also be delicious with ½ cup of the pomegranate replaced with lime juice.

My apologies for an unwieldy recipe.

2 ½ cups pomegranate juice (if making fresh, from about 10 medium pomegranates—see below)
¾ cup water (or diluted juice—see below)
¾ cup sugar
2 tablespoons good-tasting vodka

To extract the pomegranate juice, score the fruit and seed them as instructed above; it will take 7-8 cups of pomegranate arils to make the juice. Place the arils, as much membrane as possible removed, in a blender or food processor. Pulse several times, until the volume reduces by about half and the mixture is mostly liquefied (brief pulses will extract the juice without pulverizing the seeds). Strain through a sieve or fine strainer, pressing gently to remove extra juice. Measure out 2 ½ cups juice and pour into an 8-inch square glass baking dish; reserve any additional juice for another use.

Place the water or diluted juice in a small pan with the sugar. (Use diluted juice to get every last drop out of your fruit: take the drained pomegranate seeds and transfer to a bowl or back to the blender. Pour about 1 C water over and stir briefly to combine; strain again and use the diluted juice in place of water.)

Place the water and sugar over medium high heat and cook, stirring regularly, just until the sugar is dissolved; do not let boil.

Gently stir the syrup into the juice and add the vodka. Cover the dish with foil and transfer carefully to the freezer.

Freeze, breaking up the crystals with a fork every hour or so, until the mixture is frozen throughout, 6-8 hours.

Serve with sweetened whipped cream if desired.

Makes a very scant quart (about 3 ½ cups)

13 November 2010

On family ties and oat cookies

When I was growing up my parents had two close friends that we visited often. They were always a unit—Pat'n'Pam—and they were always fun to be around. I remember them playing Scrabble, I remember their laughs, I remember the living room of their house, and I remember the first time I ever ate lentil soup, sitting in their dining room. I do not remember Pam's Oatmeal Cookies.

Pat'n'Pam moved away when I was still young, and our families lost touch soon after. I've tried to find them over the years, and I think of them whenever I see a Scrabble box or eat lentil soup. Oatmeal cookies were, until recently, free of this bittersweet association.

pam's oatmeal cookies

The trials of being the youngest! The rest of my family remembers those oatmeal cookies fondly, even passionately: very small but thick, chewy and intensely oat-y.

A few months ago, the recipe, transcribed by my six-year-old self, was discovered in my mom's recipe files. She sent it to me, along with her notes from the one or two times she had attempted the recipe.

Perhaps I wasn't careful enough when I wrote out that recipe as a child; perhaps Pam had some secret method that I didn't know about. When I first baked the cookies, they spread, thin and lattice-like, to all edges of the sheet. They tasted delicious—the butter along the bottom browned slightly and the sugar caramelized into a satisfying crunch—but they were more useful for an ice cream mix-in than for eating plain.

cookies and milk = dinner

Two months and half a dozen tries later, we have a cookie that is everything an oatmeal cookie should be: chewy without being tough, thick but not too big, unpretentious but tasting deeply of oats and brown sugar, and entirely without superfluity like raisins or chocolate.

I hesitate to call anything like an oatmeal cookie "perfect"—my blog, with a good dash of irony, is an exception. However, these cookies are the closest to perfect that I've stumbled upon, and they are already winging their way to my grandpa (happy birthday!) and dad (happy latelatelate birthday!). Bake these cookies until the edges are beginning to turn golden brown—they will still be very soft in the middle—then cool completely on the sheets. This will yield a chewy-but-not-tough cookie.

perfect oatmeal cookies


Perfectly Simple Oat Cookies
adapted from Pam's recipe

While these cookies could be made with nothing more than a spoon and some elbow grease, the dough is quite thick, so I recommend a mixer of some kind. You can also make big cookies easily, by using ¼ cup of dough per cookie (you may want only 6 per sheet).

1 ¾ cups all-purpose flour
3 ¼ cups rolled oats
¾ teaspoon baking soda
¾ teaspoon baking powder
generous ¼ teaspoon cassia or cinnamon
½ teaspoon salt (plus a pinch if desired)
1 cup (two sticks) unsalted butter
1 ¼ cups dark brown sugar
½ cup granulated sugar
2 large eggs
2 teaspoons vanilla

Mix the flour, oats, leavening agents, and seasoning in a large bowl until combined.

In a very large bowl, cream the butter until fluffy. Add the sugars and beat until light and creamy. Add the eggs and vanilla; beat until well combined.

Add the dry ingredients and stir or beat on low speed until well integrated. Cover and refrigerate until well chilled, at least one hour; dough will keep well overnight in the refrigerator.

To bake, preheat oven to 350ºF. Line baking sheets with parchment paper or silicone mats. Scoop dough by rounded tablespoonfuls (about 2 tablespoonfuls each) and arrange on baking sheets. For best results, bake 8-9 cookies at a time.

Bake, two sheets at a time, rotating halfway through cooking time, until the edges are set and beginning to brown, 12-14 minutes total. Transfer sheets to racks and cool cookies on sheets until completely cool, 15-20 minutes.

Store at room temperature in an air-tight tin for up to a week.

Makes between 3 and 4 dozen cookies

08 November 2010

Enter braising

We've had a contentious relationship, carrots and I.

braised carrots

Don't get me wrong, I've never had a complaint about a carrot stick, crunched by itself or dipped in hummus for a snack, but until a few years ago, I didn't want to have anything to do with a cooked carrot.

My clearest memories are of pot roast—not one of my preferred childhood meals anyway—at which time I would take the carrots that were forced on my plate and carefully mash them into mounds of potatoes, sometimes theatrically holding my nose and gulping milk after choking them down.

When I visited France in high school, I bravely swallowed endless mouthfuls of carrots puréed in cream without complaint, silently mystified by the radical change from crunchy and sweet to mushy and cloying.

My first positive experience with cooked carrots was in a holiday Tofurky—never my favorite Christmas meal, but one that my husband still adores. The "meat" was tightly wrapped with carrots, potatos, and onions, then dressed with a soy sauce-based dressing before cooking. One Thanksgiving afternoon one of those carrots found its way onto my plate, and never one to refuse a food another chance, I bit into it.

What a revelation! The carrot was sweet and tender, with an earthy complexity that would be unrecognizable in a raw carrot.

From that inauspicious start, I have become quite enamored of the lowly cooked carrot. In soups and stews, puréed or roasted, I spend much of the cooler months finding new ways to cook and eat carrots.

honey-ginger carrots

Enter braising—is there a better way to cook in the winter? The oven warms the house as flavors deepen and vegetables slump into tender piles of comfort. I am partial to this fantastic cabbage recipe, to be sure, but last night I wanted carrots to take center stage.

Here is the result: halved carrots, braised in stock with honey, ginger, and onions until just tender, then heated under the broiler until just beginning to brown. Infused with ginger and the sweet complexity of honey, these would be a delicious accompaniment to roast chicken, pork chops, or even, I suppose, a pot roast.

braised carrots with honey and ginger


Braised Carrots with Honey and Ginger

1 ½ pounds medium carrots (about three bunches)
½ large white onion
3 inches fresh ginger, peel scraped or cut off
2 tablespoons honey (I used avocado because it's what I have in the house)
2 tablespoons olive oil
3-4 tablespoons chicken or vegetable stock, or water
salt and pepper

Preheat the oven to 325˚F.

Peel the carrots, or thoroughly scrub them if you trust where they came from and like the skin. Keep smaller carrots whole and split large ones lengthwise. For presentation, I like to buy carrots with the tops, trim so that about one inch remains. Arrange carrots in an au gratin dish or other medium baking dish.

Thinly slice the onion half and add to the carrots. Cut the peeled ginger into matchsticks, halving once lengthwise if desired, and scatter over the carrots. Drizzle the honey, olive oil, and stock over the carrots, season with salt and pepper, and toss well to combine. Cover with aluminum foil or a tight-fitting lid and place in the oven.

Cook 45 minutes to an hour. Toss the vegetables well; if the carrots are not completely tender, recover and cook 15-20 minutes more. When the vegetables are completely tender, uncover and place the vegetables in the top half of the oven and turn on the broiler. (Note: if you don't have a broiler, simply uncover the dish and increase heat to 450˚.)

Broil until the edges are beginning to blacken, 5-10 minutes.

Serves about 4

06 November 2010

Failure and success

Who doesn't love apple season? Apples may be available year round in some form, but fall and winter bring the crisp Galas, giant Fujis, sweet-tart Pippins, and luscious Rome Reds. At my local grocer or the farmer's market, I find myself picking a few from each variety, planning tarts, cakes, and pies, and wishing desparately for a food mill.

My sophomore year of college I travelled to rural Pennsylvania with a good friend for Thanksgiving. Her family owned an apple orchard, and I spent Wednesday morning pressing my own cider.

It was a heady experience—much like making stock from scratch for the first time and discovering the true inferiority of box, can, and foil-wrapped brick. Why had I ever bought apple cider before? How would I ever enjoy it again? What reason had I for going to college when my true calling was to be an apple farmer?

In retrospect, I probably wouldn't be a very good apple farmer; I would be far too likely to hoard my apples, sitting on a slowly mounting pile of pastries and cores, licking applesauce off my fingers while growing to monstrous proportions.

Earlier in the week I made a pie for a friend. She had been sick earlier in the year, and I promised her a pie all for herself when she convalesced.

Is there any easier pie than apple? Don't ask me that today. A confluence of events left me with a lackluster filling, a soggy bottom crust, and a mockingly delicious, flaky, shatter-under-your-fork top crust.

I love the way the top crust sets before the fruit collapses on itself, leaving a little apple cathedral inside—the Duomo delle mele, if you will.

a cavern of apples!

Luckily for my friend, I embarked upon an experiment while the pie dripped apple syrup all over my oven—an experiment, based on vague memories of articles and blog postings, that became a resounding success.

chocolate and caramel and apples ... oh my

As you might know by now, I don't like to waste food if I can avoid it: no fewer than 4 bags of vegetable bits reside in my freezer, ready for stock, soup, or anywhere else I can fit them; I carefully hoard fat from roasting chickens for gravy or potatoes; I never need an excuse for ice cream or macarons—especially since I always have yolks or whites sitting in my fridge.

I remembered something about quince syrup being used for caramel (I did some research and remembered that it was this post from Chez Pim). As I prepared the apples for my pie, I tossed the peels and cores—stems, seeds, and all— into a large pot with just enough cold water to cover. I plopped it on the stove and set it to a boil for about 30 minutes, until the cores were softened and the peels limp. The mixture of Jonathan and Granny Smith apples that I was using for my failed pie left a lovely pink juice.

caramels aux pommes

My biggest problem with caramel is avoiding crystallization: I just can't leave things alone in the kitchen, so I tend to overstir. Even crystallized caramel couldn't make this plan go wrong: the resulting candies, coated with chocolate, were similar to New Orleans praline or butterscotch squares. A few tweaks to the recipe, though, and the second batch was even more successful. The tang of the apple comes through in a rich, buttery, chewy bite of whimsy: this is my answer to caramel apples.

dark chocolate

Another bonus, of course, is that you can use your trash to make holiday gifts for your loved ones.

apple caramels


Caramels aux Pommes, or Apple Caramels

1 cup Poor Man's Apple Cider (see below)
½ cup brown sugar
1 ½ cup granulated sugar
½ cup butter, softened and cut into small pieces
¼ cup heavy cream
Tempered Chocolate for dipping (optional)

To make the cider

Place a large pot in your sink with about ¾ cup cold water. As you peel 2-4 pounds apples for some delicious treat, toss the refuse (all peels, cores, stems, etc.—I shake out the loose seeds, but I don't worry about the rest) into the pot. After peeling and coring all the apples, place over medium-high heat and bring to a boil. Lower heat to medium and cook, stirring from time to time, until the juice is colorful and fragrant and the cores have completely distintegrated, 20-45 minutes. Let cool slightly, then strain through a sieve, pressing on the solids to extract as much juice as possible.

For the caramels

Butter an eight-inch square pan and line with parchment paper. Butter the parchment and set aside.

Place the sugar in a medium saucepan; add the apple juice, stir just to combine with a clean spoon and place over medium high heat. Bring to a full bowl.

When the sugars are completely dissolved, add the butter, a few pieces at a time, then the cream. Stir just to combine. Cook without stirring until your thermometer reaches between 248 and 250ºF (cook to a lower temperature if your kitchen is cold or if you prefer squishy caramel).

Remove from heat and pour into the prepared pan without stirring or scraping the pan. If desired, you can scrape the remaining caramel onto another small plate (it may crystallize).

Let cool, then cut into pieces and wrap in waxed paper or dip in tempered chocolate.

Notes for cutting: use a sharp knife dipped in hot water and saw gently with little pressure. It will take a bit of time, but it will be a lot less messy than the alternatives.

Makes about 60 small caramels

01 November 2010

Some things will always be ours

My husband and I bonded over carrot cake before we even started dating. He has much less interest in food than I—eating 7000 calories a day to maintain weight for several years will do that to anyone, I suppose—but there are a few things that he genuinely loves, and carrot cake is one of them.

topped with candied orange peel

One Thursday, six-and-a-half years ago, we were sitting together at work craving cake. Not just any cake, but a moist carrot cake with pineapple, coconut, and a not-too-sweet cream cheese frosting.

Internet searches were made, plans were set, and that Saturday we combined our efforts in the kitchen to cook our first dish together. Over the next week he brought big slices to work for us to share; I should have known right then that we were meant for one another.

hallowe'en batter

I've tweaked the recipe over the years, adjusting amounts and scribbling them onto the smeared and stained pink index cards, and the end result is always delicious. The lightness of the buttermilk counteracts the proclivity of fruit & vegetables to make a heavy, bread-like cake, and the citrus-laced cream cheese frosting offers a tang that accentuates the flavors without overpowering them.

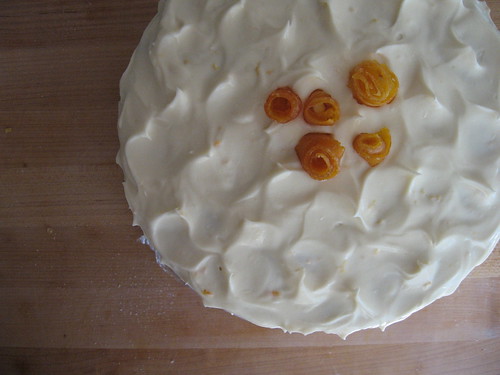
Oft-requested by friends and family, I have been known to bake the three layers but to only assemble a two layer cake, leaving the last just for us. Mike's favorite part is the thin slice cut from the top of the layer, smeared with frosting and rolled up like a taquito.

carrot cake

There are some dishes that will always be ours, no matter who cooks them: falafal, salsa, farfalle pasta with a chunky tomato-and-vegetable sauce ... and carrot cake.


Carrot Cake with Orange-Cream Cheese Frosting
Makes three nine-inch layers.

I shred about half of the carrots with the coarse grater and half with the fine; the finely shredded bits seem to dissolve into the cake, and the coarser pieces add a little texture and visual appeal. I've also been known to add chopped walnuts upon request, but I feel that chunks of nuts don't belong in cookies and cakes, so I prefer it plain.

For the cake

3 cups unbleached, all-purpose flour
2 teaspoons baking soda
1 ½ teaspoons baking powder
1 tablespoon cassia (see note below)
1 ½ teaspoons cinnamon
¼ teaspoon nutmeg
¼ teaspoon cloves
¾ teaspoon salt
3 large eggs
2 ½ cups granulated sugar
1 cup canola oil
1 ½ cups buttermilk
1 tablespoon vanilla extract
¾ cup pineapple, drained, well chopped, and packed
3 cups shredded carrots, lightly packed
¾ cup dried, sweetened coconut, lightly packed

For the frosting

½ pound butter (two sticks)
1 pound cream cheese (preferably regular, although low-fat or Neufchâtel will work)
2 teaspoons vanilla extract
1 tablespoon freshly-squeezed orange juice
2 teaspoons orange zest
approximately 4 cups confectioners' sugar


Grease and flour three 9-inch cake pans; set aside. Preheat oven to 350ºF and place racks in the top and bottom thirds of the oven.

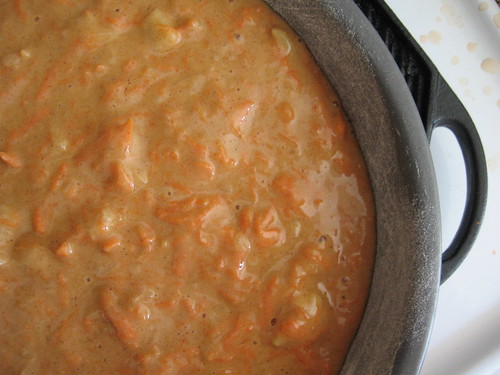
Whisk together the flour, leavening, spices and salt in a medium bowl; set aside. In a large mixing bowl, beat the eggs until light yellow. Add the sugar and beat until very pale and slightly fluffy, 2-4 minutes by hand. Add the oil, buttermilk and vanilla; mix well. Quickly beat in the flour mixture, then add the pineapple, carrots, and coconut. Mix well just until combined.

Divide evenly between the prepared cake pans and transfer to the oven, placing one pan on the lower rack and two on the top. Bake 50-60 minutes or until skewer comes out clean, switching from top to bottom after thirty minutes. Cool on racks 10-15 minutes, then remove from pans and cool completely.

For the frosting:

Have all ingredients at room temperature. Cream butter and cream cheese until quite fluffy. Add vanilla, juice, and zest; beat well to combine. Add the first three cups of frosting, sifting directly into the bowl and beating to combine. Add additional frosting if desired.

For best results while assembling cake, transfer the frosting to the refrigerator for 5-10 minutes before frosting. Otherwise, your frosting between the layers may be thin, and nobody wants that.

A note about cassia/cinnamon

What you usually buy at the store as "cinnamon" is actually cassia, a similar spice from a related plant. It typically comes from Indonesia, China, or Vietnam (the best, in my opinion, is the "Saigon Cinnamon" from Vietnam), and it is quite spicy and perfect for savoury dishes. "True" cinnamon, sometimes marketed as "Ceylon" cinnamon, has a more delicate, floral flavor, and it is the cinnamon flavor common in Mexican cooking and many cinnamon flavored candies. I prefer a mixture of the two in this recipe, but you can interchange them as you like.