20 March 2011

Unsung hero of the taco

A few days ago I got a lovely piece of halibut out of the freezer to thaw. If there's one thing that I love about having parents in Alaska, it's the regular restocking of my freezer with responsibly-fished halibut, prawns, and salmon (smoked and fresh). I had great plans to make Potato-Wrapped Halibut, but once I got home, fish tacos sounded more appealing.

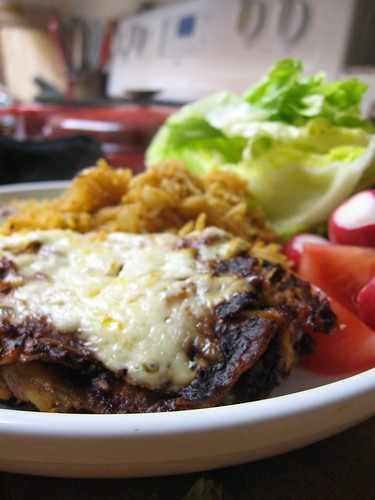
The tacos themselves are pretty simple: sear cubed halibut, seasoned with salt & pepper; thinly slice some green cabbage; load into tortillas with salsa, guacamole, and a quick crema (or yoghurt, or sour cream thinned with a bit of water)-lime-cilantro sauce. However, Nicole from And Baby Cakes Three made a passing comment about flour tortillas the other day, and even though I envy her life in Rome, I remember cooking without certain key ingredients available in stores, so I decided to focus on the unsung hero of the taco.

flip it!

Tortillas are often an afterthought, but just as a Reuben requires good rye bread, and a gyro isn't all it could be with stale and bland pita, a good tortilla becomes more than just a filling-holder.

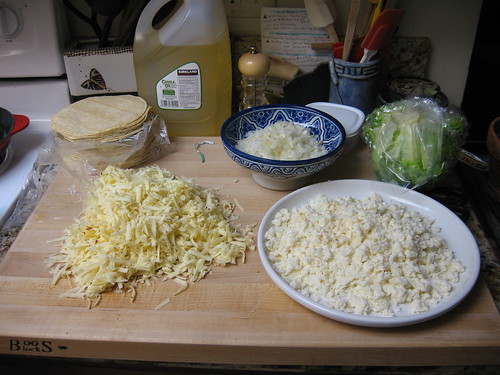
Like many great breads, tortillas have few ingredients: flour, salt, shortening, and water. If you have a good source of lard, do use it, but at present I use Spectrum Organics non-hydrogenated shortening. Because of the paucity of ingredients, process is key.

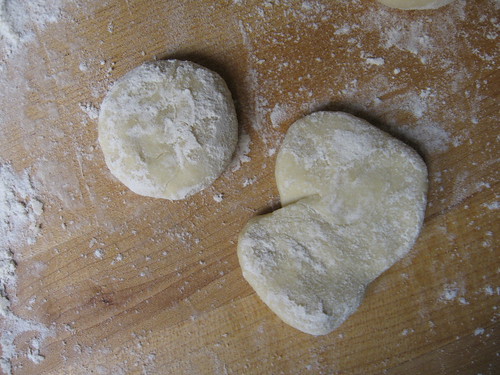
After kneading the dough, it is broken up into flat disks of dough before resting. I have the best luck by pressing the hunk of dough between my palms while making five or six little circles, but these disks may end up round or amoebic.

some are rounder...

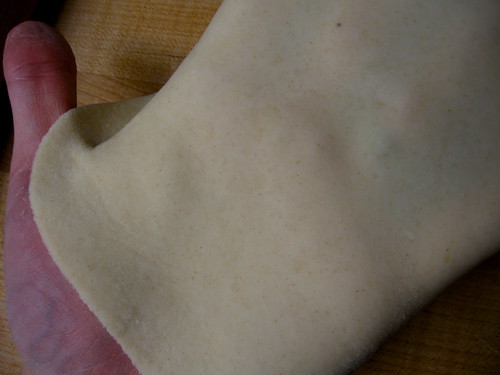
When rolling out, I start with a tapered rolling pin like this—it is often said that tapered pins are harder to work with than the standard cylindrical pin, but I struggled for years with various incarnations of pins, marble, wood, and plastic, before discovering tapered pins. I find them much more intuitive; direct contact with the pin makes it easier to feel the dough, and the tapered edges allow minute adjustments. Tortilla dough is relatively soft and elastic, so the key to rolling it is regular turning and flipping. If you look carefully, you can see the outline of my fingers and a bit of my ring through the tortilla.

roll them thin

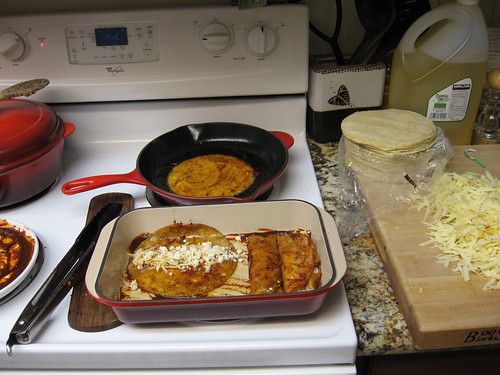
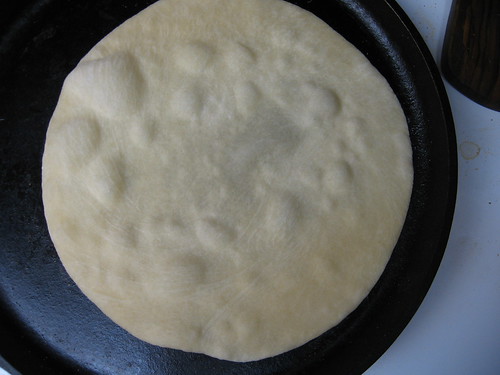
The cooking process is easy but a bit time consuming. If you have plenty of range space you can heat up multiple pans, but I usually cook them one at a time, preparing the rest of my meal as they cook, checking them regularly to pop bubbles, flip, and roll dough as needed. Once cooked, tortillas will last for several days in the fridge—wrap them in a towel and place them in a plastic bag; reheat briefly on the stove or even in the microwave, just until warm and pliable.

side A


Flour Tortillas
This recipe makes "standard" 6-8 inch tortillas; if you want to make the cute little mini-tortillas popular at taco stands, either halve the recipe or cut in twice as many pieces. Flour tortillas will work with any filling, but I particularly like fish and carne asada.

3 cups all-purpose flour, plus about 1 cup bench flour for kneading/rolling
1 ½ teaspoons salt
generous ½ cup vegetable shortening (I like Spectrum Organics) or lard
1 cup plus 2 tablespoons warm water

Combine 3 cups flour and salt in a large bowl, then add shortening and just over a cup of water—reserve remaining water. Stir until the mixture begins come together into a soft and flexible ball; add the additional water if the dough is very stiff. Sprinkle your counter or a large board with some of the bench flour, then turn the dough out and knead until smooth and elastic, adding flour as needed to keep it from sticking, 5-10 minutes (note: you will probably use about half of the flour during this process). Cut the flour into 16 equal pieces, roll them into flattened balls, and dip each side in flour. Cover the dough pieces with a clean dish towel; let rest 20 minutes.

Heat a cast iron skillet, tortilla pan, or griddle over medium-high heat (note: for most stoves, cast iron will operate best if you treat "medium" or "high," so this would actually be medium-low heat).

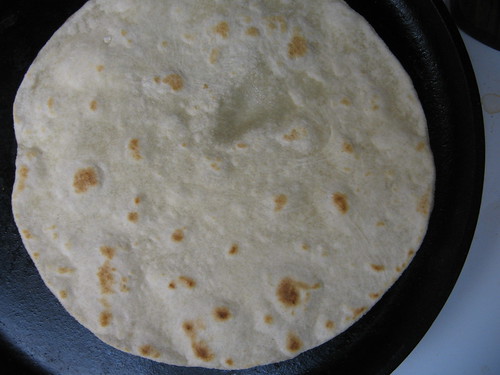
Dip each ball of dough in flour again and roll out into a very thin tortilla—the dough should be barely translucent, about 1-2 mm thick. Place on the hot tortilla pan and cook until opaque and bubbling all over, 1-2 minutes. Gently break the bubbles with a wooden spoon, tongs, or your finger to let the underside cook evenly. Flip with tongs or your fingers - the tortilla should be golden brown in spots. Let the second side cook about 1 minute more, until golden-brown spots develop.

Remove the tortilla from heat and wrap in another clean towel. Repeat, taking care not to stack the uncooked tortillas after rolling them out.

Makes 16 tortillas about 6-8 inches thick

13 March 2011

First time's a charm ... again

The muffin obsession continues apace.

apple-nutmeg muffins

I fiddle obsessively with recipes, reducing sugar with abandon, increasing spices with impunity, and shuffling ingredients as the whim suits me. However, I have only recently started building recipes from scratch, and although it has increased my rate of epic failure in the kitchen, there is little that's more exciting than starting with little more than an idea and ending up with breakfast.

This idea was born, in part, out of necessity. I was sitting at home, alone, with a few good books and a craving for muffins. I had a few apples that had been sitting in the crisper drawer for far too long—while I appreciate their longevity, the shriveled skin that apples develop after a long rest leaves them good for baking and little else—some wheat pastry flour that I've been experimenting with sporadically, and half a nutmeg.

I stirred and grated, holding my pen between my teeth and jotting down notes when I had a moment. It was like a moment out of a movie when I took the pan out of the oven. The muffins weren't flat or rock-hard; nor had they run over into a blackened mess. They looked ... like muffins.

muffins with streusel

Carefully plucked out of the pan and cooled to won't-quite-burn-your-fingers temperature, I pulled one apart. Success! The crumb was fine and moist, streaked with bits of coarsely-grated apple. The wheat flour provided body and a toothsome flavor, and the nutmeg and mace combined with not-too-much sugar for delicate flavor.

I wish every random craving had such fine results—but until then, I will counter each flop with a batch of muffins to take the edge off.


Apple-Nutmeg Muffins

For the streusel:

3 tablespoons butter, melted
3 tablespoons brown sugar
6-8 tablespoons flour

For the muffins:

1 cup all-purpose flour
1 cup whole wheat pastry flour (or ½ cup whole wheat and an additional ½ cup all-purpose)
2 teaspoons baking powder
1 teaspoon baking soda
¾ teaspoon salt
½ freshly ground nutmeg
½ mace (or additional nutmeg)
pinch cinnamon
2 tablespoons brown sugar, lightly packed
¼ cup granulated sugar
1 cup grated apple, lightly packed (from one quite large or two smaller apples; I used Gala)
½ cup butter, melted and cooled
1 egg, beaten
1 cup buttermilk

Preheat oven to 400ºF. Butter the cups of a muffin pan or line it with paper liners; set aside.

To make the streusel, melt the butter, then stir in the brown sugar. Add the first 6 tablespoons flour, mix well, and add additional flour if necessary to make a crumbly texture; set aside.

Mix both flours, leavening, salt, spices, and sugars in a large bowl. Add the apple, butter, egg, and buttermilk and mix just until combined—the batter will be lumpy. Spoon the batter evenly into the muffin cups and sprinkle liberally with streusel.

Bake 25-30 minutes, or until golden brown, turning the pan once during the cooking time. Remove from the tin and cool on a rack; serve warm or at room temperature.

Makes a dozen

04 March 2011

Heady

It's been a few weeks since I made a dinner that filled me with excitement. Oh, I've had eagerness to eat certain meals (my first falafal in over six months), and happiness with the fast-yet-perfect nature of my favorite pasta dish, but I haven't had those moments of trying something new with the vaguest idea, the barest of inspirations, tasting, eyes widening, then tasting some more.

I wish that I had taken notes, that it had been perfect and blog-worthy in that first moment, that I had taken a picture—but let it be known, Chicken-Chipotle tacos will be coming your way the next time I buy a chicken. In the meantime, let's talk enchiladas.

cheese and onions

Living in Southern California, Mexican food is ubiquitous—the good and the bad, the traditional and the contemporary American style. For every delicious stand at the Grand Central Market, there is a restaurant serving stale food straight out of the microwave; for every traditional taquería, there is a fusion restaurant just down the street. Whether food is down-home traditional or more contemporary and upscale, I tend to like it, but my half-Mexican husband is a bit more picky.

When he was growing up, Mike's kitchen was the nexus of the family—every Saturday, his tías, cousins, and family friends would converge on their house. Carne asada, rice and beans, enchiladas, tamales, and more were served, and his mom was smart enough not to do the work on her own—at four o'clock in the morning Mike would be shaken awake, put to work chopping onions or shredding cheese. When visiting family in Mexico one summer, his grandmother woke his mother up, proudly displaying the healed blisters on his fingers that allowed him to flip tortillas over the open flame.

The family has diminished and scattered over the years, and it has taken half a decade for Mike & I to perfect some of our favorite family dishes. Salsa and guacamole were the first priorities, but they were followed closely by cheese and onion enchiladas.

There are a few keys to good and easy enchiladas. First, the sauce. It make take a bit longer than opening up a can, but once you've tried a homemade enchilada sauce, you'll never want anything else. It's little more than a very smooth salsa—chiles, garlic, and some tomato—but it has a rich, smoky, complex flavor. The sauce can be easily adapted, too: use vegetable or chicken stock instead of water for a richer flavor; add a roughly chopped chipotle for a more intense smoky flavor; add onions for a bit of texture and a more salsa-like taste.

The construction of the enchiladas is a bit messy, leading to an oil-splattered stove, but if you take a few minutes for mise en place, you will quickly fall into a rhythm. Here's my setup:

To the left I have my sauce on a plate, for dipping the tortillas, and some extra water for thinning the sauce if it gets too thick.

work station: the sauce (and beans in the back)

This is where I stand - I cook the tortillas on the back, then transfer them directly into the baking dish where I fill and wrap them.

work station: construction zone

To my right, I prepare all of my fillings and keep them close at hand; the tortillas and vegetable oil are also within easy reach.

work station: the fillings

The production of a large batch of food leads to a busy hum of work, a steady stream of things to do. It's one of my favorite times to be in the kitchen, preferably with a big mug of iced tea and a sunny window letting a cool breeze in. Once the enchiladas are in the oven (or freezer, as it may be), there's ample time to make some rice, set the table and sit down with a book for a few minutes before it's time to eat. And eating is the best part—it may have taken a while, but if I've learned anything from Mike, it's how to properly eat enchiladas.

it ain't pretty ... but it's good

See that big pile of vegetables on the plate? Mike grew up with enchiladas served with thick slices of iceberg lettuce, long wedges of cucumber, and cold, salted radishes. The cool crunch of the vegetables is the ideal foil for the creamy, spicy, and soft enchiladas. I've never heard of anyone else eating enchiladas like this, but I'll never go back.

Enchiladas come in many forms—nearly as many as there are families—but this recipe is basic: red mole for sauce, cheese and onions for filling. The assembly takes a bit of time, and for that reason I always make a fair batch—about two dozen. I recommend making it on a weekend; an ideal time to linger in the kitchen with family & friends, and perhaps a cold beer.


Cheese & Onion Enchiladas
I think the sauce is best if made the day before and refrigerated overnight; also, a tray of unbaked enchiladas will freeze quite well for at least a month; wrap tightly in plastic wrap, then aluminum foil. Remove the plastic wrap and replace the foil before baking (can be baked frozen).

Note: the leftover oil, laced with tortilla flavor and studded with little bits of browned mole, makes fantastic Mexican rice.

For the sauce:

4-6 cloves garlic
1 teaspoon dried oregano (or one sprig fresh, if available)
2 dried pasilla chiles (also called ancho)
7 dried guajillo chiles (also called California chiles)
3-4 dried chiles de arbol (optional)
2 tomatoes
salt to taste
(yields about 3 cups)

For the enchiladas:

2 dozen (six inch) corn tortillas
1 pound Monterey Jack, Pepper Jack, or other mild grating cheese
1 pound queso fresco (or an aged cheese like cotija)
1 large onion, finely chopped
oil, for frying the tortillas


To make the sauce: heat a heavy skillet (preferably cast iron) over medium heat. Add the dried chiles and the tomatoes and cook, turning regularly, until the tomatoes are beginning to blacken and the chiles are softened and fragrant but not burnt, 5-8 minutes.

Meanwhile, bring a couple cups of water to boil. When the chiles are done, add them to the pot, lower the heat to a simmer, and cover. The peppers will soften in 5-15 minutes.

Peel the garlic and toss it into a blender with the oregano. Discard the seeds and stems from the dried chiles, if you haven't already, and add the peppers to the blender. Peel and core the tomatoes and add them, as well. Add some of the chile water.

Blend the sauce thoroughly until it makes a sauce. Add more water as needed to achieve a thickness like applesauce, and add salt to taste. You should have about three cups of sauce. If you're making the sauce ahead of time, let cool, then cover and refrigerate overnight or up to a week.

To assemble the enchiladas, prepare all the fillings: grate the Jack cheese, crumble the queso fresco, and chop the onions; keep all of them close at hand. Also keep two baking dishes handy—for a thin layer of enchiladas, use two 9 by 13 pans, for a thicker layer (you will push the enchiladas together; this is how I prefer them), use one 8 inch square pan and one 9 by 13 or 8 by 12 pan. You will also need the cooking oil, the enchilada sauce, and some water for thinning the sauce as needed.

Preheat the oven to 350ºF. Heat a generous layer of oil at medium-high heat in a 12 inch cast iron skillet. Spread some of the sauce into the baking dish and pour some onto a plate, thinning it with a bit of water if needed. Coat a tortilla on both sides with a layer of sauce (it does not need to soak) for long. With tongs, carefully place the tortilla in the oil—it will pop and sputter. Cook 15-30 seconds on each side, until the tortilla is pliable but not falling apart. Transfer to your baking dish and let cool for a few seconds, then add some of each cheese and a few onions, then fold and move to the side of the dish. Repeat, adding more oil to the pan as needed—after a few you should get into a rhythm, filling one cooled tortilla while another one is cooking and a third is sitting in the sauce.

Once all the tortillas are filled, thin the remaining sauce with about a quarter cup of water and distribute it over both of the baking dishes, getting sauce around all the edges and between enchiladas, if possible. Sprinkle the tops with the remaining cheese and cover with foil. Bake for 30 minutes, until the cheese is bubbling. Uncover and cook 10-15 minutes more.

Remove from the oven and let sit 5-10 minutes before serving—serve with an assortment of cold, crunchy vegetables, and rice and beans if desired.

Makes about 24 enchiladas