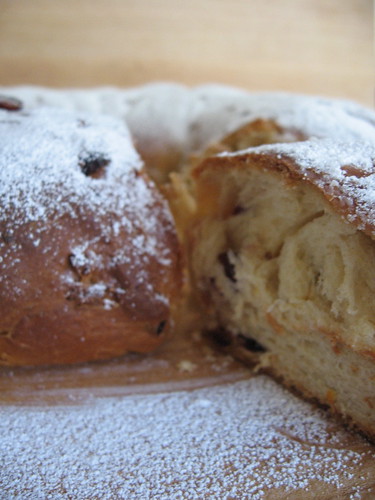
What timing! Did you know that today is National Fruitcake Day?
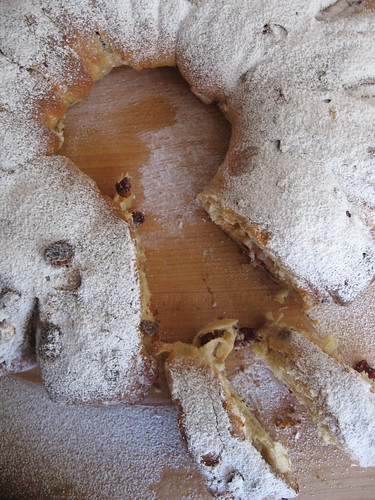
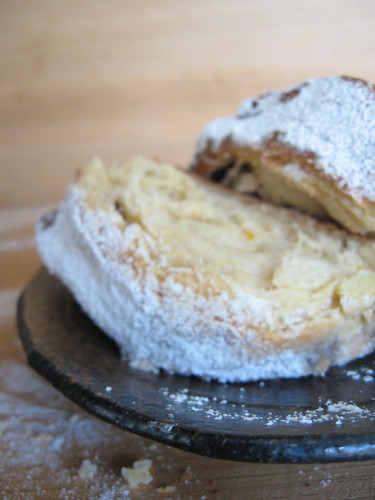
The 2010 December Daring Bakers’ challenge was hosted by Penny of Sweet Sadie’s Baking. She chose to challenge Daring Bakers to make stollen. She adapted a friend’s family recipe and combined it with information from friends, techniques from Peter Reinhart’s book ... and Martha Stewart’s demonstration.
Stollen is a German fruitcake that bears a similarity to panettone and other traditional holiday yeast breads. This bread is stuffed with dried fruit, zest, candied citrus, and nuts, and the mildly sweet dough is topped with melted butter and confectioners' sugar after baking.
I have a fractious relationship with fruitcake at best. I didn't grow up with a family that baked traditional fruitcakes, but I heard the stories from friends and, well, the world at large, which told me that fruitcake was heavy, saccharine-sweet, and stuffed with everything from raisins to the frightening red and green jellied cubes that were supposed to be candied citrus.
Of course, I've moved on from that point in my life, at least a little bit. I still prefer my raisins eaten out of hand to mixed into bread, and I only recently discovered that homemade candied citrus is not only edible, but absurdly delicious, but I've eaten various fruitcakes from around the world over the years.
I made a few variations to the recipe based on my desires and my pantry stock: I substituted the traditional raisins with cranberries that needed terribly to be used; I soaked them in orange juice instead of rum (to avoid waste from the fruit I was zesting and candying); I used finely chopped almonds rather than slivered almonds because I don't like big pieces of crunchy things in my bread. I also added the candied orange peel only when I was rolling the dough into its wreath shape, as I didn't start making it until I was ready to make the bread. Luckily for us, there was enough orange peel left over for us to munch on it throughout the evening, as well.
Due to this bread's longevity—supposedly, it lasts for a couple weeks at room temperature—I may continue to fiddle with the recipe before next year's holiday season. I'm sure my family wouldn't be bothered by the addition of a fruitcake to the cornucopia that I mail out.
27 December 2010
24 December 2010
Short and sweet-tart
Were you thinking, perhaps, that cranberry sauce wasn't worth the effort this year? That the recipe on the back of the back didn't turn out much better than a can, or that the solid mass of ribbed, jellied sauce that slurps out of the can would make up for what it lacks in pure amusement value?
Reach to the back of your freezer, then, for the bag of cranberries that you stashed away when they were on sale last January, because this cranberry sauce is so much more.
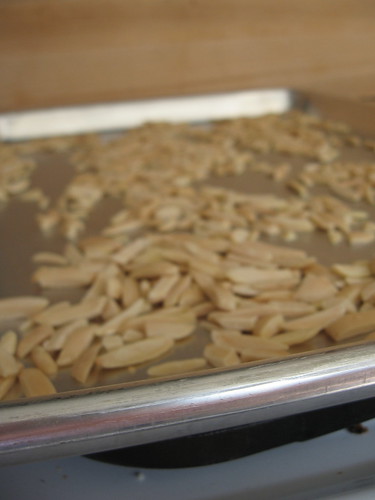
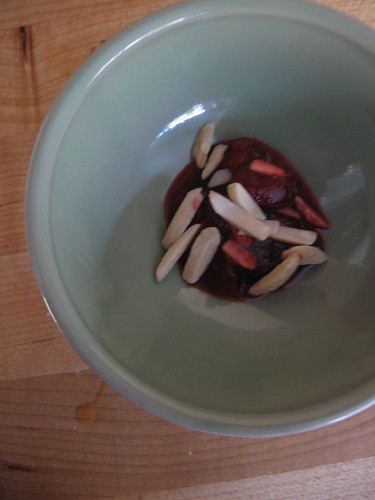
The most obvious addition is slivered almonds—toasted to perfection, half are mixed in with the hot sauce, the other half sprinkled over the top before serving. More subtle is star anise, a beautiful spice with subtle, complex flavor.
All told, this takes about 15 minutes to make—at least thirteen of which can be spent paying attention to other things—so it's ideal to make on Christmas Eve or even in the morning when you are brewing your tea or coffee. Just reserve time for the sauce to cool and chill (an hour or two if you put it directly in the fridge).
The turkey is brining, the sausage is made. Stale bread is finishing the drying process in the oven, and bottles of Prosecco and grape juice are chilling in the fridge. I have a mug of spiced cider in hand, and the presents are all wrapped and under the tree.
The only thing left to do is decide what's for dessert tomorrow. Oops.
Spiced Cranberry Sauce with Tangerines and Almonds
If you don't have star anise, most Chinese five-spice powder mixes would would as a replacement (just make sure it doesn't have chile, pepper, or salt); just add about ¼ teaspoon powder.
1 cup slivered almonds
12 ounces fresh or frozen cranberries (one standard bag)
1 tangerine or small orange
¾ cup water
¾ cup granulated sugar
1 nutmeg, broken into large pieces with a pestle or rolling pin (or 1 pinch ground nutmeg)
2 whole star anise
¼ teaspoon cinnamon
Preheat oven to 350ºF. Spread almonds in a single layer over a rimmed baking sheet and toast, stirring once or twice, until light golden and fragrant, 5-10 minutes. Set aside to cool.
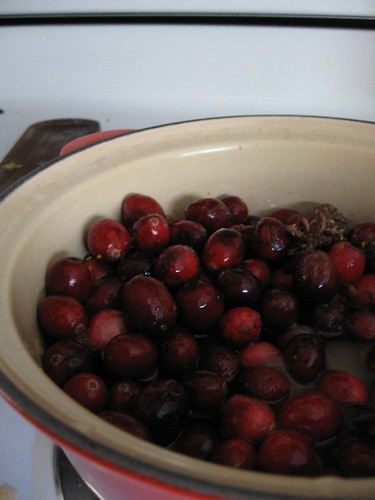
Pour the cranberries into a medium saucepan and briefly rinse, then pick over to remove any bad berries. Zest the tangerine directly into the pot, then cut in half and juice into the pot. Add the water, sugar, and spices, stir to combine, and place over medium-high heat.
Bring to a boil, then reduce heat and simmer 10 minutes. The cranberries will be breaking down and the mixture will have thickened slightly. Mash one quarter to one third of the mixture roughly with a wooden spoon, then stir well to combine. Remove from heat and stir in half of the almonds.
Transfer the mixture to a bowl and cool completely. Chill before serving—mixture will thicken further as it cools.
Makes about 3 cups
21 December 2010
Raise your glass
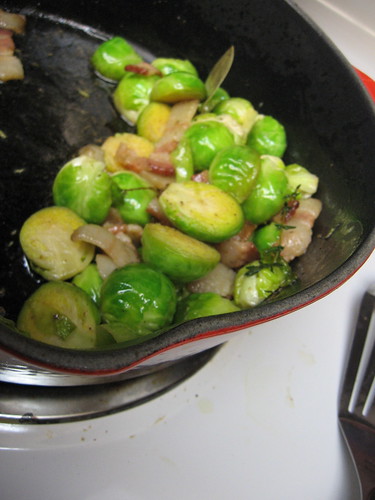
Are you planning a feast of some sort this Saturday? I know I am. Roast turkey (I contemplated goose for a day or two); dressing with homemade pork sausage and apples; Mike's fantastic, rich, and rustic mashed potatoes; braised pearl onions; roasted carrots & parsnips; the essential cranberry sauce with tangerines, almonds, and star anise; and the ugly duckling of the holiday feast: sautéed Brussels sprouts with bacon & herbs.
I had never eaten a Brussels sprout until a year or two ago. My mother had grown up hating them, so she never made them at home, and while I spent college tentatively trying new foods and cuisines, I wasn't quite ready for institutionally-prepared, boiled-and-buttered sprouts, however good my school's food might have been.
Finally, finally, I spent one winter Saturday wandering through the farmers' market, looking for inspiration. There they were: little miniature cabbages, so cute and unoffending, so green and bright among the root vegetables and butternuts, so lonely and unwanted. I grabbed a few—their bad rap renewed my tentative streak—and went home to my internet and my trusty, dog-eared, and stained copy of Chez Panisse Vegetables.
It was love at first bite. Why on earth does everyone malign the poor, defenseless Brussels sprout? When cooked properly, they are nutty, sweet, and not at all stinky like their reputation suggests, and they are now a regular winter guest in our home. I've tried them hashed (delicious tossed with hot pasta) and whole, and you can't go wrong roasting the halves in a hot oven until caramelized around the edges—adults and children alike will be filching them off the platter like candy.
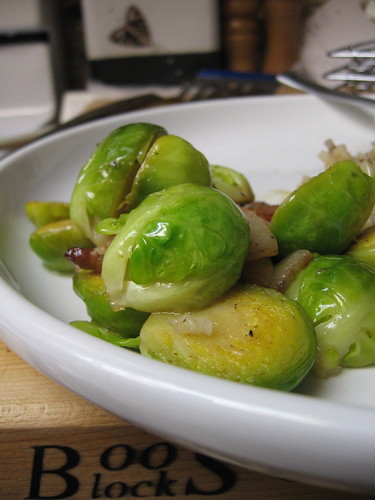
My new favorite way to prepare sprouts, discovered this November, is with bacon. It may be unoriginal, and it may counteract the various health benefits—but try it and you may be converted. The sprouts are sautéed in some of the rendered fat just until hot, after which point a splash of white wine and stock are added to deglaze the pan. As the sprouts finish cooking, the sauce coats them in a silky emulsion of smoky bacon, herbs, and wine—the flavor is bright and springy, fending off the winter blues, making you raise your eyebrows and reach for more with each bite.
If you're afraid of Brussels sprouts, if you've been trained to think of them as little ping pong balls of evil, please, take a deep breath, drink a glass of wine, and try them with bacon.
Sautéed Brussels Sprouts with Bacon
Adapted from a few recipes in Chez Panisse Vegetables
If you don't like bacon or don't eat it, add a couple tablespoons of olive oil to replace the lost fat. This recipe will double (or even triple, I suppose) easily, but you want the sprouts in a single layer if possible so that they will cook evenly.
About 1 pound fresh Brussels sprouts (chose smaller heads with compact leaves)
1 tablespoon butter
2-3 ounces uncured bacon (about 2-3 slices for most)
½ small onion or one shallot, chopped (optional)
2-3 sprigs fresh thyme, or 1 teaspoon dried thyme
1 bay leaf
salt & pepper
splash white wine
2-4 tablespoons mild stock or water
Peel off the tough, blemished outer layers of each sprout, revealing clean, bright heads. Trim the root end of each sprout and cut in half or quarters; if the size varies, cut smaller specimens in half only.
Meanwhile, heat the butter a large pot over medium-high heat. Cut the bacon into lardons about ½ inch thick and add to the pot. Cook, stirring once or twice, until just beginning to brown (note: if your bacon renders a huge amount of fat, you may want to remove a small amount before proceeding). If desired, add the onion or shallot and stir to combine.
Add the sprouts, thyme, and bay leaf and season with salt and pepper. Cook, stirring regularly, until the sprouts are hot and just beginning to wilt and brown, 3-4 minutes. Add a splash of white wine and stir well to deglaze. Add two or three tablespoons stock, partially cover, and let cook until the sprouts are tender throughout, about 5-10 minutes more. If the mixture is dry, add a bit more stock. Serve hot.
Serves about 4 as a side dish at a normal meal; at a feast with many dishes, would probably serve 8 easly
20 December 2010
Pretty darned fantastic
Can we all get together and agree that chickpeas are pretty darned fantastic?
For one thing, they really do look like miniature naked chickens, and that can't do anything but improve them. Further, there's no complaining about any food that has multiple, fun names. Chickpeas has a whimsical ring to it, the kind of word that I like to use for finger foods like roasted, spiced chick peas and falafal. Garbanzo beans, then, are like the chickpeas' smoky, all-the-boys-love-her older sister, sultry, mysterious, and brooding. Garbanzo beans are just cool.
So really, could it be anything but garbanzo beans in this dish? What happens when you mix garbanzo beans with chard, and cook them both with handfuls of shallots, scads of garlic and buckets of olive oil? Good things happen. Magic happens.
I stumbled upon a recipe for Roasted Garbanzo Beans and Garlic with Swiss Chard several years ago in a Bon Appétit, and I believe I made it for dinner that night. I've made this dish countless times since, a cure for an uninspired fall, the winter blues, or a misty spring day alike.
The original recipe, provided by Michael Psilakis, was mindblowing, but it was no suprise: what wouldn't be good with 1 ¼ cups of olive oil? I'm not anti-fat by any means, but my frugal wallet winced at roasting the beans in that much oil, just to drain it off. Sure, I could (and did) reuse it, but still. I slashed at the amount until I found the perfect level of olive oil—all of the flavor and none of the waste.
As if roasted, garlicky, herb-covered garbanzo beans bathing in velvety chard wasn't enough, I dare you to find a way not to serve this. I've had it under seared salmon and aside roast chicken. I've tossed it with pasta; I've added stock for a soup. I've topped it with a runny-yolked poached egg (oh, the unctuous sauce that resulted!); I've drained it and stuffed a pita for a sandwich. Truly, the versatility of this dish knows no bounds.
I waited all day to finish this post so that I could take photos; unfortunately, I was at work with nothing but my leftovers to eat, so they were gone before I got to my camera. Still, I've got more garbanzo beans in the refrigerator, so I'm sure I'll make more in the next week, and I promise you pictures at that point. Until then, I exhort you—soak some garbanzo beans tonight, or get out a few cans and start immediately. You won't be sorry.
Roasted Garbanzo Beans with Swiss Chard
Adapted from this Michael Psilakis recipe on Epicurious, from Bon Appétit
This dish calls for a large amount of garlic, but as most of it is roasted, and the rest lightly sautéed, it offers a mellow flavor. Use whatever kind of chard you like; the red chard, which I usually buy, will stain the broth and the beans lightly pink.
For the garbanzo beans:
3 cups cooked, drained garbanzo beans (or about 2 cans, rinsed well and drained)
1 teaspoon fennel seed
2 bay leaves
2 shallots, thinly sliced (can replace with ½ red onion)
10 cloves garlic, peeled
salt & pepper
¼ cup good olive oil
For the chard:
2 tablespoons olive oil
2 shallots, thinly sliced (see above)
5 cloves garlic, peeled and crushed
2 bay leaves
1 large or 2 small bunches chard, ribs removed and leaves coarsely torn
1 ½ cups mild broth (I prefer vegetable stock)
Preheat the oven to 350ºF. Toss the drained beans with the herbs, shallots, garlic, and liberal amounts of salt & black pepper (at least ½ teaspoon salt and 1 teaspoon pepper for me). Drizzle the olive oil over, toss lightly, and cover the dish tightly with foil or its lid. Place in the oven and roast, stirring once or twice, until the beans are tender and a light gold color, and the garlic and shallots have relaxed completely. Remove from heat and set aside (can make a day ahead if desired; bring to room temperature before proceeding).
Heat the olive oil over medium-high heat in a large, deep pot. Add the shallots and garlic and cook for a minute or two, until fragrant. Add the bay leaves, then about a third of the chard. Stir well until wilted, then add remaining chard in batches. Add the stock, bring to a boil, and cook until the chard is tender, 5-10 minutes. Add the garbanzo beans, mix well, and cook one to two minutes more, until the beans have absorbed a little of the broth. Adjust seasoning as desired, remove bay leaves and serve.
Serves 4 as part of a main dish (with an egg, pasta, etc.), or 8 as a side dish
17 December 2010
An unassuming trio
I'm running behind schedule—and not just when it comes to blogging. My parents came to visit, which was fantastic ... but wow. Christmas is one week from tomorrow.
I'm behind on my blogging, to be sure, and my blog reader is about to burst from all the unread posts, but that's the least of my worries.
I'm behind on gifts—there are some downsides to focusing as much as possible on hand made items. I'm behind on knitting, on wrapping, and on so much as thinking about stocking stuffers. And until yesterday, I had not made a single Christmas cookie.
How is that possible? I'm usually the queen of Christmas cookies, with half a dozen varieties baked up before the second week of December begins. I may have a party to go to this weekend, but I think I will be stocking up on butter, buying another bag of sugar, and dirtying every baking sheet I own. Several times.
Luckily for my blog (and for my belly), I made shortbread last night. Shortbread is one of my favorite kinds of cookie, and one that I rarely make after December. A simple, sugar-flour-butter cookie—complimented with a dash of vanilla and a sprinkle of salt—is all that anyone should ask for, but what can I say? My favorite thing about shortbread isn't the rich butter or the melt in your mouth sandy texture (no wondering why these are called sablées in France), but rather the endless tweaking that I can do to a recipe.
Last year I became more than a little bit obsessed with dark chocolate-drizzled cardamom shortbread, but I'm a fickle girl, and they haven't even crossed my mind. This year, it's time for something old, and something new; for tradition and experimentation. Yesterday afternoon, after recovering from a vicious migraine, I made up for lost time by making four different batches of shortbread. One I'm saving for later, but I'll show three of them to you today.
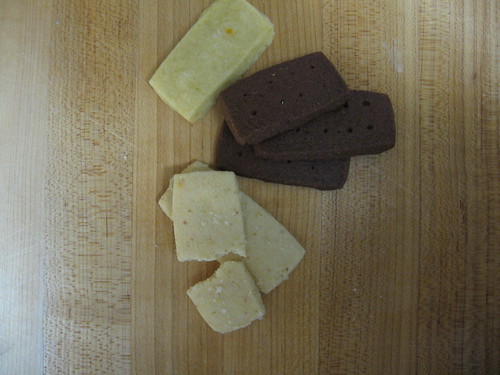
It's an unassuming trio of little rectangles—no fancy shapes for the humble shortbread in my house—of brown butter and salt, Mexican chocolate, and Meyer lemon. Each delights me in different ways, but I'm going to start, as I so often do, with chocolate.
I was inspired by the Salt & Pepper Cocoa Shortbreads from Dorie Greenspan's lovely "Baking: From my Home to Yours," but after several hours pondering black pepper (with chocolate? without chocolate? with lemon instead of chocolate?), I scratched that idea and went with a classic chocolate-cinnamon combination. I think these would be ideal with Ceylon, or "true" cinnamon (see my polemic on cinnamon at the bottom of this post), but I spaced out (I blame the vestiges of migraine) and used cassia. No matter - these are crumbly, intensely chocolaty, and jolted by the shot of spice.
The most important things about shortbread are the butter and the method of mixing them together. While you don't need to bankrupt yourself buying the best butter available, it should definitely taste delicious just by itself. I mix my shortbread by hand only—it lowers the chances of over mixing and dirties nothing more than one bowl and one spoon, and it gives me an arm workout too. Use butter that is softened but still slightly firm—not at all oily—or else you'll lose that sandy texture. Also, don't beat the butter and sugar like you would for, say, chocolate chip cookies, or you'll end up with a cookie that will puff and then, most likely, collapse when cool. Five minutes and a little elbow grease will produce a perfect, light-yet-rich, crumbly-but-melting cookie that you won't be able to keep your hands off. I should know—I ate some for breakfast this morning.
Mexican Chocolate Shortbread Cookies
These cookies are not too sweet—a common occurrence with my desserts, to be honest—so if you like sweeter cookies, you may want to add a few extra tablespoons of sugar. These cookies would be fantastic with a café au lait or an espresso, but they stand alone just fine. An added bonus for those with cookie thieves in the house: cut and bake the ragged ends, reserving the pretty pieces for gift boxes.
1 ½ cups unbleached flour
6 tablespoons cocoa powder
1 teaspoon cinnamon (or cassia, if you prefer)
½ teaspoon salt
1 cup (two sticks) good-quality unsalted butter, mostly softened
⅖ cups confectioners' sugar
1 teaspoon vanilla extract
Mix the flour, cocoa, cinnamon, and salt in a medium bowl and set aside.
Break the butter up with a wooden spoon in a large bowl, then stir briskly to loosen. Add the sugar and beat briefly until well combined, with no lumps. Add the vanilla and beat very briefly, until just combined.
Dump in the flour mixture and carefully stir until just combined—watch out here to avoid flour explosions that dump your carefully measured dry goods onto the floor (ask me how I know this).
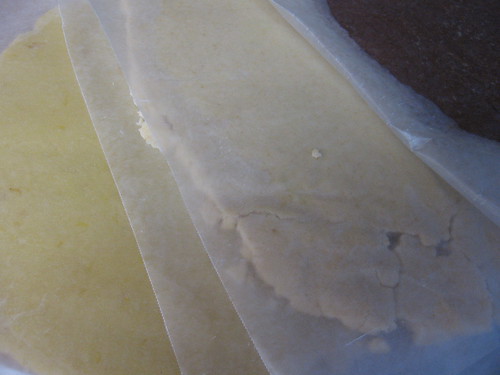
Place a piece of waxed paper on a large board or clean counter. Dump the dough onto the paper, cover with another piece of paper, and quickly roll out the dough about ¼ inch thick (for me, this made a square roughly eight inches by fourteen. Transfer to a baking sheet and refrigerate at least two hours, but the longer the better (cover the entire sheet with plastic wrap if you will chill overnight.
Preheat the oven to 350˚F and place racks in top and bottom third of the oven. Line two baking sheets with parchment or Silpat. Remove the cookies from the oven, peel off the top layer of waxed paper and cut into 1 inch by 3 inch fingers. Using a thin spatula, transfer to the sheets.
Bake 12-14 minutes, swapping sheets midway through the baking time. The cookies will still be a little soft when gently pressed with a finger, but not mushy. Transfer to racks and let cool.
These cookies will keep in a tin for 4 or 5 days at room temperature; alternatively, wrap tightly and freeze for up to two months.
Makes about 3 dozen (plus the ugly bits)
03 December 2010
Not a sabbatical
How life does get away from me sometimes.
I've been offline for days. My meals have been simple, formulaic, and unphotogenic in the early evening darkness: brussels sprouts with brown rice; pasta tossed with tomato sauce and mozzarella; simplest turkey soup with a rich stock from Thanksgiving's carcass.
But the clearest sign that things are not as they are supposed to be? Today is the third day of December, and I have not baked a single cookie. No spritz, no shortbread, no gingerbread, no spiced-treacle, no pumpkin. With a full weekend scheduled—my best friend is in town to visit—I don't know if I'll have an opportunity to rectify this situation before my parents come into town mid-week.
Something had to be done to take the edge off, and I declared that something to be yet another pot of soup. In the winter months I cling to soup like it's the only thing to keep me warm (and with no central heat in our southern California home, it's sometimes true). I miss true winter, with icicles and snowmen and big heavy boots and an endless supply of hand knit mittens, gloves and scarves—but without that available to me, I open my doors to the cold coastal air, put on a sweater and make soup.
I had never eaten split pea soup until a few years ago. Split peas were in the "just throw everything in" vegetable soup from my childhood, but the classic split pea was something reserved for restaurants, where it often looked grey, crusty, and altogether unappetizing.
On a whim one winter day five years ago, I pulled out my computer, some cookbooks, and a plastic tub of green legumes, and a few hours later, I was converted.
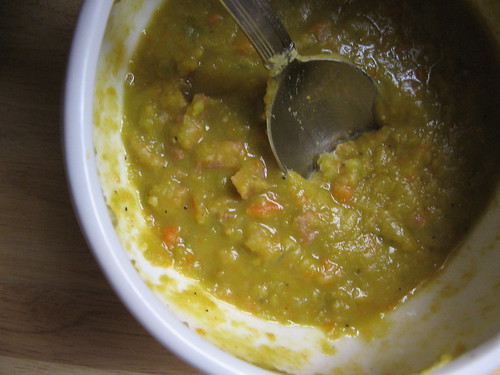
Often split pea soup is puréed and sieved into a smooth, sauce, but I prefer to mash the soup roughly with a potato masher, leaving a chunkier soup with more body. No one is ever going to claim that split pea soup is a particularly attractive—in fact, I hesitate to even post a picture.
Shall I? Oh, what the heck. Here is is, in all its baby food-like glory.
Split Pea Soup
For some extra flavor, feel free to add diced ham, lardons of bacon, or a hambone where noted below; otherwise, a sprinkle of smoked salt adds some depth to the flavor of a vegetarian soup.
2 tablespoons olive oil
1 medium bunch carrots, peeled and diced (about 1 ½ cups)
1 large onion, chopped (about 2 cups)
1 cup ham, chopped, or 4 ounces of bacon, sliced, or a small hambone (optional)
2 cups dried green split peas
2 large sprigs fresh thyme
2 bay leaves
4 cups (or more) mild stock or water, or a mixture of the two
salt and freshly cracked black pepper
Heat a large pot over medium-high heat with the olive oil. Add the carrots and onions and cook about five minutes, stirring occasionally. Add the meat, if using, and stir for a few minutes to distribute.
Add the split peas and herbs and stir well, then add the 4 cups stock and/or water. Season with salt and pepper. Bring to a boil, then reduce the heat to a simmer. Cook, partially covered, until the peas are tender and beginning to fall apart, 1 ½ to 2 hours. Add more stock or water by half-cupfuls if the mixture gets dry.
Mash roughly in the pot with a potato masher or big wooden spoon. The soup may be quite thick—add additional stock or water to thin to your tastes. Adjust seasonings as needed.
Serves 4 as a main course or up to 8 as a starter
Subscribe to:
Posts
(
Atom
)