In some ways, I think that the hardest thing about blogging for a class and on an academic subject is tone. This week, I'm going to try to geek out over now, before I've said anything of real substance. This is, I'm a bit ashamed to admit, the first time I've read Hous of Fame. I knew the basic premise, of course, and have heard about it plenty of times ... but I'd never actually read it before. My marginalia is chockablock with exclamation points, hearts and smilies, and, at one point, a barely-legible "this is crazypants!". Really, my goal in this blog post is to organize these completely un-critical thoughts into some sort of cogent thought about what is happening in this poem, particularly Book 2.
Of course, this is the cognition and identity show, so we all know what I'm going to write about. In particular, I want to focus on lines 555–566:
Til at the laste he to me spak
In mannes vois and sayde, "Awak!"
And be nat agast so, for shame!"
And called me by my name,
And, for I sholde the bet abreyde
Me mette "Awak" to me he seyde
Right in the same vois and stevene
That useth oon I coude nevene;
And with that vois, soth for to seyne,
My minde cam to me ageyne,
For it was goodly seyd to me,
So nas it never wont to be.
So. Let's provide a little context, shall we? Chaucer (the narrator, but considering that the eagle calls him "Geffrey" in line 728, we can probably assume that Chaucer and the narrator are even more closely linked in this poem than perhaps in other dream visions, where the connection between author and narrator can be a bit more blurry) is already asleep long before the lines began; he falls asleep on the tenth of December, when "...as I slept, me mette I was / Within a temple y-mad of glas" (119–20). After a long description of the engravings at the Temple of Venus (which mirror the paintings outside the courtyard in the Romaunt of the Rose—which was originally what I planned to write about this week), an eagle arrives overhead. Then, the narrative is disrupted again for the invocation of the second book. Finally, the eagle snatches poor Geffrey up only a few lines into Book 2, and he speaks the lines quoted above only about 20 lines after the beginning of the first book.
So when the eagle tells him to wake up, does he remain sleeping? When the narrator then dreams the invocation to walk up being spoken into his ear again, is he sleeping within his dream? Is he actually awake? After the speech, spoken by a voice "Right in the same stevene / That useth oon I coulde name," (According to the notes in the Norton, this may refer to Chaucer's wife), he awakens ... into his dream.
Speaking of the line between waking and sleep, I am blurring it far too much at present to be able to write any more coherently on the subject. I do want to develop this idea further; however, a practical application of the dream vision is not a helpful means to those ends. I will post more details in the morning.
Next week, stay tuned for an old favorite: (more) eagles, and dreamers, and Nature—oh, my! After that, there may be cookies.
24 September 2013
16 September 2013
Multivalent Realities in The Book of the Duchess and Romaunt de la Rose
Well, with a title like that, my post is clearly not going to live up to Megg's absolutely amazing post on BDSM and homoeroticism in Roman de la Rose. In fact, that post kind of made me want to drop the notes I'd been writing on the bridge between dreaming and waking to write about medieval smut and double entendre, but ... alas. We do what we know best.*
That being said, it's no secret that I have a lot of interest in emotion and cognition, and the way dreams are represented or used in medieval literature has been a growing part of this interest. In particular, I am interested two major aspects of dreams in Chaucer's literature: first, the way dreams are acting as a sort of medium through which the dreamer comes upon some new source of knowledge, and second, the different forms of reality that emerge for the dreamer (and by extension, the reader or listener) through this medium.
Chaucer's Romaunt of the Rose is a more complicated and yet also very interesting text for these purposes because it is a translation; to truly break any ground in this area would require a much closer familiarity with the French exemplar Roman de la Rose than my time has allowed me to develop of late. However, if in fact there were any noticeable differences in the way Chaucer and Lorris or de Meun deal with cognition and dreaming—well, that would be amazing, but I can't speculate on it just yet. (On the other hand, some of the things that the Romaunt got me started thinking about are even more interesting in some of Chaucer's original poems, so I'm also rooting for it being a formulaic translation when it comes to these issues)
The very beginning of the romance offers us a glimpse into the role of dreams:
"Many men sayn that in sweveninges
There nys but fables and lesynges;
But men may some sweven[es] sen
Whiche hardely that false ne ben,
But afterward ben apparaunt.
...
And whoso saith or weneth it be
A jape, or elles nycete,
To wene that dremes after falle,
Let whoso lyste a fol me calle." (1–5, 11–14)
Additionally, Macrobius and his Somnium Scipionis are again brought up (more on Macrobius later in the semester, I'm sure). Much like in the introduction to The Book of the Duchess, the act of entering upon the dream is both very direct and somewhat muddled. Unlike Duchess, the Narrator isn't preoccupied with his (in)ability to sleep; in addition, he does not enter the dream in the pseudo-waking state of others.
However, within both this dream and the dream in Duchess, there are additional layers of reality within the dream. The walled enclosure of the garden in the dream provides almost a second layer of the dream; as he moves from a serene natural dreamscape to the setting of the romantic drama, he must enter a sort of cloister, guarded by portraits of (horrible) women and a (also female) sort of gatekeeper. (As a note, I am very interested to look at the diction used to describe the women in the portraits and see how it is different from and similar to representations of Fortune in Duchesse.
This idea is completely confused at this point in time, and as a result I am not able to write in very much depth just yet. Keep an eye out for another post later this week that expands upon these ideas and maybe even draws upon Macrobius.
*That last sentence was shamelessly stolen from Megg's lips. Because it was too perfect to go to waste.
09 September 2013
A Lak of Boethius
The "Boethian Ballads"(generally comprised of Fortune, Trouthe, Gentilesse, and Lak of Steadfastnesse—hereafter LoS) are so called because of their subject matter, generally thought to coincide not only with Chaucer's interest in Boethius's Consolation of Philosophy, but with the time during which he was actively translating the work into his Middle English Boece. However, while some of the poems, such as Trouthe, experiment directly with ideas from the Consolation, LoS's Boethian ideas are more circumspect.
In Chaucer's Boece Book II, Prosa 6, 29–38: "O, ye erthliche bestes, considere ye nat over whiche thyng that it semeth that ye hand power? Now yif thou saye a mows among othere mysz that challanged to hymself-ward ryght and and power over all othere mysz, how gret scorn woldestow han of it! (Glosa. So fareth it by men [that the wikkid men have power over the wikkid men; that is to seye], the body hath power over the body.)" Chaucer uses this rhetoric to great effect in Trouthe, in which he uses a pun on Sir Philip de la Vache to compare the typical foibles of humans with the more "natural" activities of animals. Further, the refrain in this poem, "And trouthe thee shal delivere, it is no drede" focuses on a very typical Boethian view.
In contrast, John Scattergood argues in his article "Social and Political Issues in Chaucer: An Approach to Lak of Stedfastnesse," Chaucer is using the complaint poem genre to address specific political issues occurring at the time of its composition (in the case of LoS, he argues that he is referring to the political upheavals of c. 1387). While there are certainly some aspects of Boethianism in LoS, the refrain "That al is lost for lak of stedfastnesse" seems more focused on individual actions than the mutability of life. In this case, Chaucer's direct address to (purportedly) King Richard II is necessarily reducing the important of the Consolation of this poem—while the undertones of the poem remain focused on the fickleness of life, an invocation to or support of action on the part of the king does not allow for the same sort of inevitability which appears in his other poems.
Why, though, does any of this matter? While the influences of Boethius on Chaucer (and many other medieval writers) are important to consider, it is equally important to not become hamstrung by such associations. It may be useful to think of Chaucer's poems in groupings such as the "Boethian Ballads", but rethinking the different ways in which Chaucer is using Boethian rhetoric creates new readings of his individual poems, as well.
02 September 2013
Truth and fiction in the Dream Vision
My next few posts will likely be a sort of smorgasbord of partly-formed ideas I have about The Book of the Duchess. There are many things about this poem that captivate me, and I am fairly certain that my larger project later in the semester will involve this poem, but I'm not yet certain which aspect will be my main focus.
While dreams and visions are by no means rare in earlier writing, the "dream vision" is a real preoccupation of both Middle English poets and contemporary scholars. Several times in The Book of the Duchess, the narrator makes mention of the Somnium Scipionis and Macrobius's treatise on dream interpretation based on the Somnium. In addition to Macrobius, Gregory the Great's Homilies on Ezekiel and the Somniale Danielis are all common medieval sources of dream theory. However, these medieval theorists don't seem to spend much time analyzing the paradox of the dream vision, nor do they focus on the liminal space between waking and dreaming. As we discussed in class, is Alcyone awake when Morpheus comes in, in the guise of her dead husband, and tells her to wake up? Is the narrator awake or asleep when he is "waked / With smale foules a grete hepe / That had affrayed me out of my slepe / Thurgh noyse and swetness of hir songe;" (294–97). Contemporary writing rarely focuses on how dreams begin and end—and our focus on any dream, whether our own or a literary dream, is usually the plot and development rather than the entrée and exit—yet the dream visions of The Book of the Duchess and many (most? all?) other Middle English poetry revolve around the act of waking into the dream.
As I've recently been writing about affect and realism in Anglo-Saxon dreams and visions, I find this preoccuptation curious. It seems almost that in order to enter this new world of the dream, the dreamer has to pass through a liminal space between the waking world and the dreaming world through the physical acts of falling asleep and waking up. There is an authenticity created by the act of waking which allows the dreamer (or in a more practical sense, the reader) to accept the truth of the dream or vision.
What, then, might this tell us about Chaucer's role as narrator in The Book of the Duchess? Chaucer has to walk a narrow path here. In writing a poem about the death of a (exceedingly powerful) patron's beloved wife, the dual truth and fiction of the dream vision offers him a venue in which he can write a tribute to her and still engage with greater issues of grief, love, narrativity, and authenticity.
That trewely I that made this blog...
A full fourteen months after my last post, I sorely doubt that anyone is following my poor, sad, lonely blog any longer. A lot of things have happened in the last year—I moved across the country to start graduate school; I finished my first year of graduate school and passed my exams; I became simultaneously sorely in need of cooking therapy, and pathetically short of time in which to do it. In addition, almost every aspect of my move away from Southern California was positive, but the loss of always-availabile fresh local produce has been a difficult one.
Enter the fall semester 2013. Among other things, I am taking a class on Chaucer, and one of the class assignments is to maintain an ongoing blog through which we can explore ideas which may not get adequate airtime in class, and also to see what others in the class may be thinking about and working on. This seemed like an ideal time to try to breathe some life into this blog again, in time for birthday cakes, Hallowe'en cookies, and Thanksgiving side-dishes. As a result, I can't promise that there won't be recipes scattered in here for the remainder of the semester, but the main focus of this space for the next four months will be discussing some of Chaucer's many poems.
Coming soon: The Book of the Duchess. Dreams, liminality, gender, and adaptation—it's like this thing was written for me.
06 July 2012
Salad makes everything better
... I hope.
Are any of you left, dear readers? My reader is full of hundreds of posts from blogs that I love, but a recent gruelling schedule has meant that I hardly have time to think about food, much less cook it, much less read or write about it. I've managed to find time to scribble down recipes and sometimes even take photographs—my busy schedule has actually allowed me to refine many dishes because I've been eating the same thing meal after meal—but when it comes to writing, I just get stuck.
I even thought about putting my blog out of its misery, but the fact is that when I do get a chance to write here, it's a little corner of my life that is quietly joyful. I didn't want to turn my back on it despite the chaos of the last year (and the different, continuing chaos that I have to look forward to in the next year). Then I polled a group of friends and they voted in a landslide for me to keep it and do what I can. Wise words from wise people ... so here I am.
The current weight on my shoulders (sometimes literally) is a move that is happening in less than a month. I don't particularly like moving. We are a relatively simple pair, but the few things that we like to have are all heavy. Books? Boxes of them. Music? Too much to mention - and not packed onto our hard drives. Cast Iron? I bless the luck that allowed me to accumulate a large collection of Le Creuset by the age of 24, but I don't look forward to lugging it around.
Due to the planning, the yard sale, the various too-big-to-fit-into-the-moving-truck-and/or-new-apartment items that are being sold on craigslist or ebay, and the books being sorted into "take with us"/"sell to a local shop"/"store at Mike's step mom's house" categories, our home is starting to make me twitch. I've managed to keep the kitchen relatively ordered thus far, and tonight I'm going to inventory the freezer, fridge, and pantry to figure out what we need to eat (and what kinds of meals to make it into) before we pack up.
I can tell you now that one thing that means is lots of legumes. Since I prefer dry beans to canned, I have a fairly well-stocked pantry, and since the weather is quickly warming up, I foresee a lot of salads in our future. After all, when it's hot outside and you're too busy to do much cooking, salad makes everything better.

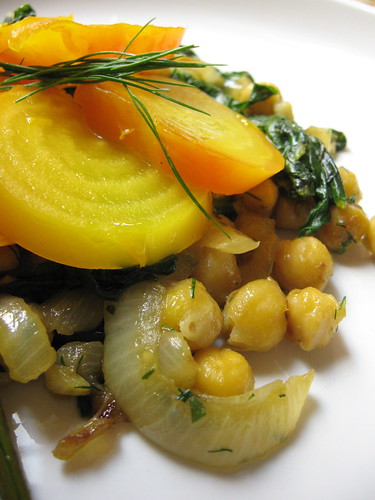
Herbed Chick Pea Salad with Beets
Vaguely inspired by a description of a recipe in Yotam Ottolenghi's Plenty via a friend (sadly, this cookbook hasn't made its way to my house yet).
Of course, roasting beets does involve heating up the oven, and beets aren't at their best right now (I made this several weeks ago before the spring-to-summer transition was complete), but this salad would be equally delicious with sautéed zucchini, super-ripe tomatoes, or even (as I'm planning this weekend) garlicky cubes of eggplant.
As an added note, this salad is equally good warm or cold, and would make a great accompaniment to cold chicken or something similar at a picnic.
1 bunch of beets, tops included (I used golden beets)
3 tablespoons olive oil, plus more as needed
½ medium onion, thinly sliced
4 cloves garlic, minced
Approximately 3 cups cooked chick peas (cooked from about 1 cup dry, or two cans, rinsed and drained)
1 teaspoon good salt, plus more if needed
black pepper
Several large sprigs, or a handful, fresh dill, chopped
1 teaspoon dried oregano (optional)
black pepper
red wine vinegar as needed
To roast the beetroots, remove and reserve the tops, wash the roots, and place them on a piece of aluminum foil. Drizzle with 1 tablespoon of the olive oil and sprinkle with a little bit of salt, then wrap them in the foil and roast at 400ºF until tender, usually 20 minutes to an hour depending on their size (note that the temperature doesn't matter too much if you're already using your oven for something else). When tender, let the beets cool, then remove and discard the skins; set aside.
Heat the remaining 2 tablespoons oil in a large heavy skillet on medium-high heat. Add the onions and sauté until translucent and beginning to soften, but not browned, 3-4 minutes. Meanwhile, wash the beet tops well and shake some of the water off; tear or chop into 2-3" pieces and set aside.
Add the garlic to the onions and stir just until fragrant, then add the beet greens, a handful or so at a time, stirring until wilted. Add the salt and the drained chick peas and cook, stirring occasionally, until the beans are heated through and the greens are tender, around 3-5 minutes. Add the dill and oregano, plus black pepper to taste; adjust seasonings as needed. Remove from the heat.
Meanwhile, either slice or chop up the beets (chopping them is best if you will serve it cold or as a side dish, but sliced has a nice presentation for a knife-and-fork meal). If you chop the beets, add them to the chick pea mixture and stir to combine.
Plate the salad; if you sliced the beets, arrange them atop the beans. Drizzle with some additional olive oil and a bit of red wine vinegar, and a bit of additional coarse salt if desired. Serve warm or cold.
Serves 4-6 as a side dish, 3 as a main dish
Are any of you left, dear readers? My reader is full of hundreds of posts from blogs that I love, but a recent gruelling schedule has meant that I hardly have time to think about food, much less cook it, much less read or write about it. I've managed to find time to scribble down recipes and sometimes even take photographs—my busy schedule has actually allowed me to refine many dishes because I've been eating the same thing meal after meal—but when it comes to writing, I just get stuck.
I even thought about putting my blog out of its misery, but the fact is that when I do get a chance to write here, it's a little corner of my life that is quietly joyful. I didn't want to turn my back on it despite the chaos of the last year (and the different, continuing chaos that I have to look forward to in the next year). Then I polled a group of friends and they voted in a landslide for me to keep it and do what I can. Wise words from wise people ... so here I am.
The current weight on my shoulders (sometimes literally) is a move that is happening in less than a month. I don't particularly like moving. We are a relatively simple pair, but the few things that we like to have are all heavy. Books? Boxes of them. Music? Too much to mention - and not packed onto our hard drives. Cast Iron? I bless the luck that allowed me to accumulate a large collection of Le Creuset by the age of 24, but I don't look forward to lugging it around.
Due to the planning, the yard sale, the various too-big-to-fit-into-the-moving-truck-and/or-new-apartment items that are being sold on craigslist or ebay, and the books being sorted into "take with us"/"sell to a local shop"/"store at Mike's step mom's house" categories, our home is starting to make me twitch. I've managed to keep the kitchen relatively ordered thus far, and tonight I'm going to inventory the freezer, fridge, and pantry to figure out what we need to eat (and what kinds of meals to make it into) before we pack up.
I can tell you now that one thing that means is lots of legumes. Since I prefer dry beans to canned, I have a fairly well-stocked pantry, and since the weather is quickly warming up, I foresee a lot of salads in our future. After all, when it's hot outside and you're too busy to do much cooking, salad makes everything better.
Herbed Chick Pea Salad with Beets
Vaguely inspired by a description of a recipe in Yotam Ottolenghi's Plenty via a friend (sadly, this cookbook hasn't made its way to my house yet).
Of course, roasting beets does involve heating up the oven, and beets aren't at their best right now (I made this several weeks ago before the spring-to-summer transition was complete), but this salad would be equally delicious with sautéed zucchini, super-ripe tomatoes, or even (as I'm planning this weekend) garlicky cubes of eggplant.
As an added note, this salad is equally good warm or cold, and would make a great accompaniment to cold chicken or something similar at a picnic.
1 bunch of beets, tops included (I used golden beets)
3 tablespoons olive oil, plus more as needed
½ medium onion, thinly sliced
4 cloves garlic, minced
Approximately 3 cups cooked chick peas (cooked from about 1 cup dry, or two cans, rinsed and drained)
1 teaspoon good salt, plus more if needed
black pepper
Several large sprigs, or a handful, fresh dill, chopped
1 teaspoon dried oregano (optional)
black pepper
red wine vinegar as needed
To roast the beetroots, remove and reserve the tops, wash the roots, and place them on a piece of aluminum foil. Drizzle with 1 tablespoon of the olive oil and sprinkle with a little bit of salt, then wrap them in the foil and roast at 400ºF until tender, usually 20 minutes to an hour depending on their size (note that the temperature doesn't matter too much if you're already using your oven for something else). When tender, let the beets cool, then remove and discard the skins; set aside.
Heat the remaining 2 tablespoons oil in a large heavy skillet on medium-high heat. Add the onions and sauté until translucent and beginning to soften, but not browned, 3-4 minutes. Meanwhile, wash the beet tops well and shake some of the water off; tear or chop into 2-3" pieces and set aside.
Add the garlic to the onions and stir just until fragrant, then add the beet greens, a handful or so at a time, stirring until wilted. Add the salt and the drained chick peas and cook, stirring occasionally, until the beans are heated through and the greens are tender, around 3-5 minutes. Add the dill and oregano, plus black pepper to taste; adjust seasonings as needed. Remove from the heat.
Meanwhile, either slice or chop up the beets (chopping them is best if you will serve it cold or as a side dish, but sliced has a nice presentation for a knife-and-fork meal). If you chop the beets, add them to the chick pea mixture and stir to combine.
Plate the salad; if you sliced the beets, arrange them atop the beans. Drizzle with some additional olive oil and a bit of red wine vinegar, and a bit of additional coarse salt if desired. Serve warm or cold.
Serves 4-6 as a side dish, 3 as a main dish
24 May 2012
Long-forgotten
I've sat down to write this post at least two dozen times in the past couple weeks. Somehow, no matter what I do nothing comes out on the page. I could have moved on to any number of other recipes, but my funny little brain insisted on sharing this one first.
I guess it's appropriate. Mike had been requesting this cake for months—since I made Maple Mousse Cakes, in fact, and I see that that was over a year ago now. Cake scraps, of course, are one of the best parts of cake making, and Mike is well aware of that fact. It doesn't take very long after a carrot cake has cooled to find him lingering at the periphery of the kitchen offering to help me frost it. The mousse cakes, cut out of a very thin layer of sheet cake, provided all sorts of tasty scraps, and Mike declared the walnut cake base perfect just as it was.
I, however, am an unapologetic fiddler. I see recipes and can't help but tweak them; I make notes in the margins of magazines and cookbooks, lists of dates marking the different changes I tried; after a few bites of any new meal I'm already thinking about what I can do next time to take it that little bit closer to perfection.
The trouble was ... I couldn't think of what to do with that walnut cake. I thought about a syrup or glaze like so many simple, rustic cakes, but nothing seemed to be a good fit. Mike said it would be delicious as is, but that seemed a little bit too rustic. I set the recipe away in the back of my brain and started worrying about other things, like what to do with those 6 pounds of marionberries in my freezer or what kind of sausage we should make next (Oh, yes, we've started making sausage from scratch now—more on that later).
Finally I had a breakthrough. Unsurprisingly, much of the credit goes to Deb over at Smitten Kitchen. An online friend mentioned something about Hazelnut Brown Butter Cake, and when I clicked the link everything fell into place. How could I have forgotten chocolate?
Ganache it was.
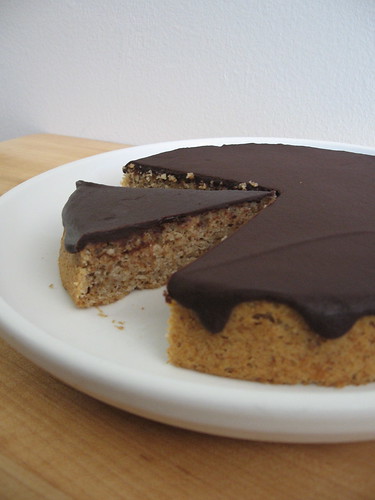
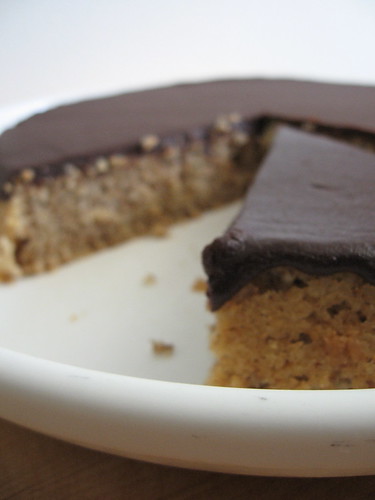
That very evening, I got to work. I made a few changes to my original recipe: omitting the bourbon, browning the butter (because when is that a bad idea?), and beating the egg whites to further lighten the crumb. Mike still says it would be fine without the ganache, but with it, it's nearly perfect. The cake is moist and tender, with a robust walnut flavor that is set off by the brown butter. The ganache is velvety and rich—and just enough to keep from overwhelming someone (like me) who is frankly on the fence about walnuts most of the time.
Of course, that doesn't mean that I wasn't already making plans for the next one.
Walnut Cake with Bittersweet Ganache
Note that this recipe makes enough batter for one ten inch layer (or a very thin layer in a 13"x18" rimmed sheet); one eight inch and one six inch pan can be used instead if you prefer.
For the cake:
6 ounces butter (1½ sticks)
4 ounces walnuts (1 heaping cup)
5 ounces unbleached flour (about a scant 1¼ cups)
½ teaspoon salt
1½ teaspoon baking powder
5 ounces white sugar (about ¾ cup)
2 ounces brown sugar (about ¼ cup packed)
3 large egg whites
¾ cup milk
For the ganache:
4 ounces bittersweet chocolate, chopped
¼ cup heavy cream
Preheat the oven to 350ºF with a rack set in the center of the oven. Butter one ten inch round pan (or one 8" and one 6" pan). Line the bottom of the pan with parchment, butter the parchment, and set the pan(s) aside.
Brown the butter in a medium saucepan over medium heat, stirring occasionally until the milk solids are evenly brown and the butter is very nutty smelling, 5-8 minutes. Set aside to cool.
Finely grind the walnuts in a food processor, being careful not to over-process. Add the other dry ingredients (including the sugars) and pulse to combine.
Whip the egg whites to soft peaks. Transfer the dry ingredients to a large bowl with the milk. Stir just to combine, then add the brown butter and stir until well mixed. Carefully fold in the egg whites. Spread the batter evenly in the pan(s). Bake until a tester inserted in the center comes out clean, 50-55 minutes (35-40 with smaller pans).
Cool in the pan for 15-20 minutes, then run a knife around the edges to loosen and invert onto a rack. Remove the pan and the parchment, then set right side up to cool completely.
Meanwhile, make the ganache. Heat the cream to a boil on the stove or in the microwave; pour over the chocolate and let sit for a minute or two. Stir until very smooth. (Note: if it ends up being too thick with this method, you can transfer the mixture back to the stove on very low heat or microwave in five second bursts, until smooth and loose enough to pour).
Arrange the cake(s) on a plate and pour the ganache over. Use an offset spatula to spread the ganache in an even layer over the top, letting it drip, more or less as to your tastes, over the edges of the cake. Let the cake sit at room temperature to firm up.
Note that if you will be eating your cake in more than the next day, the ganache needs refrigeration.
Serves about 12
I guess it's appropriate. Mike had been requesting this cake for months—since I made Maple Mousse Cakes, in fact, and I see that that was over a year ago now. Cake scraps, of course, are one of the best parts of cake making, and Mike is well aware of that fact. It doesn't take very long after a carrot cake has cooled to find him lingering at the periphery of the kitchen offering to help me frost it. The mousse cakes, cut out of a very thin layer of sheet cake, provided all sorts of tasty scraps, and Mike declared the walnut cake base perfect just as it was.
I, however, am an unapologetic fiddler. I see recipes and can't help but tweak them; I make notes in the margins of magazines and cookbooks, lists of dates marking the different changes I tried; after a few bites of any new meal I'm already thinking about what I can do next time to take it that little bit closer to perfection.
The trouble was ... I couldn't think of what to do with that walnut cake. I thought about a syrup or glaze like so many simple, rustic cakes, but nothing seemed to be a good fit. Mike said it would be delicious as is, but that seemed a little bit too rustic. I set the recipe away in the back of my brain and started worrying about other things, like what to do with those 6 pounds of marionberries in my freezer or what kind of sausage we should make next (Oh, yes, we've started making sausage from scratch now—more on that later).
Finally I had a breakthrough. Unsurprisingly, much of the credit goes to Deb over at Smitten Kitchen. An online friend mentioned something about Hazelnut Brown Butter Cake, and when I clicked the link everything fell into place. How could I have forgotten chocolate?
Ganache it was.
That very evening, I got to work. I made a few changes to my original recipe: omitting the bourbon, browning the butter (because when is that a bad idea?), and beating the egg whites to further lighten the crumb. Mike still says it would be fine without the ganache, but with it, it's nearly perfect. The cake is moist and tender, with a robust walnut flavor that is set off by the brown butter. The ganache is velvety and rich—and just enough to keep from overwhelming someone (like me) who is frankly on the fence about walnuts most of the time.
Of course, that doesn't mean that I wasn't already making plans for the next one.
Walnut Cake with Bittersweet Ganache
Note that this recipe makes enough batter for one ten inch layer (or a very thin layer in a 13"x18" rimmed sheet); one eight inch and one six inch pan can be used instead if you prefer.
For the cake:
6 ounces butter (1½ sticks)
4 ounces walnuts (1 heaping cup)
5 ounces unbleached flour (about a scant 1¼ cups)
½ teaspoon salt
1½ teaspoon baking powder
5 ounces white sugar (about ¾ cup)
2 ounces brown sugar (about ¼ cup packed)
3 large egg whites
¾ cup milk
For the ganache:
4 ounces bittersweet chocolate, chopped
¼ cup heavy cream
Preheat the oven to 350ºF with a rack set in the center of the oven. Butter one ten inch round pan (or one 8" and one 6" pan). Line the bottom of the pan with parchment, butter the parchment, and set the pan(s) aside.
Brown the butter in a medium saucepan over medium heat, stirring occasionally until the milk solids are evenly brown and the butter is very nutty smelling, 5-8 minutes. Set aside to cool.
Finely grind the walnuts in a food processor, being careful not to over-process. Add the other dry ingredients (including the sugars) and pulse to combine.
Whip the egg whites to soft peaks. Transfer the dry ingredients to a large bowl with the milk. Stir just to combine, then add the brown butter and stir until well mixed. Carefully fold in the egg whites. Spread the batter evenly in the pan(s). Bake until a tester inserted in the center comes out clean, 50-55 minutes (35-40 with smaller pans).
Cool in the pan for 15-20 minutes, then run a knife around the edges to loosen and invert onto a rack. Remove the pan and the parchment, then set right side up to cool completely.
Meanwhile, make the ganache. Heat the cream to a boil on the stove or in the microwave; pour over the chocolate and let sit for a minute or two. Stir until very smooth. (Note: if it ends up being too thick with this method, you can transfer the mixture back to the stove on very low heat or microwave in five second bursts, until smooth and loose enough to pour).
Arrange the cake(s) on a plate and pour the ganache over. Use an offset spatula to spread the ganache in an even layer over the top, letting it drip, more or less as to your tastes, over the edges of the cake. Let the cake sit at room temperature to firm up.
Note that if you will be eating your cake in more than the next day, the ganache needs refrigeration.
Serves about 12
29 April 2012
Turn around the winter blues
We may be well into spring here in southern California (I've been eating asparagus for a month now), but since it's still snowing in parts of the country, I don't mind writing about kale in April.
Kale is one of my go-to winter vegetables. It's delicious braised or sautéed, in soups or gratin, and I'm shocked to see that I have not put a single kale recipe on this site.
I suppose I shouldn't be surprised. It's not the most photogenic of foods, and for me, at least, kale tends to find itself sautéed, perhaps seasoned with garlic and herbs or soy sauce and sesame, and relegated to the oft-forgotten category of side vegetable.
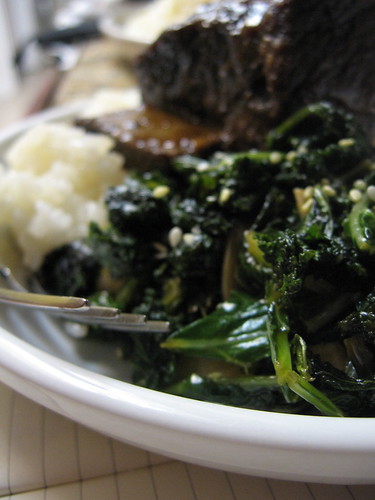
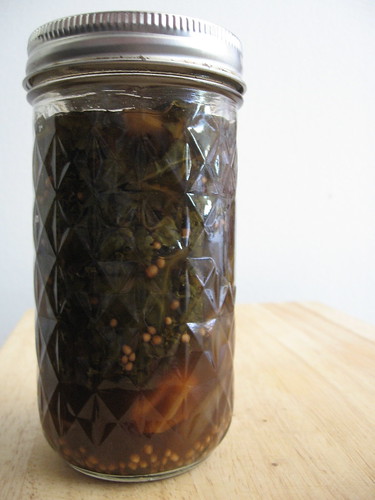
And this is no exception, but it is, at least, a little bit more unusual. Pickled kale.
You heard me right. When I was flipping through Liana's fantastic cookbook late last fall, I saw those words and nearly ran to buy new canning jars that minute. Kale is available nearly year-round here, but I made these in mid-fall, when it seemed to be overgrowing all the farmers' fields. Since appearances aren't so important for a humble pickle, late season kale would also be ideal; just snatch it up before the weather gets too warm, because that's when it starts to be bitter.
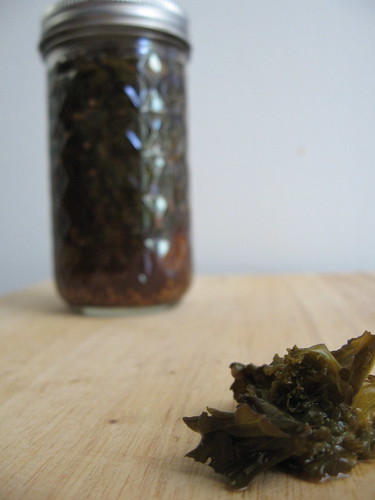
Now, if you're anything like Mike, my sister, or anybody else that I told about this recipe, you're probably wondering what the heck you might do with pickled kale. I wasn't sure myself when I made it. Liana suggests serving it stirred into Jamaican rice and peas (still on my list) or on a sandwich. My first thought was to pair the zing and little bit of spice with pastrami.
It was a revelation. A smear of spicy dijon mustard, several slices of pastrami and Swiss cheese, and a generous layer of pickled kale slapped between two slices of rye bread, and we ate almost an entire jar (half-pint, in our defense) of pickles with one meal. Since then I've also experimented with a meatless version—grilled Swiss on rye with mustard & kale pickles—and it's just as good.
Spicy Pickled Kale
Adapted from Canning for a New Generation
Note: Liana's recipe called for 7 cups cider vinegar and 1 cup balsamic, but I was running out of cider vinegar (and using a bit less kale) and so changed the amounts.
two big or 3 smaller bunches of curly kale (I had 3.5 pounds total)
3 tablespoons yellow mustard seeds
1 tablespoon whole allspice
1 tablespoon green cardamom pods, lightly crushed
3 cups apple cider vinegar
3 ½ cups white vinegar
½ cup balsamic vinegar
1 cup water
2 tablespoons kosher salt
2 tablespoons sugar
3 large or six small habañero chiles
6 cloves garlic
1 small onion, cut into 12 wedges
Wash the greens, then pull the leaves off of the hard ribs. Discard the ribs and stems or keep for another use. Chop the kale into medium chunks then shake off most of the water (the cookbook recommends putting them in an old pillowcase and shaking it outside. I just used the salad spinner in batches).
Combine the mustard seeds, allspice, and cardamom in a small bowl; set aside.
To prep for canning, heat water in a large canning pot; wash the jars and keep them in the pot, and put the lids in a small heatproof pot or bowl.
Combine the vinegars and water with the salt or sugar and bring just to a boil; cover, remove from heat, and set aside.
Ladle boiling water from the canning pot into the bowl with the lids. Remove the jars from the canning pot (returning the water to the pot) and carefully place them on a towel.
Halve the chiles, if you have large ones. Place one chile or chile half, one garlic clove, and a wedge or two of onion in each jar. Pack the greens into the jars (tightly, as they will shrink when processing). Distribute the spices into the jars as well. Carefully ladle the hot vinegar mixture into the jars, using a chopstick as needed to remove air bubbles, and leaving ½ inch headspace.
Put the lids on the jars and screw rings on just finger-tight. Return the jars to the canning pot and process at a full boil for 15 minutes. Remove the jars to the folded towel and let rest overnight. (Check them after an hour or so to make sure they have sealed; if not, transfer to the fridge.)
Makes about 6 pints
Kale is one of my go-to winter vegetables. It's delicious braised or sautéed, in soups or gratin, and I'm shocked to see that I have not put a single kale recipe on this site.
I suppose I shouldn't be surprised. It's not the most photogenic of foods, and for me, at least, kale tends to find itself sautéed, perhaps seasoned with garlic and herbs or soy sauce and sesame, and relegated to the oft-forgotten category of side vegetable.
And this is no exception, but it is, at least, a little bit more unusual. Pickled kale.
You heard me right. When I was flipping through Liana's fantastic cookbook late last fall, I saw those words and nearly ran to buy new canning jars that minute. Kale is available nearly year-round here, but I made these in mid-fall, when it seemed to be overgrowing all the farmers' fields. Since appearances aren't so important for a humble pickle, late season kale would also be ideal; just snatch it up before the weather gets too warm, because that's when it starts to be bitter.
Now, if you're anything like Mike, my sister, or anybody else that I told about this recipe, you're probably wondering what the heck you might do with pickled kale. I wasn't sure myself when I made it. Liana suggests serving it stirred into Jamaican rice and peas (still on my list) or on a sandwich. My first thought was to pair the zing and little bit of spice with pastrami.
It was a revelation. A smear of spicy dijon mustard, several slices of pastrami and Swiss cheese, and a generous layer of pickled kale slapped between two slices of rye bread, and we ate almost an entire jar (half-pint, in our defense) of pickles with one meal. Since then I've also experimented with a meatless version—grilled Swiss on rye with mustard & kale pickles—and it's just as good.
Spicy Pickled Kale
Adapted from Canning for a New Generation
Note: Liana's recipe called for 7 cups cider vinegar and 1 cup balsamic, but I was running out of cider vinegar (and using a bit less kale) and so changed the amounts.
two big or 3 smaller bunches of curly kale (I had 3.5 pounds total)
3 tablespoons yellow mustard seeds
1 tablespoon whole allspice
1 tablespoon green cardamom pods, lightly crushed
3 cups apple cider vinegar
3 ½ cups white vinegar
½ cup balsamic vinegar
1 cup water
2 tablespoons kosher salt
2 tablespoons sugar
3 large or six small habañero chiles
6 cloves garlic
1 small onion, cut into 12 wedges
Wash the greens, then pull the leaves off of the hard ribs. Discard the ribs and stems or keep for another use. Chop the kale into medium chunks then shake off most of the water (the cookbook recommends putting them in an old pillowcase and shaking it outside. I just used the salad spinner in batches).
Combine the mustard seeds, allspice, and cardamom in a small bowl; set aside.
To prep for canning, heat water in a large canning pot; wash the jars and keep them in the pot, and put the lids in a small heatproof pot or bowl.
Combine the vinegars and water with the salt or sugar and bring just to a boil; cover, remove from heat, and set aside.
Ladle boiling water from the canning pot into the bowl with the lids. Remove the jars from the canning pot (returning the water to the pot) and carefully place them on a towel.
Halve the chiles, if you have large ones. Place one chile or chile half, one garlic clove, and a wedge or two of onion in each jar. Pack the greens into the jars (tightly, as they will shrink when processing). Distribute the spices into the jars as well. Carefully ladle the hot vinegar mixture into the jars, using a chopstick as needed to remove air bubbles, and leaving ½ inch headspace.
Put the lids on the jars and screw rings on just finger-tight. Return the jars to the canning pot and process at a full boil for 15 minutes. Remove the jars to the folded towel and let rest overnight. (Check them after an hour or so to make sure they have sealed; if not, transfer to the fridge.)
Makes about 6 pints
22 April 2012
A farewell and a soup recipe
I've got a whole list of recipes to post, but frankly, I haven't been much in the mood.
We lost somebody—somebody that I haven't written about much, if at all, but who had wormed his way into every part of my life.

This is Magnus. We adopted him, along with his sister Greta, just over six years ago. He was a giant of a cat: 17 pounds of solid muscle, built like a mini mountain lion. After surviving 3 surgeries for an aggressive but benign tumor in his leg, he got hit with a battle he couldn't beat: lung cancer. Thankfully, it was fast—he started having trouble breathing (we thought it was his normal springtime allergies) on a Friday, and we said goodbye on the following Tuesday.
As a cat who couldn't get enough playtime and acted like a kitten every single day until that Friday, I can only assume that had he a choice, he would have chosen ten great years without the frustration of aging. Not that it makes it any easier for those of us who are left.

Magnus took after his mama when it came to food, too. While I was a little bit fanatical about feeding him well (yes, I am one of those pet parents), his tastes were quite broad. Nothing made him happier than a piece of pineapple. He once crept up behind Mike and stole a piece of smoked gouda—he speared it on one claw and ran away on three legs before devouring it. He would come running when he heard me open a yoghurt container, knowing that he got to lick the plastic seal before I threw it away. In perhaps my personal favorite example of his devilry, he once caused a diversion in the kitchen—jumping onto a counter and throwing a bag of bread on the ground—so that he could steal a plate of leftover barbecue when Mike ran into the kitchen.
He may have been bad, but he was also the best.

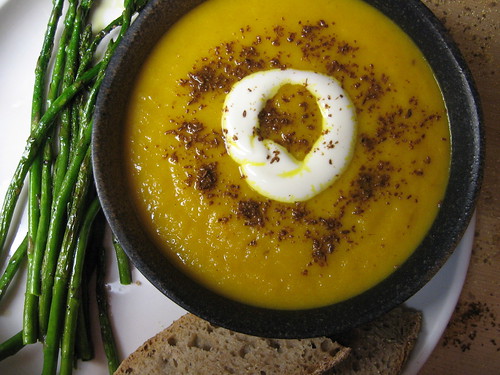
That being said, I have been cooking. I have another iteration of my walnut cake, I have pickled kale and daikon (separately, not together), I have lemon pie and caramelized! white! chocolate! pudding! But today, I have something simple, comforting, and warm. Something to eat when spring vegetables are arriving but evenings are still cool; something to serve in a big mug and to eat while wrapped up in a wool blanket. I'm talking about spiced carrot soup.

Carrot soup is always good, and it's a fine way to make use of sad, starchy winter carrots. However, this soup really shines with the sweetest, small spring carrots you can find. With good, sweet carrots, you don't even need to use stock in this soup; I just used water and added a crushed garlic clove and bay leaf to the vegetables while they were cooking.
Spiced Carrot Soup
Adapted from a Bon Appétit recipe for "Moroccan Carrot Soup" (which bears no resemblance to anything I ever ate in Morocco, for the record).
2 teaspoons cumin seeds
2 tablespoons butter or olive oil
½ large yellow onion, chopped
1 pound (usually one bunch) small-medium sweet spring carrots
1 clove garlic, peeled and lightly crushed (if using water)
1 bay leaf (if using water)
1/8 teaspoon ground allspice
pinch smoked paprika (optional)
2½ cups water or mild vegetable broth
1 tablespoon honey
2 teaspoons fresh lemon juice, plus more if needed
salt to taste
a few dollops plain yoghurt, preferably whole-milk
Set a dry heavy skillet over medium-high heat. When hot, add the cumin seeds and stir/shake until fragrant and deep brown, 2-3 minutes. Transfer to a mortar and crush into a coarse powder; set aside.
Heat the butter or oil in a medium pot. Add the onions and cook until translucent and softened but not browned, 5-7 minutes. Meanwhile, wash the carrots and chop them into a rough dice (there's no need to peel them if they are sweet young carrots; if they are older or woody, you may wish to do so). Add the carrots, garlic & bay leaf (if using), allspice, paprika, and about ½ teaspoon of the cumin and stir to combine.
Add the water or stock and bring to a boil, then lower the heat to a simmer and mostly cover. Simmer until the carrots are very tender, about 20 minutes.
Purée in batches in a blender (letting a cool a bit for your safety), or—the much easier option, in my opinion—take the pot off the heat and use an immersion blender to purée until the mixture is smooth. Stir in the honey, lemon juice, and some salt; taste and adjust seasoning as desired. With sweet carrots you may prefer a bit more lemon juice.
Return the soup to a bare simmer. Serve in bowls or mugs with a dollop of yoghurt and a generous sprinkle of spiced cumin, preferably with some warm crusty bread alongside.
Serves 4 (maybe 5?) as a side, 3 as a main dish
We lost somebody—somebody that I haven't written about much, if at all, but who had wormed his way into every part of my life.
This is Magnus. We adopted him, along with his sister Greta, just over six years ago. He was a giant of a cat: 17 pounds of solid muscle, built like a mini mountain lion. After surviving 3 surgeries for an aggressive but benign tumor in his leg, he got hit with a battle he couldn't beat: lung cancer. Thankfully, it was fast—he started having trouble breathing (we thought it was his normal springtime allergies) on a Friday, and we said goodbye on the following Tuesday.
As a cat who couldn't get enough playtime and acted like a kitten every single day until that Friday, I can only assume that had he a choice, he would have chosen ten great years without the frustration of aging. Not that it makes it any easier for those of us who are left.
Magnus took after his mama when it came to food, too. While I was a little bit fanatical about feeding him well (yes, I am one of those pet parents), his tastes were quite broad. Nothing made him happier than a piece of pineapple. He once crept up behind Mike and stole a piece of smoked gouda—he speared it on one claw and ran away on three legs before devouring it. He would come running when he heard me open a yoghurt container, knowing that he got to lick the plastic seal before I threw it away. In perhaps my personal favorite example of his devilry, he once caused a diversion in the kitchen—jumping onto a counter and throwing a bag of bread on the ground—so that he could steal a plate of leftover barbecue when Mike ran into the kitchen.
He may have been bad, but he was also the best.
That being said, I have been cooking. I have another iteration of my walnut cake, I have pickled kale and daikon (separately, not together), I have lemon pie and caramelized! white! chocolate! pudding! But today, I have something simple, comforting, and warm. Something to eat when spring vegetables are arriving but evenings are still cool; something to serve in a big mug and to eat while wrapped up in a wool blanket. I'm talking about spiced carrot soup.
Carrot soup is always good, and it's a fine way to make use of sad, starchy winter carrots. However, this soup really shines with the sweetest, small spring carrots you can find. With good, sweet carrots, you don't even need to use stock in this soup; I just used water and added a crushed garlic clove and bay leaf to the vegetables while they were cooking.
Spiced Carrot Soup
Adapted from a Bon Appétit recipe for "Moroccan Carrot Soup" (which bears no resemblance to anything I ever ate in Morocco, for the record).
2 teaspoons cumin seeds
2 tablespoons butter or olive oil
½ large yellow onion, chopped
1 pound (usually one bunch) small-medium sweet spring carrots
1 clove garlic, peeled and lightly crushed (if using water)
1 bay leaf (if using water)
1/8 teaspoon ground allspice
pinch smoked paprika (optional)
2½ cups water or mild vegetable broth
1 tablespoon honey
2 teaspoons fresh lemon juice, plus more if needed
salt to taste
a few dollops plain yoghurt, preferably whole-milk
Set a dry heavy skillet over medium-high heat. When hot, add the cumin seeds and stir/shake until fragrant and deep brown, 2-3 minutes. Transfer to a mortar and crush into a coarse powder; set aside.
Heat the butter or oil in a medium pot. Add the onions and cook until translucent and softened but not browned, 5-7 minutes. Meanwhile, wash the carrots and chop them into a rough dice (there's no need to peel them if they are sweet young carrots; if they are older or woody, you may wish to do so). Add the carrots, garlic & bay leaf (if using), allspice, paprika, and about ½ teaspoon of the cumin and stir to combine.
Add the water or stock and bring to a boil, then lower the heat to a simmer and mostly cover. Simmer until the carrots are very tender, about 20 minutes.
Purée in batches in a blender (letting a cool a bit for your safety), or—the much easier option, in my opinion—take the pot off the heat and use an immersion blender to purée until the mixture is smooth. Stir in the honey, lemon juice, and some salt; taste and adjust seasoning as desired. With sweet carrots you may prefer a bit more lemon juice.
Return the soup to a bare simmer. Serve in bowls or mugs with a dollop of yoghurt and a generous sprinkle of spiced cumin, preferably with some warm crusty bread alongside.
Serves 4 (maybe 5?) as a side, 3 as a main dish
08 April 2012
Teasing
It helps, when planning a trip with limited internet access, to finish and publish a blog post before you go. Oh well. I had a fabulous trip, part of which included hanging out with my college best friend—on our old college campus no less. The nostalgia-fueled meals, coffees, and ice cream weren't bad, either.
Happy Easter! I don't have anything Easter themed ready for the day, but here's a sunny picture to tide you for a few days.

And another taste (sorry, couldn't resist) of what's to come:
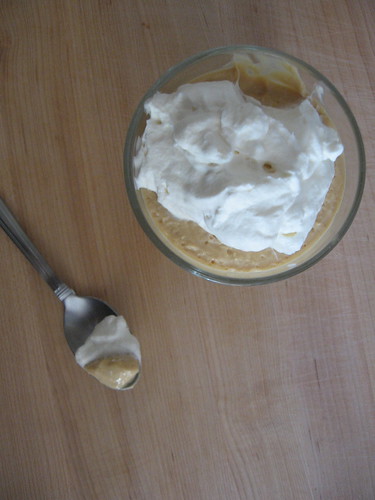
That's Meyer lemon macarons filled with Meyer lemon curd up top, and Caramelized White Chocolate Pudding below. My dessert making has been a little bit haphazard of late, but the stuff I've been making, when I get around to it, has been pretty fantastic. In honor of Easter and the tail end of Meyer Lemon season, I will be making a Shaker Lemon Pie this evening, but for you, I'm adding to the endless piles of chocolate that appear on this holiday.
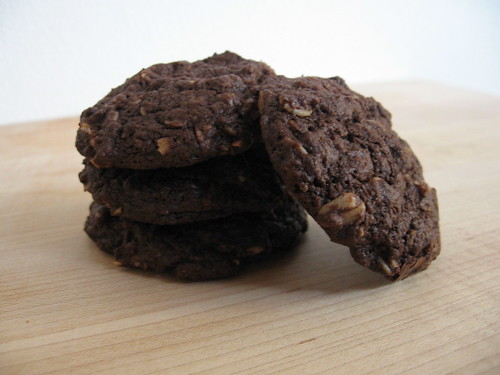
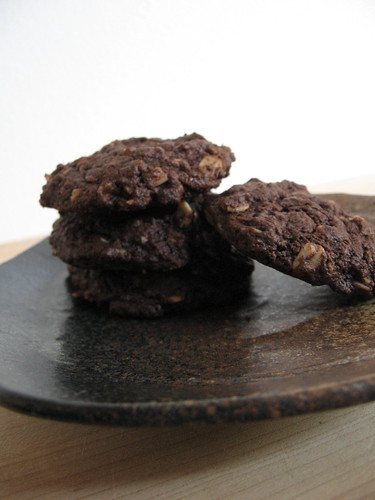
These cookies, however, are much better than a boring hollow chocolate bunny. Kind of like a brownie in cookie form, these have chocolate three ways, brown sugar and oats for a perfectly chewy texture, and just a touch of cinnamon. Also like brownies, they're a bit fragile, especially when warm, so I prefer to make smaller cookies.
I've noticed a real dearth of cookie recipes on the blog, which is weird—cookies are some of my favorite desserts, and I have all sorts of classics that haven't gotten up here yet. I've been making these cookies for several years, and finally they're here, thanks to a promise to provide the recipe to several online friends.
Oatmeal Brownie Cookies
Heavily adapted from a recipe in Baking: From My Home to Yours. This is a cookie that, in my opinion, requires a cold glass of milk, but they'd also probably be great with ice cream or even a cup of coffee. I'd also imagine that they would be pretty good with some chopped nuts, but as I'm not usually partial to nuts in cookies, I've never tried it.
2.5 ounces unsweetened cocoa powder, natural or Dutched (about ¾ cup)
7 ounces unbleached flour (about 1¼ cup) (Note: last time I used 3 ounces whole wheat pastry flour and 4 unbleached flour, and it added a nice body to the cookies)
1 teaspoon baking soda
¼ teaspoon baking powder
1 teaspoon salt
½ teaspoon cinnamon
12 ounces bittersweet chocolate, chopped and divided
9 ounces dark brown sugar (about 1¼ cup packed)
8 ounces (2 sticks) unsalted butter, in pieces (cold is fine)
2 large eggs
1 teaspoon vanilla
6 ounces rolled oats (about 1½ cups)
Place the oven racks in top & bottom thirds of the oven and preheat to 350ºF. Line two baking sheets with parchment or silicone; set aside.
Sift the cocoa powder into a large bowl. Add the flour, soda, baking powder, salt, and cinnamon and whisk to combine; set aside.
Set a medium heatproof bowl over a pan of simmering water. Add the sugar and 8 ounces of the chocolate (reserving the rest) and stir regularly. When the chocolate is about half melted, add the butter and continue to stir until the entire mixture is melted—it will still be grainy. Don't overheat, or the butter will separate.
Remove the pan from the heat and whisk in the eggs one at a time; the mixture will become very shiny. Beat in the vanilla, then scrape the mixture into the dry ingredients. Stir until mostly combined, then add the remaining chocolate chunks and the oats and stir just until there are no more streaks of flour.
Drop the dough by level tablespoonfuls onto the baking sheets; a dozen to a sheet should give them space to spread out. Bake 12-14 minutes, rotating top to bottom and front to back halfway through the cooking time. Transfer to a rack to cool. If the cookies are very fragile (especially if you made bigger ones), leave on the pan to cool for a minute or two before transferring.
Repeat with remaining dough, cooling the sheets between batches. You can chill the dough before baking, but the cookies will spread a little bit less and take longer to cook.
These will keep, well wrapped, for several days at room temperature and for a couple months (if you can stand it) in the freezer.
Makes about 5 dozen cookies
Happy Easter! I don't have anything Easter themed ready for the day, but here's a sunny picture to tide you for a few days.
And another taste (sorry, couldn't resist) of what's to come:
That's Meyer lemon macarons filled with Meyer lemon curd up top, and Caramelized White Chocolate Pudding below. My dessert making has been a little bit haphazard of late, but the stuff I've been making, when I get around to it, has been pretty fantastic. In honor of Easter and the tail end of Meyer Lemon season, I will be making a Shaker Lemon Pie this evening, but for you, I'm adding to the endless piles of chocolate that appear on this holiday.
These cookies, however, are much better than a boring hollow chocolate bunny. Kind of like a brownie in cookie form, these have chocolate three ways, brown sugar and oats for a perfectly chewy texture, and just a touch of cinnamon. Also like brownies, they're a bit fragile, especially when warm, so I prefer to make smaller cookies.
I've noticed a real dearth of cookie recipes on the blog, which is weird—cookies are some of my favorite desserts, and I have all sorts of classics that haven't gotten up here yet. I've been making these cookies for several years, and finally they're here, thanks to a promise to provide the recipe to several online friends.
Oatmeal Brownie Cookies
Heavily adapted from a recipe in Baking: From My Home to Yours. This is a cookie that, in my opinion, requires a cold glass of milk, but they'd also probably be great with ice cream or even a cup of coffee. I'd also imagine that they would be pretty good with some chopped nuts, but as I'm not usually partial to nuts in cookies, I've never tried it.
2.5 ounces unsweetened cocoa powder, natural or Dutched (about ¾ cup)
7 ounces unbleached flour (about 1¼ cup) (Note: last time I used 3 ounces whole wheat pastry flour and 4 unbleached flour, and it added a nice body to the cookies)
1 teaspoon baking soda
¼ teaspoon baking powder
1 teaspoon salt
½ teaspoon cinnamon
12 ounces bittersweet chocolate, chopped and divided
9 ounces dark brown sugar (about 1¼ cup packed)
8 ounces (2 sticks) unsalted butter, in pieces (cold is fine)
2 large eggs
1 teaspoon vanilla
6 ounces rolled oats (about 1½ cups)
Place the oven racks in top & bottom thirds of the oven and preheat to 350ºF. Line two baking sheets with parchment or silicone; set aside.
Sift the cocoa powder into a large bowl. Add the flour, soda, baking powder, salt, and cinnamon and whisk to combine; set aside.
Set a medium heatproof bowl over a pan of simmering water. Add the sugar and 8 ounces of the chocolate (reserving the rest) and stir regularly. When the chocolate is about half melted, add the butter and continue to stir until the entire mixture is melted—it will still be grainy. Don't overheat, or the butter will separate.
Remove the pan from the heat and whisk in the eggs one at a time; the mixture will become very shiny. Beat in the vanilla, then scrape the mixture into the dry ingredients. Stir until mostly combined, then add the remaining chocolate chunks and the oats and stir just until there are no more streaks of flour.
Drop the dough by level tablespoonfuls onto the baking sheets; a dozen to a sheet should give them space to spread out. Bake 12-14 minutes, rotating top to bottom and front to back halfway through the cooking time. Transfer to a rack to cool. If the cookies are very fragile (especially if you made bigger ones), leave on the pan to cool for a minute or two before transferring.
Repeat with remaining dough, cooling the sheets between batches. You can chill the dough before baking, but the cookies will spread a little bit less and take longer to cook.
These will keep, well wrapped, for several days at room temperature and for a couple months (if you can stand it) in the freezer.
Makes about 5 dozen cookies
03 March 2012
There are always muffins
There's nothing like a bag of lemons in my fridge to keep me in the kitchen. Tart? Check. Cake? Check. Pie? Check. Ice cream? Well, not yet, but it probably won't be long. In the meantime, there are always muffins.
Muffins aren't my favorite quickbread—banana bread will probably always hold that title—but when it comes to quick weekend breakfasts, you can't do much better. With only a few dirty dishes (never mind that one of them is the much-hated muffin pan), even the sleepiest cook can have a batch ready in less than an hour.
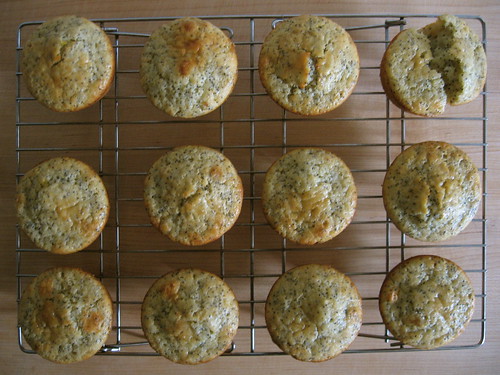
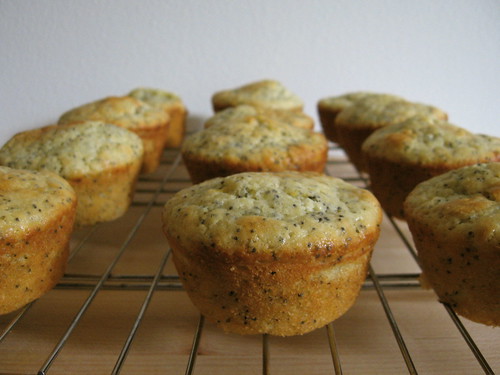
Lemon-poppy seed muffins at bakeries are often aggressively lemony (and daffodil yellow). Clearly, I'm all about lemons, but good grief! Maybe it's because I'm usually making them at 7 am on a Saturday morning, but I prefer my muffins (and the lemon in them) in moderation.
Lemon-Poppy Seed Muffins
If you like a bit more lemon, add ½ teaspoon lemon extract to the wet ingredients before mixing it all together.
4 ounces granulated sugar (½ cup)
zest and juice (about 3 tablespoons) from 1 lemon (I use Meyer)
8 ounces unbleached white flour (2 cups)
1 teaspoon baking powder
½ teaspoon baking soda
½ teaspoon salt
2 tablespoons poppy seeds
1 egg
11 ounces milk, preferably whole (1¼ cups)
3 ounces unsalted butter, melted & cooled (6 tablespoons)
Grease the cups of a muffin pan with butter or line with paper or foil cups; set aside. Preheat the oven to 400ºF.
Measure the sugar into a large bowl. Zest the lemon into the bowl and rub it into the sugar briefly. Add the flour, baking powder, soda, salt, and poppy seeds and mix together with a fork or whisk until combined.
In a medium bowl, lightly whisk the egg. Add the milk and whisk well, then stir in the melted butter. Dump the wet ingredients into the dry and stir just until combined. Scrape the batter into the muffin cups (they will be around three-quarters full).
Bake until a tester in one of the middle muffins comes out clean, about 20-25 minutes. Let cool on a rack for a few minutes before unmolding. Unlike some muffins, lemon ones are usually better once cooled.
Makes about a dozen muffins
Muffins aren't my favorite quickbread—banana bread will probably always hold that title—but when it comes to quick weekend breakfasts, you can't do much better. With only a few dirty dishes (never mind that one of them is the much-hated muffin pan), even the sleepiest cook can have a batch ready in less than an hour.
Lemon-poppy seed muffins at bakeries are often aggressively lemony (and daffodil yellow). Clearly, I'm all about lemons, but good grief! Maybe it's because I'm usually making them at 7 am on a Saturday morning, but I prefer my muffins (and the lemon in them) in moderation.
Lemon-Poppy Seed Muffins
If you like a bit more lemon, add ½ teaspoon lemon extract to the wet ingredients before mixing it all together.
4 ounces granulated sugar (½ cup)
zest and juice (about 3 tablespoons) from 1 lemon (I use Meyer)
8 ounces unbleached white flour (2 cups)
1 teaspoon baking powder
½ teaspoon baking soda
½ teaspoon salt
2 tablespoons poppy seeds
1 egg
11 ounces milk, preferably whole (1¼ cups)
3 ounces unsalted butter, melted & cooled (6 tablespoons)
Grease the cups of a muffin pan with butter or line with paper or foil cups; set aside. Preheat the oven to 400ºF.
Measure the sugar into a large bowl. Zest the lemon into the bowl and rub it into the sugar briefly. Add the flour, baking powder, soda, salt, and poppy seeds and mix together with a fork or whisk until combined.
In a medium bowl, lightly whisk the egg. Add the milk and whisk well, then stir in the melted butter. Dump the wet ingredients into the dry and stir just until combined. Scrape the batter into the muffin cups (they will be around three-quarters full).
Bake until a tester in one of the middle muffins comes out clean, about 20-25 minutes. Let cool on a rack for a few minutes before unmolding. Unlike some muffins, lemon ones are usually better once cooled.
Makes about a dozen muffins
26 February 2012
A long time coming
Back last spring, my sister and her stepdaughter Malia needed to go to Palm Springs ... for a cheerleading competition. Setting aside the fact that I saw more glittery eyeshadow that weekend than in the rest of my life combined, it was a fantastic weekend.
Palm Springs is an odd little place. There are lots of golf courses, of course, and plenty of old people. There is almost always at least one convention going on (some event planner wisely decided to counter the thousands of peppy teens and tweens by scheduling a rodeo during the same weekend). They have an unsurprising glut of restaurants ... and a surprisingly large proportion of those restaurants are really good.
Not that we ate at too many places. With Sherman's Deli—a.k.a. the land of the unholy-good-Reuben—just down the street from our hotel, it was hard to be very adventurous. In fact, one day we ate such a great lunch at the deli that we didn't have room for any of the desserts in the very large bakery display, so we had dessert for dinner. Malia had a cream puff that was nearly the size of her head, Mike had a slice of coconut cream pie, and my sister and I had frozen yoghurt from a little shop down the street.

If you've ever been there, you probably know that the frozen yoghurt craze that has come and gone in the rest of the country two or three times never died in Palm Springs. They are everywhere. Most of them are the self-serve places with an endlessly-changing armory of flavors, and if you know anything about me, you know that I get weak in the knees for good frozen desserts. I bypassed the standard (chocolate and cheesecake) and odder (red velvet cake?) flavors and went straight for the pink grapefruit.
It was perfect. Not too sweet and with a bold citrusy flavor, I could as easily imagine it served in a shot glass as a palate cleanser at a fancy restaurant as from a paper cup at a country fair. I immediately proclaimed that I would recreate it when I got home, but grapefruit season was already past, and within a few months all I was making in my churn were strawberry ice creams and sorbets.
A couple weeks ago, though, I saw fragrant grapefruit at the store and decided to dive in. Winter may not be much to talk about here in L.A., but even when I lived in colder climes winter never stopped me from eating ice cream. After all, anecdata (I can't find any reputable information) says that we Alaskans eat more ice cream per capita than any other state.
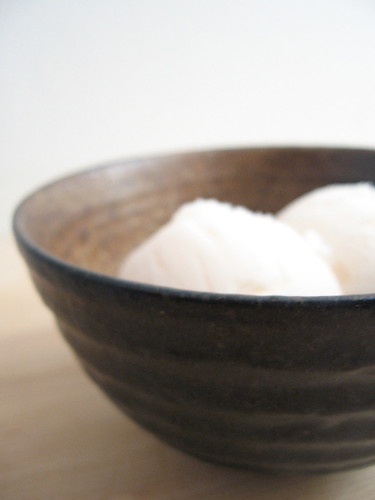
It was worth the wait. The resulting frozen yoghurt is the palest pink (if you used red grapefruit it would probably be a bit darker) and not too tart—the acidity of the grapefruit really comes through.
Pink Grapefruit Frozen Yoghurt
After a little bit of research on Yelp, I discovered that we had gone to Yogurt on Tap, which claims to be the first self-serve frozen yogurt shop in Palm Springs (they also claim that frozen yoghurt is a healthy dessert, so have at it, I guess).
8 ounces granulated sugar (1 cup)
zest of 2 grapefruits
2 cups fresh pink grapefruit juice (from 2-3 grapefruit)
2 cups plain, whole milk yoghurt
Rub the zest into the sugar in a small saucepan (supposedly this distributes the oils for better flavor; I don't know if it really does anything, but I do it anyway). Add one cup of the juice and heat over medium heat until the sugar is dissolved. Mix in the additional juice and pour through a sieve into a large bowl, pressing out as much liquid as possible from the zest. Discard the solids and thoroughly chill the syrup mixture.
Add the yoghurt, stirring until combined. For a perfectly smooth mixture you will want to use a blender or immersion blender, as stirring will probably result in some small chunks of yoghurt that refuse to mix in. I ignored them and they mixed up fine in the churn (and saved me some dishes). Freeze according to your ice cream maker's instructions.
Makes one quart
Palm Springs is an odd little place. There are lots of golf courses, of course, and plenty of old people. There is almost always at least one convention going on (some event planner wisely decided to counter the thousands of peppy teens and tweens by scheduling a rodeo during the same weekend). They have an unsurprising glut of restaurants ... and a surprisingly large proportion of those restaurants are really good.
Not that we ate at too many places. With Sherman's Deli—a.k.a. the land of the unholy-good-Reuben—just down the street from our hotel, it was hard to be very adventurous. In fact, one day we ate such a great lunch at the deli that we didn't have room for any of the desserts in the very large bakery display, so we had dessert for dinner. Malia had a cream puff that was nearly the size of her head, Mike had a slice of coconut cream pie, and my sister and I had frozen yoghurt from a little shop down the street.
If you've ever been there, you probably know that the frozen yoghurt craze that has come and gone in the rest of the country two or three times never died in Palm Springs. They are everywhere. Most of them are the self-serve places with an endlessly-changing armory of flavors, and if you know anything about me, you know that I get weak in the knees for good frozen desserts. I bypassed the standard (chocolate and cheesecake) and odder (red velvet cake?) flavors and went straight for the pink grapefruit.
It was perfect. Not too sweet and with a bold citrusy flavor, I could as easily imagine it served in a shot glass as a palate cleanser at a fancy restaurant as from a paper cup at a country fair. I immediately proclaimed that I would recreate it when I got home, but grapefruit season was already past, and within a few months all I was making in my churn were strawberry ice creams and sorbets.
A couple weeks ago, though, I saw fragrant grapefruit at the store and decided to dive in. Winter may not be much to talk about here in L.A., but even when I lived in colder climes winter never stopped me from eating ice cream. After all, anecdata (I can't find any reputable information) says that we Alaskans eat more ice cream per capita than any other state.
It was worth the wait. The resulting frozen yoghurt is the palest pink (if you used red grapefruit it would probably be a bit darker) and not too tart—the acidity of the grapefruit really comes through.
Pink Grapefruit Frozen Yoghurt
After a little bit of research on Yelp, I discovered that we had gone to Yogurt on Tap, which claims to be the first self-serve frozen yogurt shop in Palm Springs (they also claim that frozen yoghurt is a healthy dessert, so have at it, I guess).
8 ounces granulated sugar (1 cup)
zest of 2 grapefruits
2 cups fresh pink grapefruit juice (from 2-3 grapefruit)
2 cups plain, whole milk yoghurt
Rub the zest into the sugar in a small saucepan (supposedly this distributes the oils for better flavor; I don't know if it really does anything, but I do it anyway). Add one cup of the juice and heat over medium heat until the sugar is dissolved. Mix in the additional juice and pour through a sieve into a large bowl, pressing out as much liquid as possible from the zest. Discard the solids and thoroughly chill the syrup mixture.
Add the yoghurt, stirring until combined. For a perfectly smooth mixture you will want to use a blender or immersion blender, as stirring will probably result in some small chunks of yoghurt that refuse to mix in. I ignored them and they mixed up fine in the churn (and saved me some dishes). Freeze according to your ice cream maker's instructions.
Makes one quart
11 February 2012
Better than medicine
Sometimes I think I should have named this the Blog of Ugly Food. Chilaquiles; Split Pea Soup; Baingan Bharta; and now Lentil-Sausage Stew.
I last made this soup a few weeks ago, but I've spent the past three days huddled on my couch with the mother of all chest colds. While I've been eating little more than soup, it's been basic noodles in broth, and I've been longing for another bowl of this. This soup—really more of a stew, as it's very thick and chunky—is a family tradition from the same origin as these oat cookies. I've changed the recipe over the years: I use white wine instead of red (although my mom usually decreases the amount or eliminates it entirely); I've increased the vegetables and decreased the amount of sausage; and I use stock (preferably homemade) instead of dried bouillon. In the nine years that I didn't eat meat, I left out the sausage (and even occasionally substituted vegetarian substitutes)
This soup quickly became a tradition in chilly Alaskan winters; not only is it warm, comforting, and easy, but it's even better a day or two after you make it.
This soup—really more of a stew, as it's very thick and chunky—is a family tradition from the same origin as these oat cookies. I've changed the recipe over the years: I use white wine instead of red (although my mom usually decreases the amount or eliminates it entirely); I've increased the vegetables and decreased the amount of sausage; and I use stock (preferably homemade) instead of dried bouillon. In the nine years that I didn't eat meat, I left out the sausage (and even occasionally substituted vegetarian substitutes)
This soup quickly became a tradition in chilly Alaskan winters; not only is it warm, comforting, and easy, but it's even better a day or two after you make it.
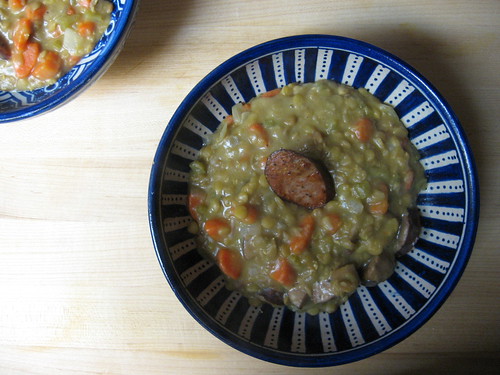 Lentil-Sausage Stew
From a photocopied page of an unknown cookbook. If you like, cut a few slices of sausage on a diagonal, sear just before serving and use them to top the stew. If you leave out the sausage, you may want to add a little bit of smoked salt to finish.
8 ounces dry brown lentils (1¼ cups)
12 ounces smoked kielbasa or Polish sausage, halved and thinly sliced (optional)
3 large carrots, chopped (about 1½ cups)
4 cups vegetable or chicken stock, or a mixture of stock and water, divided
1 bay leaf
4 tablespoons butter
½ large onion, diced (about 1 ½ cups)
3 stalks celery, chopped (1 generous cup)
3 tablespoons flour
½ cup white wine
salt & pepper
Rinse and drain the lentils. Combine with the sliced sausage and carrots in a 4 quart dutch oven or heavy oven-safe pot. Add 3 cups of the stock and the bay leaf and bring to a boil; lower heat, cover and simmer 30 minutes.
Preheat the oven to 375ºF.
Meanwhile, melt the butter in a large skillet over medium-high heat. Cook the onion and celery until tender but not browned, about 10 minutes. Add the flour and cook 1-2 minutes more, stirring constantly. Add the remaining 1 cup stock and the wine; cook, stirring often, until thickened and just brought to a boil, 3-4 minutes more.
Stir the onion mixture into the stew. Season to taste with salt and pepper, then transfer to the oven. Bake, uncovered, at least 40 minutes, stirring from time to time.
Garnish with seared sausage if desired. Serve with sour cream and warm bread.
Serves 6 or more
Lentil-Sausage Stew
From a photocopied page of an unknown cookbook. If you like, cut a few slices of sausage on a diagonal, sear just before serving and use them to top the stew. If you leave out the sausage, you may want to add a little bit of smoked salt to finish.
8 ounces dry brown lentils (1¼ cups)
12 ounces smoked kielbasa or Polish sausage, halved and thinly sliced (optional)
3 large carrots, chopped (about 1½ cups)
4 cups vegetable or chicken stock, or a mixture of stock and water, divided
1 bay leaf
4 tablespoons butter
½ large onion, diced (about 1 ½ cups)
3 stalks celery, chopped (1 generous cup)
3 tablespoons flour
½ cup white wine
salt & pepper
Rinse and drain the lentils. Combine with the sliced sausage and carrots in a 4 quart dutch oven or heavy oven-safe pot. Add 3 cups of the stock and the bay leaf and bring to a boil; lower heat, cover and simmer 30 minutes.
Preheat the oven to 375ºF.
Meanwhile, melt the butter in a large skillet over medium-high heat. Cook the onion and celery until tender but not browned, about 10 minutes. Add the flour and cook 1-2 minutes more, stirring constantly. Add the remaining 1 cup stock and the wine; cook, stirring often, until thickened and just brought to a boil, 3-4 minutes more.
Stir the onion mixture into the stew. Season to taste with salt and pepper, then transfer to the oven. Bake, uncovered, at least 40 minutes, stirring from time to time.
Garnish with seared sausage if desired. Serve with sour cream and warm bread.
Serves 6 or more
I last made this soup a few weeks ago, but I've spent the past three days huddled on my couch with the mother of all chest colds. While I've been eating little more than soup, it's been basic noodles in broth, and I've been longing for another bowl of this.
This soup—really more of a stew, as it's very thick and chunky—is a family tradition from the same origin as these oat cookies. I've changed the recipe over the years: I use white wine instead of red (although my mom usually decreases the amount or eliminates it entirely); I've increased the vegetables and decreased the amount of sausage; and I use stock (preferably homemade) instead of dried bouillon. In the nine years that I didn't eat meat, I left out the sausage (and even occasionally substituted vegetarian substitutes)
This soup quickly became a tradition in chilly Alaskan winters; not only is it warm, comforting, and easy, but it's even better a day or two after you make it.
Lentil-Sausage Stew
From a photocopied page of an unknown cookbook. If you like, cut a few slices of sausage on a diagonal, sear just before serving and use them to top the stew. If you leave out the sausage, you may want to add a little bit of smoked salt to finish.
8 ounces dry brown lentils (1¼ cups)
12 ounces smoked kielbasa or Polish sausage, halved and thinly sliced (optional)
3 large carrots, chopped (about 1½ cups)
4 cups vegetable or chicken stock, or a mixture of stock and water, divided
1 bay leaf
4 tablespoons butter
½ large onion, diced (about 1 ½ cups)
3 stalks celery, chopped (1 generous cup)
3 tablespoons flour
½ cup white wine
salt & pepper
Rinse and drain the lentils. Combine with the sliced sausage and carrots in a 4 quart dutch oven or heavy oven-safe pot. Add 3 cups of the stock and the bay leaf and bring to a boil; lower heat, cover and simmer 30 minutes.
Preheat the oven to 375ºF.
Meanwhile, melt the butter in a large skillet over medium-high heat. Cook the onion and celery until tender but not browned, about 10 minutes. Add the flour and cook 1-2 minutes more, stirring constantly. Add the remaining 1 cup stock and the wine; cook, stirring often, until thickened and just brought to a boil, 3-4 minutes more.
Stir the onion mixture into the stew. Season to taste with salt and pepper, then transfer to the oven. Bake, uncovered, at least 40 minutes, stirring from time to time.
Garnish with seared sausage if desired. Serve with sour cream and warm bread.
Serves 6 or more
28 January 2012
Resolved
Well, hello, blog. It's been a while.
It's been far longer than I intended, but when Major Life Stuff intervened, I thought it would be better to just take a break entirely and wait until I was able to hit the reset button on my life before I started back up.
Frankly, you didn't miss much. I did a bit of holiday baking, but not nearly as much as I usually do. Since the dust settled a few weeks ago, though, I've been getting to know my kitchen again. Spending some leisurely time cooking has reminded me of just how therapeutic it is. Whether I'm clanging pots in frustration or chopping up vegetables while humming off-tune, there's rarely a day that isn't improved by some time cooking.
And when it's winter in Los Angeles and Meyer lemons are four for a dollar, there's really no excuse not to make something delicious.
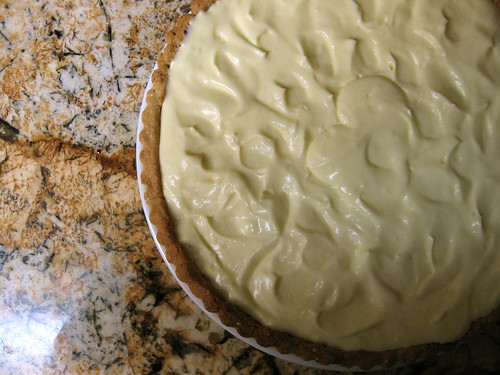 (While L.A. winter may not offer me the cold weather that I love, it does get dark early, which means terrible photos for a few more weeks— my apologies.)
I think I've made it clear that I'm a big fan of Dorie Greenspan. Her cookbooks are absolutely loaded with fantastic recipes, she always has variations (that sometimes sound even better than the original), and I haven't yet found an error. However, I would return every recipe I've ever tried—I might be willing to give up every recipe idea I've ever gotten from her—as long as I could keep the lemon cream recipe.
She credits Pierre Hermé, pâtissier extraordinaire, with the recipe; the man should have a monument in his honor somewhere in central Paris. Lemon cream is similar to lemon curd, but the butter is left out of the original mixture. Sugar, lemon juice, zest, and eggs are whisked in a double boiler until thickened. Once cooled a bit, the mixture is whizzed in a blender or food processor and softened butter is added. The butter emulsified, the curd lightens in color, and the whole shebang becomes light, creamy, and not nearly as rich as something with nearly three sticks of butter should be.
I've probably made this tart a dozen times in the last few years, but a couple weeks ago I decided to change it up. After all, when life gives you lemons ... get the blueberries out of the freezer.
(While L.A. winter may not offer me the cold weather that I love, it does get dark early, which means terrible photos for a few more weeks— my apologies.)
I think I've made it clear that I'm a big fan of Dorie Greenspan. Her cookbooks are absolutely loaded with fantastic recipes, she always has variations (that sometimes sound even better than the original), and I haven't yet found an error. However, I would return every recipe I've ever tried—I might be willing to give up every recipe idea I've ever gotten from her—as long as I could keep the lemon cream recipe.
She credits Pierre Hermé, pâtissier extraordinaire, with the recipe; the man should have a monument in his honor somewhere in central Paris. Lemon cream is similar to lemon curd, but the butter is left out of the original mixture. Sugar, lemon juice, zest, and eggs are whisked in a double boiler until thickened. Once cooled a bit, the mixture is whizzed in a blender or food processor and softened butter is added. The butter emulsified, the curd lightens in color, and the whole shebang becomes light, creamy, and not nearly as rich as something with nearly three sticks of butter should be.
I've probably made this tart a dozen times in the last few years, but a couple weeks ago I decided to change it up. After all, when life gives you lemons ... get the blueberries out of the freezer.
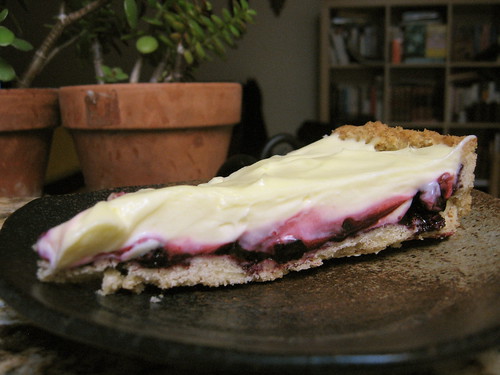 Lemon Cream-Blueberry Tart
Adapted from Dorie Greenspan's Baking: From My Home to Yours
I almost exclusively use Meyer lemons for this now, but I have made it with Eureka lemons before; if your lemons are very tart, you may wish to add a bit more sugar. Also, this is a big recipe, but nothing is difficult. The cream is a little bit fiddly, but well worth the effort, and crust, blueberries, and lemon cream can each be made ahead of time. Ideally, though, the tart should be assembled the same day it will be eaten.
For the crust:
5 ounces unbleached flour (1 ¼ cups)
½ cup finely ground almonds
2 ounces confectioners' sugar (½ cup)
¼ teaspoon salt
4.5 ounces unsalted butter, well chilled and in several pieces (9 tablespoons)
1 large egg yolk
For the lemon cream:
7 ounces granulated sugar (1 cup)
zest of 3 Meyer lemons
4 large eggs
¾ cup Meyer lemon juice (from 4-5 lemons)
10.5 ounces butter, in pieces, at room temperature (21 tablespoons)
For the blueberry filling:
1 ½ cups fresh or frozen blueberries (use the best you can find)
1 tablespoon lemon juice
2 tablespoons sugar
1 tablespoon arrowroot (or cornstarch)
For the crust, whiz the flour, almonds, sugar, and salt together in a food processor. Add the butter and pulse until it is a oatmeal/pea consistency (this won't take long - just a few seconds). Add the yolk in a few drizzles, pulsing briefly each time, then pulse in 10-second increments until the dough just comes together—listen for the funny noise the processor makes, which means it's almost ready.
Press the dough quickly into a 9 or 10 inch tart pan with a removable bottom. Butter the shiny side of a piece of foil and press it over the surface of the tart, then transfer to the freezer for at least half an hour. I usually make it a day ahead. (Note: you really should save a little bit of dough in the fridge in case your crust cracks, but I never bother with this; just fair warning.)
To make the lemon cream, set some water to simmer. Also, have a strainer handy next to your blender or food processor. In a bowl that can be set over (not in) the simmering water, combine the sugar and lemon zest. Rub it together until the sugar is moist and fragrant, then whisk in the eggs and lemon juice. Set the bowl over the water and whisk from time to time until warm, then whisk constantly until the mixture reaches 180ºF (if you're not using a thermometer, which I will admit to plenty of the time, it will be rather thick, like lemon curd, and relatively hot to the touch). Immediately strain the mixture into the blender or food processor, discarding the solids. Let the cream stand until cooled a bit, about 5-10 minutes). Put the lid on the machine and set the speed to high. Add the butter pieces in about 4 additions, stopping to scrape the sides if needed. After all the butter is added, keep the machine on high for three more minutes. Scrape the mixture into a bowl, press some plastic against the surface, and transfer to the fridge to chill completely, 4 hours to overnight.
Meanwhile, make the blueberry sauce. Combine the blueberries and lemon juice in a small saucepan. Stir the sugar and starch together in a little bowl, then mix with the fruit. Heat over medium heat until the mixture is thickened and the blueberries are beginning to break down, about 10 minutes. Chill until you are ready to assemble the tart.
To bake the crust, preheat the oven to 375ºF. Put the tart on a baking sheet, leaving the foil on, and bake 25 minutes. Remove from the oven and carefully remove the foil. Press down any puffy bits, then return the tart to the oven for 8-10 minutes more, until golden brown. The edges of my crusts usually brown long before the rest of it, so you want to keep an eye on it and cover the edges with foil if necessary. Transfer to a rack and let cool completely.
Spread the blueberry mixture across the bottom of the tart, leaving about ¼ inch at the edges. Quickly whisk the cream to loosen it, then scrape it into the crust, spreading it carefully over the blueberries. Spread it up to the edges, swirl it around until it's pretty (or at least somewhat so). You can cut and serve immediately, but for best results, refrigerate for at least 15 minutes to let the lemon cream set a bit.
Serves 8
Lemon Cream-Blueberry Tart
Adapted from Dorie Greenspan's Baking: From My Home to Yours
I almost exclusively use Meyer lemons for this now, but I have made it with Eureka lemons before; if your lemons are very tart, you may wish to add a bit more sugar. Also, this is a big recipe, but nothing is difficult. The cream is a little bit fiddly, but well worth the effort, and crust, blueberries, and lemon cream can each be made ahead of time. Ideally, though, the tart should be assembled the same day it will be eaten.
For the crust:
5 ounces unbleached flour (1 ¼ cups)
½ cup finely ground almonds
2 ounces confectioners' sugar (½ cup)
¼ teaspoon salt
4.5 ounces unsalted butter, well chilled and in several pieces (9 tablespoons)
1 large egg yolk
For the lemon cream:
7 ounces granulated sugar (1 cup)
zest of 3 Meyer lemons
4 large eggs
¾ cup Meyer lemon juice (from 4-5 lemons)
10.5 ounces butter, in pieces, at room temperature (21 tablespoons)
For the blueberry filling:
1 ½ cups fresh or frozen blueberries (use the best you can find)
1 tablespoon lemon juice
2 tablespoons sugar
1 tablespoon arrowroot (or cornstarch)
For the crust, whiz the flour, almonds, sugar, and salt together in a food processor. Add the butter and pulse until it is a oatmeal/pea consistency (this won't take long - just a few seconds). Add the yolk in a few drizzles, pulsing briefly each time, then pulse in 10-second increments until the dough just comes together—listen for the funny noise the processor makes, which means it's almost ready.
Press the dough quickly into a 9 or 10 inch tart pan with a removable bottom. Butter the shiny side of a piece of foil and press it over the surface of the tart, then transfer to the freezer for at least half an hour. I usually make it a day ahead. (Note: you really should save a little bit of dough in the fridge in case your crust cracks, but I never bother with this; just fair warning.)
To make the lemon cream, set some water to simmer. Also, have a strainer handy next to your blender or food processor. In a bowl that can be set over (not in) the simmering water, combine the sugar and lemon zest. Rub it together until the sugar is moist and fragrant, then whisk in the eggs and lemon juice. Set the bowl over the water and whisk from time to time until warm, then whisk constantly until the mixture reaches 180ºF (if you're not using a thermometer, which I will admit to plenty of the time, it will be rather thick, like lemon curd, and relatively hot to the touch). Immediately strain the mixture into the blender or food processor, discarding the solids. Let the cream stand until cooled a bit, about 5-10 minutes). Put the lid on the machine and set the speed to high. Add the butter pieces in about 4 additions, stopping to scrape the sides if needed. After all the butter is added, keep the machine on high for three more minutes. Scrape the mixture into a bowl, press some plastic against the surface, and transfer to the fridge to chill completely, 4 hours to overnight.
Meanwhile, make the blueberry sauce. Combine the blueberries and lemon juice in a small saucepan. Stir the sugar and starch together in a little bowl, then mix with the fruit. Heat over medium heat until the mixture is thickened and the blueberries are beginning to break down, about 10 minutes. Chill until you are ready to assemble the tart.
To bake the crust, preheat the oven to 375ºF. Put the tart on a baking sheet, leaving the foil on, and bake 25 minutes. Remove from the oven and carefully remove the foil. Press down any puffy bits, then return the tart to the oven for 8-10 minutes more, until golden brown. The edges of my crusts usually brown long before the rest of it, so you want to keep an eye on it and cover the edges with foil if necessary. Transfer to a rack and let cool completely.
Spread the blueberry mixture across the bottom of the tart, leaving about ¼ inch at the edges. Quickly whisk the cream to loosen it, then scrape it into the crust, spreading it carefully over the blueberries. Spread it up to the edges, swirl it around until it's pretty (or at least somewhat so). You can cut and serve immediately, but for best results, refrigerate for at least 15 minutes to let the lemon cream set a bit.
Serves 8
(While L.A. winter may not offer me the cold weather that I love, it does get dark early, which means terrible photos for a few more weeks— my apologies.)
I think I've made it clear that I'm a big fan of Dorie Greenspan. Her cookbooks are absolutely loaded with fantastic recipes, she always has variations (that sometimes sound even better than the original), and I haven't yet found an error. However, I would return every recipe I've ever tried—I might be willing to give up every recipe idea I've ever gotten from her—as long as I could keep the lemon cream recipe.
She credits Pierre Hermé, pâtissier extraordinaire, with the recipe; the man should have a monument in his honor somewhere in central Paris. Lemon cream is similar to lemon curd, but the butter is left out of the original mixture. Sugar, lemon juice, zest, and eggs are whisked in a double boiler until thickened. Once cooled a bit, the mixture is whizzed in a blender or food processor and softened butter is added. The butter emulsified, the curd lightens in color, and the whole shebang becomes light, creamy, and not nearly as rich as something with nearly three sticks of butter should be.
I've probably made this tart a dozen times in the last few years, but a couple weeks ago I decided to change it up. After all, when life gives you lemons ... get the blueberries out of the freezer.
Lemon Cream-Blueberry Tart
Adapted from Dorie Greenspan's Baking: From My Home to Yours
I almost exclusively use Meyer lemons for this now, but I have made it with Eureka lemons before; if your lemons are very tart, you may wish to add a bit more sugar. Also, this is a big recipe, but nothing is difficult. The cream is a little bit fiddly, but well worth the effort, and crust, blueberries, and lemon cream can each be made ahead of time. Ideally, though, the tart should be assembled the same day it will be eaten.
For the crust:
5 ounces unbleached flour (1 ¼ cups)
½ cup finely ground almonds
2 ounces confectioners' sugar (½ cup)
¼ teaspoon salt
4.5 ounces unsalted butter, well chilled and in several pieces (9 tablespoons)
1 large egg yolk
For the lemon cream:
7 ounces granulated sugar (1 cup)
zest of 3 Meyer lemons
4 large eggs
¾ cup Meyer lemon juice (from 4-5 lemons)
10.5 ounces butter, in pieces, at room temperature (21 tablespoons)
For the blueberry filling:
1 ½ cups fresh or frozen blueberries (use the best you can find)
1 tablespoon lemon juice
2 tablespoons sugar
1 tablespoon arrowroot (or cornstarch)
For the crust, whiz the flour, almonds, sugar, and salt together in a food processor. Add the butter and pulse until it is a oatmeal/pea consistency (this won't take long - just a few seconds). Add the yolk in a few drizzles, pulsing briefly each time, then pulse in 10-second increments until the dough just comes together—listen for the funny noise the processor makes, which means it's almost ready.
Press the dough quickly into a 9 or 10 inch tart pan with a removable bottom. Butter the shiny side of a piece of foil and press it over the surface of the tart, then transfer to the freezer for at least half an hour. I usually make it a day ahead. (Note: you really should save a little bit of dough in the fridge in case your crust cracks, but I never bother with this; just fair warning.)
To make the lemon cream, set some water to simmer. Also, have a strainer handy next to your blender or food processor. In a bowl that can be set over (not in) the simmering water, combine the sugar and lemon zest. Rub it together until the sugar is moist and fragrant, then whisk in the eggs and lemon juice. Set the bowl over the water and whisk from time to time until warm, then whisk constantly until the mixture reaches 180ºF (if you're not using a thermometer, which I will admit to plenty of the time, it will be rather thick, like lemon curd, and relatively hot to the touch). Immediately strain the mixture into the blender or food processor, discarding the solids. Let the cream stand until cooled a bit, about 5-10 minutes). Put the lid on the machine and set the speed to high. Add the butter pieces in about 4 additions, stopping to scrape the sides if needed. After all the butter is added, keep the machine on high for three more minutes. Scrape the mixture into a bowl, press some plastic against the surface, and transfer to the fridge to chill completely, 4 hours to overnight.
Meanwhile, make the blueberry sauce. Combine the blueberries and lemon juice in a small saucepan. Stir the sugar and starch together in a little bowl, then mix with the fruit. Heat over medium heat until the mixture is thickened and the blueberries are beginning to break down, about 10 minutes. Chill until you are ready to assemble the tart.
To bake the crust, preheat the oven to 375ºF. Put the tart on a baking sheet, leaving the foil on, and bake 25 minutes. Remove from the oven and carefully remove the foil. Press down any puffy bits, then return the tart to the oven for 8-10 minutes more, until golden brown. The edges of my crusts usually brown long before the rest of it, so you want to keep an eye on it and cover the edges with foil if necessary. Transfer to a rack and let cool completely.
Spread the blueberry mixture across the bottom of the tart, leaving about ¼ inch at the edges. Quickly whisk the cream to loosen it, then scrape it into the crust, spreading it carefully over the blueberries. Spread it up to the edges, swirl it around until it's pretty (or at least somewhat so). You can cut and serve immediately, but for best results, refrigerate for at least 15 minutes to let the lemon cream set a bit.
Serves 8
17 November 2011
The perfect pudding
Tell me, why did it take me a month to put my pudding craving to rest?

To be honest, I think I just made it worse, but still. Pudding is so simple to make—as long as you're patient enough to keep it from curdling, it takes little more than pantry ingredients and time—but for some reason, I eat the vast majority of my custards frozen or baked in a tart crust.
After weeks of complaining about the lack of pudding in my life, last weekend the desire to procrastinate on some unrelated work got me into the kitchen. Thank you, procrastination! After reading through several cookbooks and blogs, discarding the overly fussy methods, and washing enough dishes to be able to see the bottom of the sink (oops), I was ready to get started.
"Pudding" can be a confusing term depending on who you're talking to. There are steamed puddings (often called "English puddings), which I have never eaten and rarely seen, and so won't talk about here. There are bread puddings, which are the happiest death bread could hope for: like french bread in many ways, a custard of some sort is mixed into stale chunks of bread (and often other stuff, my favorite being spiced apples), and the whole shebang is baked until creamy, fluffy, and will-you-marry-me delicious. Then there are the things that most people in the U.S. think of when they hear the term.
Well, frankly, most people probably think of either a cardboard box or a little plastic cup, but bear with me. In Europe, they are most often baked in a water bath (these are your pots de crème, or cup custards), and thickened with nothing but egg yolks. Alternatively, you can add some starch and cook it on the stovetop, and they are even quicker and almost as good (my dad would say better).
My life is, sadly, without custard cups and very short on oven-proof pudding-sized ramekins, so I decided to make a stovetop pudding. I was thinking about a chocolate pudding—how could I go wrong—but then as I saw a recipe for vanilla pudding in my trusty Dorie Greenspan cookbook, I had a brainwave. Caramel. The only sweet that I crave as often as I do custard. If it makes the most divine ice cream, why not make a pudding?

As I got to work, I quickly dismantled Dorie's method. Food processors may make the silkiest pudding, but I wouldn't know, because pouring several cups of scalding milk into a running food processor isn't an exciting thought for me. I can say that without food processor (I did use it to unclump the cornstarch and mix it with the eggs) or sieve, I had perfectly smooth, lump-free pudding.
The vanilla pudding recipe that I adapted has little puddles of chocolate ganache at the bottom, and that probably would be fantastic with the caramel, too. I could also see serving this dressed up with a poached pear or down with some spice cookies, but it was heavenly by it self, and a dollop of whipped cream was more than enough to keep us happy.

Salted Caramel Pudding
Adapted from Dorie Greenspan's Split-Level Pudding in Baking: From My Home to Yours
For a fantastic how-to on caramel, go to—who else?—David Lebovitz.
2.5 ounces sugar (about 5 tablespoons)
2¼ cups whole milk
scant 1 ounce cornstarch (about 3 tablespoons)
½ teaspoon salt, preferably sea salt or kosher salt
3 large egg yolks (reserve whites for another use)
1 ounce butter (2 tablespoons), at room temperature and cut into a few chunks
1 teaspoon vanilla extract
Have six small (4 ounce) or three larger (8 ounce) ramekins or cups at hand.
Put the sugar in a medium heavy bottomed saucepan and set the heat to medium-high. Watch the sugar carefully, and when it begins to melt, use a spatula or wooden spoon to very gently stir from time to time, allowing the unmelted sugar to melt and keeping any hot spots from burning the sugar. When the sugar is mostly melted, swirl the pan from time to time, cooking until the sugar is a deep coppery amber color but not burnt (trust me, you can tell when sugar burns!).
When the sugar first starts heating, you should have ample time to get your other ingredients together. Measure the milk into a measuring cup or bowl and set near the sugar so that you have it handy. If you'd like to use a food processor, put the cornstarch and salt in the basin and pulse a few times—leave the lid on for a few seconds to let the dust settle before transferring to a plate or piece of waxed paper. Add the egg yolks and process for a minute, until lightened a bit. Alternatively, sift the cornstarch into a small bowl; if your cornstarch is lumpy, you may want to sift it twice. Then beat the egg yolks thoroughly in a large bowl; set aside.
Returning to the caramel: as soon as it's reached that amber color, begin stirring and carefully but quickly pour the milk in—it will bubble and steam furiously, so keep your face away and cover your arm with a towel if desired. The caramel will seize into candy immediately, but keep stirring and it will melt in a few minutes. Let heat until the sugar is completely dissolved and the mixture is nearly boiling, about 5 minutes.
Meanwhile, if your eggs are in the food processor, give them another quick pulse and then add the cornstarch mixture and pulse to combine, then transfer to a large bowl. If you're not using a processor, whisk the cornstarch mixture into the eggs. While whisking, slowly pour about a quarter of the hot milk into the egg mixture to temper the eggs. Transfer the mixture back to the pot and whisk constantly until the mixture has thickened and is just barely beginning to bubble, about 5-7 minutes (if you let the milk mixture come to a boil, it will take less time).
If you are worried about lumps, set a sieve over a medium bowl and pour the pudding through. Otherwise, pour the pudding into the reserved cups. If you like skin, stretch plastic wrap over the cups; if you don't, press it against the pudding. Chill until cooled, at least one hour. Serve with whipped cream or ganache (or both). These keep in the fridge for several days (if, for some reason, you don't eat them).
Serves 6 Note: I will try to check this post carefully, but if there's anything wonky in it, I apologize—Blogger is being anything but cooperative right now.
To be honest, I think I just made it worse, but still. Pudding is so simple to make—as long as you're patient enough to keep it from curdling, it takes little more than pantry ingredients and time—but for some reason, I eat the vast majority of my custards frozen or baked in a tart crust.
After weeks of complaining about the lack of pudding in my life, last weekend the desire to procrastinate on some unrelated work got me into the kitchen. Thank you, procrastination! After reading through several cookbooks and blogs, discarding the overly fussy methods, and washing enough dishes to be able to see the bottom of the sink (oops), I was ready to get started.
"Pudding" can be a confusing term depending on who you're talking to. There are steamed puddings (often called "English puddings), which I have never eaten and rarely seen, and so won't talk about here. There are bread puddings, which are the happiest death bread could hope for: like french bread in many ways, a custard of some sort is mixed into stale chunks of bread (and often other stuff, my favorite being spiced apples), and the whole shebang is baked until creamy, fluffy, and will-you-marry-me delicious. Then there are the things that most people in the U.S. think of when they hear the term.
Well, frankly, most people probably think of either a cardboard box or a little plastic cup, but bear with me. In Europe, they are most often baked in a water bath (these are your pots de crème, or cup custards), and thickened with nothing but egg yolks. Alternatively, you can add some starch and cook it on the stovetop, and they are even quicker and almost as good (my dad would say better).
My life is, sadly, without custard cups and very short on oven-proof pudding-sized ramekins, so I decided to make a stovetop pudding. I was thinking about a chocolate pudding—how could I go wrong—but then as I saw a recipe for vanilla pudding in my trusty Dorie Greenspan cookbook, I had a brainwave. Caramel. The only sweet that I crave as often as I do custard. If it makes the most divine ice cream, why not make a pudding?
As I got to work, I quickly dismantled Dorie's method. Food processors may make the silkiest pudding, but I wouldn't know, because pouring several cups of scalding milk into a running food processor isn't an exciting thought for me. I can say that without food processor (I did use it to unclump the cornstarch and mix it with the eggs) or sieve, I had perfectly smooth, lump-free pudding.
The vanilla pudding recipe that I adapted has little puddles of chocolate ganache at the bottom, and that probably would be fantastic with the caramel, too. I could also see serving this dressed up with a poached pear or down with some spice cookies, but it was heavenly by it self, and a dollop of whipped cream was more than enough to keep us happy.
Salted Caramel Pudding
Adapted from Dorie Greenspan's Split-Level Pudding in Baking: From My Home to Yours
For a fantastic how-to on caramel, go to—who else?—David Lebovitz.
2.5 ounces sugar (about 5 tablespoons)
2¼ cups whole milk
scant 1 ounce cornstarch (about 3 tablespoons)
½ teaspoon salt, preferably sea salt or kosher salt
3 large egg yolks (reserve whites for another use)
1 ounce butter (2 tablespoons), at room temperature and cut into a few chunks
1 teaspoon vanilla extract
Have six small (4 ounce) or three larger (8 ounce) ramekins or cups at hand.
Put the sugar in a medium heavy bottomed saucepan and set the heat to medium-high. Watch the sugar carefully, and when it begins to melt, use a spatula or wooden spoon to very gently stir from time to time, allowing the unmelted sugar to melt and keeping any hot spots from burning the sugar. When the sugar is mostly melted, swirl the pan from time to time, cooking until the sugar is a deep coppery amber color but not burnt (trust me, you can tell when sugar burns!).
When the sugar first starts heating, you should have ample time to get your other ingredients together. Measure the milk into a measuring cup or bowl and set near the sugar so that you have it handy. If you'd like to use a food processor, put the cornstarch and salt in the basin and pulse a few times—leave the lid on for a few seconds to let the dust settle before transferring to a plate or piece of waxed paper. Add the egg yolks and process for a minute, until lightened a bit. Alternatively, sift the cornstarch into a small bowl; if your cornstarch is lumpy, you may want to sift it twice. Then beat the egg yolks thoroughly in a large bowl; set aside.
Returning to the caramel: as soon as it's reached that amber color, begin stirring and carefully but quickly pour the milk in—it will bubble and steam furiously, so keep your face away and cover your arm with a towel if desired. The caramel will seize into candy immediately, but keep stirring and it will melt in a few minutes. Let heat until the sugar is completely dissolved and the mixture is nearly boiling, about 5 minutes.
Meanwhile, if your eggs are in the food processor, give them another quick pulse and then add the cornstarch mixture and pulse to combine, then transfer to a large bowl. If you're not using a processor, whisk the cornstarch mixture into the eggs. While whisking, slowly pour about a quarter of the hot milk into the egg mixture to temper the eggs. Transfer the mixture back to the pot and whisk constantly until the mixture has thickened and is just barely beginning to bubble, about 5-7 minutes (if you let the milk mixture come to a boil, it will take less time).
If you are worried about lumps, set a sieve over a medium bowl and pour the pudding through. Otherwise, pour the pudding into the reserved cups. If you like skin, stretch plastic wrap over the cups; if you don't, press it against the pudding. Chill until cooled, at least one hour. Serve with whipped cream or ganache (or both). These keep in the fridge for several days (if, for some reason, you don't eat them).
Serves 6 Note: I will try to check this post carefully, but if there's anything wonky in it, I apologize—Blogger is being anything but cooperative right now.
24 October 2011
Breakfast of champions
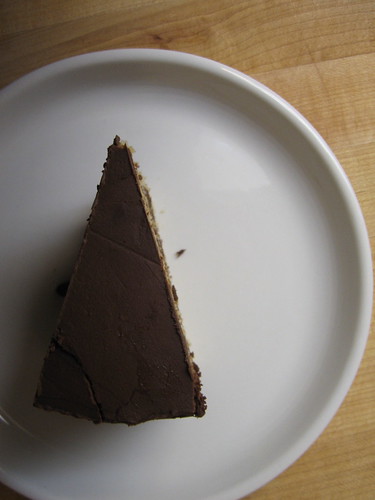 This is the time of year when all I want to make is dessert. Apple cake; banana bread; pear tart. I've had a dangerous obsession with pudding lately, and cold weather makes me develop an illogical affection for ice cream. Kale is beginning to show up again, and I made my first batch of squash soup this weekend, but I don't think I will get truly excited about fall vegetables until I find my first early Brussels sprout.
 Luckily for me, my birthday was last week, so a cake was in order. I don't eat a lot of cake in the summer, as most of my fruit goes into tarts and pies, so I wanted to do something new. I was originally planning on making a rum cake for my birthday—I've been toying for years with the idea of recreating a cake from a bakery up near Mike's hometown, and I was spurred into action when I read that the place had changed hands and gone down in quality since the last time we went.
That rum cake—which, you will notice, is not pictured here—is unlike most that I've seen. Several thin layers of moist, spiced sponge cake are brushed with rum syrup and filled with rum-spiked pastry cream; the whole thing is then frosted with more of the pastry cream and topped off with a liberal amount of shaved chocolate.
Delicious in concept, but not (yet) in reality. The sponge recipe I used was a bit too dry, the pastry cream a bit too loose. I'm not one to be bothered by fiddling with a recipe a dozen times before I'm satisfied with it, but I couldn't accept a substandard birthday cake. After flipping through my cookbooks and browsing dozens of websites, I found myself torn between two recipes from Smitten Kitchen. I wavered for a while, flipping back and forth between the pages on my computer, before I chose the Espresso Cake. The deciding factor? I already had everything I needed.
Never mind the fact that almond paste found its way into the house when shopping the other day ... another cake may be in my future, after all.
Luckily for me, my birthday was last week, so a cake was in order. I don't eat a lot of cake in the summer, as most of my fruit goes into tarts and pies, so I wanted to do something new. I was originally planning on making a rum cake for my birthday—I've been toying for years with the idea of recreating a cake from a bakery up near Mike's hometown, and I was spurred into action when I read that the place had changed hands and gone down in quality since the last time we went.
That rum cake—which, you will notice, is not pictured here—is unlike most that I've seen. Several thin layers of moist, spiced sponge cake are brushed with rum syrup and filled with rum-spiked pastry cream; the whole thing is then frosted with more of the pastry cream and topped off with a liberal amount of shaved chocolate.
Delicious in concept, but not (yet) in reality. The sponge recipe I used was a bit too dry, the pastry cream a bit too loose. I'm not one to be bothered by fiddling with a recipe a dozen times before I'm satisfied with it, but I couldn't accept a substandard birthday cake. After flipping through my cookbooks and browsing dozens of websites, I found myself torn between two recipes from Smitten Kitchen. I wavered for a while, flipping back and forth between the pages on my computer, before I chose the Espresso Cake. The deciding factor? I already had everything I needed.
Never mind the fact that almond paste found its way into the house when shopping the other day ... another cake may be in my future, after all.
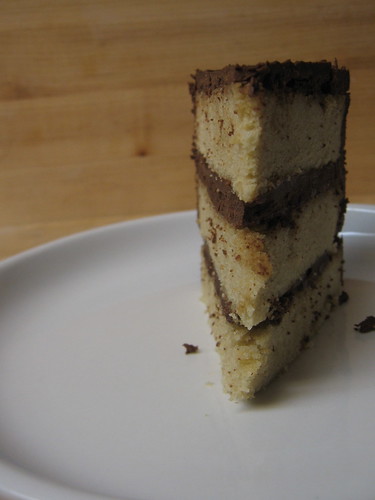 This cake is a bit time-consuming, but simple. The chiffon cake layers are assertively coffee-flavored; and a hit of espresso-rum syrup keeps them moist and adds another hit of flavor). I did decide to change the frosting—Deb calls for an instant fudge buttercream, and while "instant" and "buttercream" sound lovely together for this Swiss buttercream dévotée, it sounded too sweet and rich for my tastes. I chose instead to go with a whipped ganache—anything with a full pound of Valrhona chocolate can't be very bad—however, ganache sets firmly and takes a long time to soften, making it a bit too difficult to slice and eat a delicate cake (you can see in the picture below where the ganache cracked when I sliced it straight out of the fridge). After all, who wants to wait an hour after slicing a cake to let the frosting soften? I made this the day before I cut into it, but it would be best to make it in the morning or early afternoon and keep it at room temperature until you're ready to serve it.
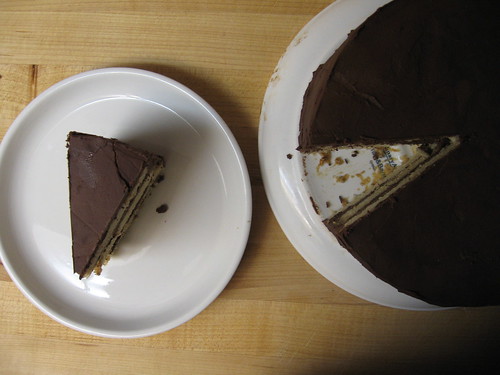 Espresso Chiffon Layer Cake
Adapted from Smitten Kitchen (danger—you will spend far too much time drooling over/making delicious food if you click over there)
Note that because chiffon cakes owe much of their leavening to egg whites, they will collapse somewhat when cooling. This is normal; however, when you are getting ready to put the cake together, I recommend gently squeezing the base of the cake if the top of your cake shrank in very much; this will help avoid having an uneven layer of frosting on the outside of the cake. Also, know that eggs are easier to separate when cold, but whip much more easily at room temperature; I generally separate my eggs before I even start assembling the other ingredients and washing whatever dishes I need that I accidentally dirtied an hour before...
For the cakes:
¼ cup mild vegetable oil (for baking, I use canola)
6 large eggs, separated
6 tablespoons espresso, room temperature
2 teaspoons vanilla extract
5 ounces cake flour (about 1⅓ cups)
9 ounces granulated sugar, divided (about 1⅓ cups)
1 teaspoon baking powder
½ teaspoon cinnamon
½ teaspoon salt
½ teaspoon cream of tartar
For the syrup:
¼ cup hot espresso
¼ cup sugar
¼ cup dark rum
For the ganache:
1 pound bittersweet chocolate, chopped (I almost always use Valrhona Extra Bitter 61% for things like this)
1 cup heavy cream
2 tablespoons light corn syrup
3 ounces unsalted butter, room temperature (6 tablespoons)
Preheat the oven to 350ºF; make sure racks are at top and bottom thirds of the oven. Line three ungreased 8-inch round cake pans with parchment rounds and set aside.
Combine the oil, egg yolks, espresso, and vanilla in a medium bowl and whisk to combine; set aside. In a large bowl, sift together the flour, 7 ounces (1 cup) of the sugar, baking powder, cinnamon, and salt—or, if you're like me and hate sifting, whisk the mixture vigorously, which as far as I can tell does the exact same thing unless you have lumpy leavening or sugar. Set aside.
In another large bowl, combine the egg whites with the cream of tartar. Beat on low speed until foamy, then increase speed to medium-high and slowly add the remaining 2 ounces (⅓ cup) sugar. Beat until soft peaks form (if you lift the beater out of the whites, they should form a little mountain in the bowl, but with a soft tip that folds over on itself); do not beat to stiff peaks or you will end up with a dense cake.
Add the egg mixture to the flour mixture and fold together until combined. Add about a quarter of the whites and fold together quickly to lighten the mixture, then fold in the remaining whites, just until the color is uniform.
Pour the batter evenly into the prepared cake pans. Bake 17-20 minutes, swapping oven location halfway through, until they are springy to the touch and don't leave any batter on a cake tester. Transfer to cooling racks and let cool completely in the pans (30 minutes minimum).
Meanwhile, make the syrup. Measure the sugar into a small bowl, then pour the hot coffee over and stir until the sugar is dissolved. Add the rum, stir well, and let cool.
To make the ganache, heat the cream and corn syrup over medium-low heat until quite hot but not boiling. Add the chocolate and let sit 1-2 minutes, then stir until melted and smooth. Let cool until it's about the consistency of yoghurt or mayo. Beat the butter in a large bowl until fluffy, then add the cooled ganache and beat until lightened and stiff, about 3-5 minutes (you don't want to overbeat it; three minutes may not be enough with a hand mixer, but it certainly should be with a stand mixer).
To assemble the cake, run a knife around the edge of each cake and invert onto the racks; remove the parchment paper. Place the first layer, bottom side up, on the cake platter. Brush with one third of the espresso syrup, then carefully spread with just over a cup of the frosting; after being soaked in syrup, the cake will be fragile, so be gentle. Repeat with the remaining layers, frosting the sides of the cake with the remaining frosting.
Serve at room temperature; if keeping for more than a day, store in the refrigerator
Serves at least 12; you could probably feed 16 easily after a big meal (if you want to share)
Espresso Chiffon Layer Cake
Adapted from Smitten Kitchen (danger—you will spend far too much time drooling over/making delicious food if you click over there)
Note that because chiffon cakes owe much of their leavening to egg whites, they will collapse somewhat when cooling. This is normal; however, when you are getting ready to put the cake together, I recommend gently squeezing the base of the cake if the top of your cake shrank in very much; this will help avoid having an uneven layer of frosting on the outside of the cake. Also, know that eggs are easier to separate when cold, but whip much more easily at room temperature; I generally separate my eggs before I even start assembling the other ingredients and washing whatever dishes I need that I accidentally dirtied an hour before...
For the cakes:
¼ cup mild vegetable oil (for baking, I use canola)
6 large eggs, separated
6 tablespoons espresso, room temperature
2 teaspoons vanilla extract
5 ounces cake flour (about 1⅓ cups)
9 ounces granulated sugar, divided (about 1⅓ cups)
1 teaspoon baking powder
½ teaspoon cinnamon
½ teaspoon salt
½ teaspoon cream of tartar
For the syrup:
¼ cup hot espresso
¼ cup sugar
¼ cup dark rum
For the ganache:
1 pound bittersweet chocolate, chopped (I almost always use Valrhona Extra Bitter 61% for things like this)
1 cup heavy cream
2 tablespoons light corn syrup
3 ounces unsalted butter, room temperature (6 tablespoons)
Preheat the oven to 350ºF; make sure racks are at top and bottom thirds of the oven. Line three ungreased 8-inch round cake pans with parchment rounds and set aside.
Combine the oil, egg yolks, espresso, and vanilla in a medium bowl and whisk to combine; set aside. In a large bowl, sift together the flour, 7 ounces (1 cup) of the sugar, baking powder, cinnamon, and salt—or, if you're like me and hate sifting, whisk the mixture vigorously, which as far as I can tell does the exact same thing unless you have lumpy leavening or sugar. Set aside.
In another large bowl, combine the egg whites with the cream of tartar. Beat on low speed until foamy, then increase speed to medium-high and slowly add the remaining 2 ounces (⅓ cup) sugar. Beat until soft peaks form (if you lift the beater out of the whites, they should form a little mountain in the bowl, but with a soft tip that folds over on itself); do not beat to stiff peaks or you will end up with a dense cake.
Add the egg mixture to the flour mixture and fold together until combined. Add about a quarter of the whites and fold together quickly to lighten the mixture, then fold in the remaining whites, just until the color is uniform.
Pour the batter evenly into the prepared cake pans. Bake 17-20 minutes, swapping oven location halfway through, until they are springy to the touch and don't leave any batter on a cake tester. Transfer to cooling racks and let cool completely in the pans (30 minutes minimum).
Meanwhile, make the syrup. Measure the sugar into a small bowl, then pour the hot coffee over and stir until the sugar is dissolved. Add the rum, stir well, and let cool.
To make the ganache, heat the cream and corn syrup over medium-low heat until quite hot but not boiling. Add the chocolate and let sit 1-2 minutes, then stir until melted and smooth. Let cool until it's about the consistency of yoghurt or mayo. Beat the butter in a large bowl until fluffy, then add the cooled ganache and beat until lightened and stiff, about 3-5 minutes (you don't want to overbeat it; three minutes may not be enough with a hand mixer, but it certainly should be with a stand mixer).
To assemble the cake, run a knife around the edge of each cake and invert onto the racks; remove the parchment paper. Place the first layer, bottom side up, on the cake platter. Brush with one third of the espresso syrup, then carefully spread with just over a cup of the frosting; after being soaked in syrup, the cake will be fragile, so be gentle. Repeat with the remaining layers, frosting the sides of the cake with the remaining frosting.
Serve at room temperature; if keeping for more than a day, store in the refrigerator
Serves at least 12; you could probably feed 16 easily after a big meal (if you want to share)
14 October 2011
Well-earned
I'm taking a well-earned rest today.
The past two weeks of work have been maddening, but the madness ended yesterday! For the next couple months, my life will be unmitigated insanity, but very little of that will be coming from work.
Will that result in this blog getting a bit lively again? Only time will tell. Over the past several months it has been a source of guilt more than joy, as I've made all sorts of food that hasn't made it on here. Some of it will probably appear in future years (it's not exactly the time to share recipes for plum cake or curried corn fritters); some of it will probably trickle to the back of my mind and be lost forever.
In the meantime, though, we have biscuits. Who could complain about that?
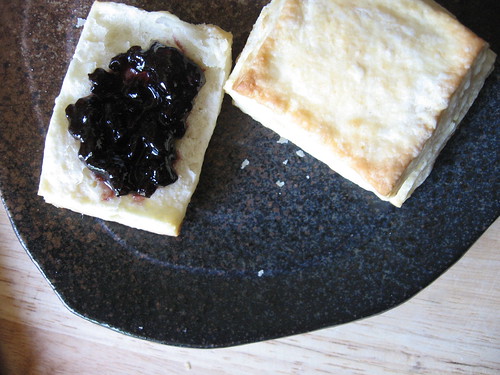 I've been making biscuits for years. They're simple—flour, salt, butter, buttermilk, and leavening—and fast. You can bake them in a jiffy to go with stews and soups (I particularly like them with split pea or lentil-sausage stew), or eat them for breakfast stuffed with eggs and sausage. A little dry ham and cheese, and you can make great little two-bite sandwiches. Biscuits are also perfect with all manner of sweet accompaniments, from jam & butter to macerated strawberries and whipped cream; it's not necessary, but I usually add a bit of sugar to the dough, as well.
For years, I made the exact same biscuits. It was the basic biscuits that most people have made at some point over the years, almost verbatim from The Joy of Cooking: rub some cold butter into flour, salt, and leavening, moisten with buttermilk, and pop into a hot oven. Eventually, though, I started fiddling with things, looking at the many variations in my different cookbooks. I started playing with flour (all cake flour wasn't sturdy enough; only A-P flour didn't have enough tenderness) and leavening (a combination of baking powder and soda seems to work best with buttermilk). All in all, I thought, I made a pretty darned good biscuit.
I've been making biscuits for years. They're simple—flour, salt, butter, buttermilk, and leavening—and fast. You can bake them in a jiffy to go with stews and soups (I particularly like them with split pea or lentil-sausage stew), or eat them for breakfast stuffed with eggs and sausage. A little dry ham and cheese, and you can make great little two-bite sandwiches. Biscuits are also perfect with all manner of sweet accompaniments, from jam & butter to macerated strawberries and whipped cream; it's not necessary, but I usually add a bit of sugar to the dough, as well.
For years, I made the exact same biscuits. It was the basic biscuits that most people have made at some point over the years, almost verbatim from The Joy of Cooking: rub some cold butter into flour, salt, and leavening, moisten with buttermilk, and pop into a hot oven. Eventually, though, I started fiddling with things, looking at the many variations in my different cookbooks. I started playing with flour (all cake flour wasn't sturdy enough; only A-P flour didn't have enough tenderness) and leavening (a combination of baking powder and soda seems to work best with buttermilk). All in all, I thought, I made a pretty darned good biscuit.
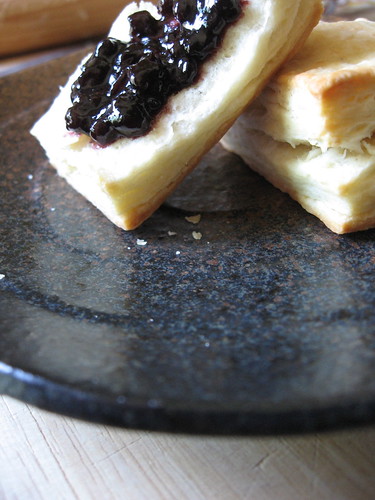 And then. And then. A few weeks ago, sitting on the floor surrounded by a pile of cookbooks and magazines, I noticed the biscuit recipe in Michael Ruhlman's Ratio. After the first basic steps and a rest in the fridge, Ruhlman gives the dough the puff pastry treatment, rolling it and folding it into thirds several times. This results in extreme layers and extra tall biscuits, and it is entirely worth the extra work.
 Extra Flaky Buttermilk Biscuits
Adapted from Michael Ruhlman's fascinating and useful book "Ratio".
If you're using these for dessert, I recommend adding a tablespoon of sugar to the dry ingredients, though it's certainly not necessary. And in a strawberry shortcake sort of application, I wouldn't do the extra rolling, as I prefer a less flaky biscuit. I've really started to embrace my kitchen scale for dry ingredients, and I highly recommend you do the same; the volume measurements are estimates in case you don't have a scale.
7 ounces all-purpose flour (about 1¾ cups)
2 ounces cake flour (about ¼ cup)
2 teaspoons baking powder
¼ teaspoon baking soda
1 teaspoon salt
3 ounces very cold butter, cut into pieces (6 tablespoons)
¾ cup cold buttermilk
Measure both flours into a mixing bowl set on your scale. Add the baking powder, soda, and salt and stir well to mix. Add the cold butter, toss to coat, and quickly rub the butter into the flour (if you naturally have very warm hands, you may want to rinse them in very cold water and dry them before starting - or use a pastry cutter or a pair of knives). The biggest pieces of flour should be no bigger than peas, and the mixture as a whole should look rather crumbly, kind of like oats. Pour in the buttermilk and stir quickly just to combine.
Empty the dough out onto a piece of plastic wrap; if you have some troublesome flour at the bottom of your bowl, just toss it on top. Use the plastic wrap, if needed, to turn the dough a few times until any dry bits are combined, then press into a 1 inch thick rectangle and wrap tightly. Transfer to the refrigerator for about half an hour or the freezer about 10 minutes.
Unwrap the dough and either dust with flour or top with another piece of plastic wrap. Roll the dough out to approximately an 8- by 10-inch rectangle. Fold it into thirds, roll out again, fold into thirds one more time, and roll out about ½ inch thick. Rewrap and return to the fridge for about 20 minutes. (Note: if your home is very warm, you may wish to refrigerate it for a few minutes between folds, as you don't want the butter, which is very thin at this point, to melt or soften).
While the dough chills, heat the oven to 400ºF.
Remove the dough from the fridge and transfer to a cutting board. Using a very sharp knife, trim the edges from the rectangle, then cut the dough into 6-10 rectangles. Transfer to an ungreased baking sheet and bake until tall and golden brown, 16-18 minutes for very small biscuits, a few minutes longer for larger ones.
Makes 10-12 little biscuits (about 2 ½ by 2 inches)
Extra Flaky Buttermilk Biscuits
Adapted from Michael Ruhlman's fascinating and useful book "Ratio".
If you're using these for dessert, I recommend adding a tablespoon of sugar to the dry ingredients, though it's certainly not necessary. And in a strawberry shortcake sort of application, I wouldn't do the extra rolling, as I prefer a less flaky biscuit. I've really started to embrace my kitchen scale for dry ingredients, and I highly recommend you do the same; the volume measurements are estimates in case you don't have a scale.
7 ounces all-purpose flour (about 1¾ cups)
2 ounces cake flour (about ¼ cup)
2 teaspoons baking powder
¼ teaspoon baking soda
1 teaspoon salt
3 ounces very cold butter, cut into pieces (6 tablespoons)
¾ cup cold buttermilk
Measure both flours into a mixing bowl set on your scale. Add the baking powder, soda, and salt and stir well to mix. Add the cold butter, toss to coat, and quickly rub the butter into the flour (if you naturally have very warm hands, you may want to rinse them in very cold water and dry them before starting - or use a pastry cutter or a pair of knives). The biggest pieces of flour should be no bigger than peas, and the mixture as a whole should look rather crumbly, kind of like oats. Pour in the buttermilk and stir quickly just to combine.
Empty the dough out onto a piece of plastic wrap; if you have some troublesome flour at the bottom of your bowl, just toss it on top. Use the plastic wrap, if needed, to turn the dough a few times until any dry bits are combined, then press into a 1 inch thick rectangle and wrap tightly. Transfer to the refrigerator for about half an hour or the freezer about 10 minutes.
Unwrap the dough and either dust with flour or top with another piece of plastic wrap. Roll the dough out to approximately an 8- by 10-inch rectangle. Fold it into thirds, roll out again, fold into thirds one more time, and roll out about ½ inch thick. Rewrap and return to the fridge for about 20 minutes. (Note: if your home is very warm, you may wish to refrigerate it for a few minutes between folds, as you don't want the butter, which is very thin at this point, to melt or soften).
While the dough chills, heat the oven to 400ºF.
Remove the dough from the fridge and transfer to a cutting board. Using a very sharp knife, trim the edges from the rectangle, then cut the dough into 6-10 rectangles. Transfer to an ungreased baking sheet and bake until tall and golden brown, 16-18 minutes for very small biscuits, a few minutes longer for larger ones.
Makes 10-12 little biscuits (about 2 ½ by 2 inches)
I've been making biscuits for years. They're simple—flour, salt, butter, buttermilk, and leavening—and fast. You can bake them in a jiffy to go with stews and soups (I particularly like them with split pea or lentil-sausage stew), or eat them for breakfast stuffed with eggs and sausage. A little dry ham and cheese, and you can make great little two-bite sandwiches. Biscuits are also perfect with all manner of sweet accompaniments, from jam & butter to macerated strawberries and whipped cream; it's not necessary, but I usually add a bit of sugar to the dough, as well.
For years, I made the exact same biscuits. It was the basic biscuits that most people have made at some point over the years, almost verbatim from The Joy of Cooking: rub some cold butter into flour, salt, and leavening, moisten with buttermilk, and pop into a hot oven. Eventually, though, I started fiddling with things, looking at the many variations in my different cookbooks. I started playing with flour (all cake flour wasn't sturdy enough; only A-P flour didn't have enough tenderness) and leavening (a combination of baking powder and soda seems to work best with buttermilk). All in all, I thought, I made a pretty darned good biscuit.
And then. And then. A few weeks ago, sitting on the floor surrounded by a pile of cookbooks and magazines, I noticed the biscuit recipe in Michael Ruhlman's Ratio. After the first basic steps and a rest in the fridge, Ruhlman gives the dough the puff pastry treatment, rolling it and folding it into thirds several times. This results in extreme layers and extra tall biscuits, and it is entirely worth the extra work.
Extra Flaky Buttermilk Biscuits
Adapted from Michael Ruhlman's fascinating and useful book "Ratio".
If you're using these for dessert, I recommend adding a tablespoon of sugar to the dry ingredients, though it's certainly not necessary. And in a strawberry shortcake sort of application, I wouldn't do the extra rolling, as I prefer a less flaky biscuit. I've really started to embrace my kitchen scale for dry ingredients, and I highly recommend you do the same; the volume measurements are estimates in case you don't have a scale.
7 ounces all-purpose flour (about 1¾ cups)
2 ounces cake flour (about ¼ cup)
2 teaspoons baking powder
¼ teaspoon baking soda
1 teaspoon salt
3 ounces very cold butter, cut into pieces (6 tablespoons)
¾ cup cold buttermilk
Measure both flours into a mixing bowl set on your scale. Add the baking powder, soda, and salt and stir well to mix. Add the cold butter, toss to coat, and quickly rub the butter into the flour (if you naturally have very warm hands, you may want to rinse them in very cold water and dry them before starting - or use a pastry cutter or a pair of knives). The biggest pieces of flour should be no bigger than peas, and the mixture as a whole should look rather crumbly, kind of like oats. Pour in the buttermilk and stir quickly just to combine.
Empty the dough out onto a piece of plastic wrap; if you have some troublesome flour at the bottom of your bowl, just toss it on top. Use the plastic wrap, if needed, to turn the dough a few times until any dry bits are combined, then press into a 1 inch thick rectangle and wrap tightly. Transfer to the refrigerator for about half an hour or the freezer about 10 minutes.
Unwrap the dough and either dust with flour or top with another piece of plastic wrap. Roll the dough out to approximately an 8- by 10-inch rectangle. Fold it into thirds, roll out again, fold into thirds one more time, and roll out about ½ inch thick. Rewrap and return to the fridge for about 20 minutes. (Note: if your home is very warm, you may wish to refrigerate it for a few minutes between folds, as you don't want the butter, which is very thin at this point, to melt or soften).
While the dough chills, heat the oven to 400ºF.
Remove the dough from the fridge and transfer to a cutting board. Using a very sharp knife, trim the edges from the rectangle, then cut the dough into 6-10 rectangles. Transfer to an ungreased baking sheet and bake until tall and golden brown, 16-18 minutes for very small biscuits, a few minutes longer for larger ones.
Makes 10-12 little biscuits (about 2 ½ by 2 inches)
25 September 2011
Overworking, with a salad
Well, crap.
Someday, perhaps, my life will be my own again, and I'll be
able to do what I want, when I want (at least from time to time). I've finally
resorted to the Pomodoro Technique at work, and I've seriously considered
bringing it home with me. I'm not quite Type A enough to handle that kind of
structure.
That being said, there is an end in sight. Work
will may return to some level of normalcy come
mid-October, and several other things will be wrapping up before Christmas.
In the meantime, believe it or not, I have been cooking. Not
much has been blog-worthy, though. I've got a pudding cake recipe that is about
3 tweaks away from perfect; a chewy whole-wheat chocolate chip cookie that, I
hope, I will be perfecting this weekend; and several ideas for tarts and cakes
that I haven't even begun to properly plan. For dinners we've eaten scads of
pasta (tomato sauce made from our crop has been the high point of the past
several weeks), the occasional salad, and anything we could think of
to eat with salsa.
This is the time of year when I get confused with the food
that's on offer. Late summer produce is still everywhere—tomatoes,
corn, grapes, peaches—but we're also getting the first fennel and
kohlrabi, the prune plums have already disappeared, and local apples arrived
just this week. I'm thrilled with all the options, but it's easy to be
overwhelmed. Do I embrace the cool, cloudy evenings and use the foods I've not
seen for nine months? Do I ignore those and instead just gorge myself on summer
favorites, hoping to help me get through the winter?
Not that it's ever worked—I'll be half-dreaming of
tomatoes from the day they turn mealy and sickly pink until they return to some
level of quality sometime next spring—but that's been my plan so far.
We've still got another dozen or so tomatoes ripening on the patio, so as long
as the evil mouse-rat that's already stolen at least 5
pounds doesn't get any more of them, I'll be continuing for a little
while longer.
Every season, I find some item that I gorge myself on no
matter what the price, and when it's gone, I swear that I'm going to eat even
more next year. Just as invariably, when that season comes again, I get
distracted by something else. Last summer, it was fresh black-eyed peas. This
year, it's been corn, and black-eyed peas are but a distant memory (I ate them
once, but it was a lackluster dish that we won't discuss). I've always loved
corn, and summers spent at my grandparents house in Oregon always included many
dinners of corn on the cob, unnecessarily but deliciously coated in butter and
salt. Corn is never as good as it is fresh from the garden—like peas,
its sugars start converting to starch the minute it's picked. However, even
after a few days in the fridge, the right seasonings and a few minutes in a hot
skillet will make a meal that I'd never complain about.
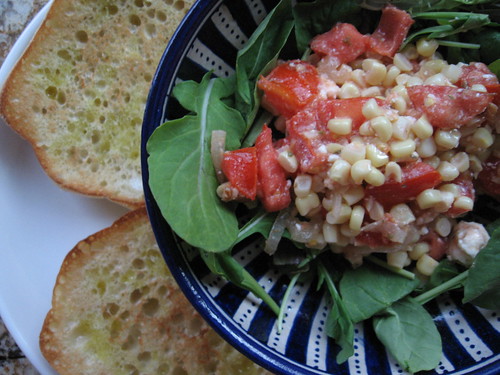
Corn-Feta Salad with
Tomatoes
Also like peas, corn freezes extraordinarily well. In the
spring, this salad would probably be great with Persian cucumbers instead of
tomatoes and some fresh-frozen corn (put it in a very hot skillet without
thawing, in a single layer to avoid steaming).
2 tablespoons olive oil, divided
½ sweet onion, thinly sliced
3 ears sweet corn, cut off the cob (2 to 2½ cups
kernels)
1 large fresh tomato
2 ounces feta cheese
pinch dried oregano
salt & pepper
salad greens (optional)
Heat a large skillet over medium-high heat. Add one
tablespoon of the olive oil and the sliced onion; sprinkle with salt and cook,
stirring well, until tender and beginning to brown, 5-7 minutes. Increase the
heat to high and add the corn, mixing well and spreading across the skillet.
Cook 2-3 minutes, stirring a few times, until tender; if your pan is hot
enough, you'll get some nice caramelized bits on the corn.
Remove from the heat and transfer to a shallow bowl; set
aside to cool to barely warm or room temperature.
Chop the tomato and add it to the mixture; crumble the feta
over. Add the oregano, some pepper, and the remaining tablespoon of olive oil
and gently stir to combine. Adjust seasoning to your taste—depending
on your feta, you may or may not need more salt.
Serve over a bed of greens, with crusty bread or crostini
(or, for that matter, <i>on</i> crostini as bruschetta).
Serves 3 as a main dish, 4-6 as a side, and
I-have-no-idea-how-many as a bruschetta appetizer (8-10, maybe?)
06 September 2011
Tart-maggedon
I like to imagine that someday, somewhere, I will have enough land to have a proper garden. Rows of tomatoes, long beanpoles, cucumbers big and small grown for various pickles, a fruit tree or two. Until then, I just have to satisfy myself with my little starter garden on our patio. Every year we try a something new in the spring—it was sweet, oblong French breakfast radishes this year—and spend the summer coaxing as many peppers and tomatoes as we can out of our various containers and small strips of earth.
Yesterday, I decided to pick the tomatoes that were ripe.
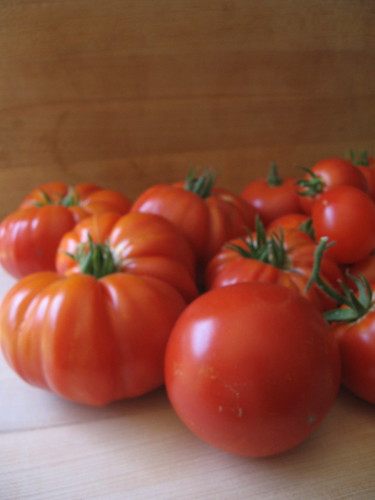
I don't think we're doing so badly for an apartment patio.
Perhaps unfortunately, I haven't been doing much of particular interest with the tomatoes. We've eaten at least a half dozen dinners of panzanella; some sandwiches with mayo, tomato, and sharp cheddar cheese; and today we had pasta with the simplest tomato sauce: fresh blanched tomatoes, onion and garlic, olive oil, salt, herbs, and a touch of butter at the end. My favorites may have been the specimens that were sliced and eaten plain, still warm from the sun.
They may only be around, in all their end-of-summer glory, for another month or so, but I'm actually not here to talk about tomatoes. I'm here to talk about a meal that it took me several weeks, no few tears, and a burn scar on my arm to perfect. I'm here to talk about cheese gone bubbly and golden-brown in the oven. I'm here to talk about a mushroom and fontina tart.
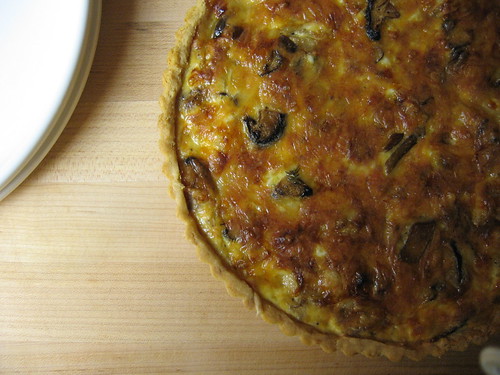
Cheese and mushrooms, I'll venture, aren't ever likely to be a bad pair. Years ago, when I was still living in Morocco, I was paging through a borrowed vegetarian cookbook when I saw a recipe for polenta, baked with fontina and topped with mushrooms. In later years, I developed a slight obsession with savory tarts. Chard, beets, tomatoes ... you name it, I'll probably be happy to stick it in a buttery crust.
The first time I made this tart, I planned it days in advance. I read recipes and made notes and made a special trip to the store to get some fontina; I bought mushrooms and scrubbed my kitchen clean.
I should have known early that it wasn't going to work out. As I sliced onions and hummed along to Motown classics, suddenly it came to me: I never made the crust! I abandoned my vegetables, cranked up the oven, and feverishly put together the food processor, shaped my crust, and tossed it in the freezer, and by the time it was ready to go into the oven to blind-bake, it was nearly nine.
Never one to quit, I kept working. My mushrooms were prepped and custard mixed when the par-baked crust came out; the whole thing wasn't out of the oven more than 2 minutes before I popped it back in with its fillings. Then I waited.
And waited. The house was filled with delicious smells and both of us were practically drooling when the timer finally beeped. Perhaps I was starting to bonk and my hands were shaking; perhaps I was just tired, getting ready for dinner at 10 pm. As I took the bubbling, golden tart from the oven, something possessed me to unmold it immediately and without a spatula. As the metal tart ring inevitably slipped and wrapped around my forearm like a bracelet, I yelled, jerked ... and the entire tart fell, face down of course, onto the floor.
I'm not ashamed to admit it. I sat down, surrounded by tart-maggedon, and I cried for a few minutes. Afterward, I got up, iced my arm, helped Mike clean up the mess, and made ramen for dinner.
Tarts were on probation in my house for a few weeks after that. Eventually, though, I was ready to give it another whack, and I'm glad that I did.

As long as you don't wait until 8:30 to start dinner, this tart is totally worth your time. The ingredients may be difficult to find (or a bit expensive) in some places, but they're used in small enough amounts that it's not a wallet-buster. The first time I made it, I used a crumbly tart crust enriched with an egg yolk, but the second time I chose to use an all-butter flaky pastry dough, which was quicker, easier, and better suited to the filling. When making an all-butter crust, I use a method similar to the one on Chez Pim—I use more water and don't roll it nearly as much. While it's blind-baking, the onions and mushrooms have ample time to cook, and while the composed tart is then baking, there's ample time to make a salad—in my case, an incongruous but delicious warm corn salad. Just make sure you unmold it carefully when it's done.
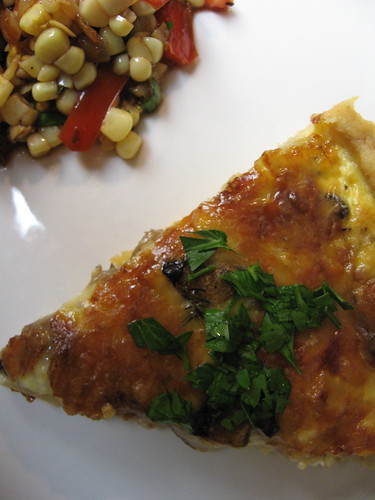
Mushroom and Fontina Tart
You might notice that my pictures look a little bit light on mushrooms; that's because I'm much worse at meal planning (and the shopping that goes along with it) than I would have you believe, and I made the second tart with only about 4.5 ounces of mushrooms
For the pâte brisée:
1 ¼ cups unbleached flour
½ teaspoon salt
4 ounces (1 stick) unsalted butter, well chilled
¼ cup cold water, plus more if needed
For the tart:
½ onion, thinly sliced
1 tablespoon olive oil
3 tablespoons butter, divided
6-8 ounces assorted mushrooms (I used a mixture of shiitake, maitake, and cremini)
2-3 sprigs fresh thyme, or ½ teaspoon dried
salt and pepper to taste
4 ounces fontina, grated
2 eggs
¾ cup milk, preferably whole
pinch salt
Preheat the oven to 375ºF.
To make the crust, mix together the flour and salt in a bowl or on a clean counter or chopping board. Cut the butter into the flour until the mixture resembles very coarse meal. Pour the cold water over the flour and mix until it just holds together; feel free to add more, a teaspoon or so at a time, if necessary. Form the dough into a flattened disk, wrap tightly with plastic wrap, and refrigerator for 30 minutes.
Roll out the dough to 11-12 inches in diameter and transfer to a 10 inch tart pan, gently pressing the crust into the edges; fold the crust under at the edges if it is thin in spots. Trim the edges, cover with foil, and weight with pie weights or some dry beans. Place the tart pan on a baking sheet and place in the oven for 15 minutes. Remove the weights and foil and return to the oven until just golden, 8-10 minutes more.
Meanwhile, set a large skillet over medium high heat with the olive oil and one tablespoon of the butter. Sauté the onion with a bit of salt until softened and just beginning to brown, 5-7 minutes; transfer to a medium bowl. Slice all the mushrooms and sauté in two additions, adding one tablespoon of the butter and seasoning with salt and pepper each time; when cooked, transfer to the bowl with the onion. Add the thyme, stir well, and set aside.
Beat the eggs together with the milk and salt; stir in the cheese, leaving a bit out. Spread the mushroom mixture evenly over the tart crust, then carefully pour the custard-cheese mixture over. Sprinkle the reserved cheese over the top.
Return the tart to the oven and bake 45-60 minutes, until golden brown all over and bubbling; if you prod a toothpick in near the middle you will see that the custard has set. Let cool 5-10 minutes before unmolding and serving. Serve hot or warm.
Serves 6 to 8
Yesterday, I decided to pick the tomatoes that were ripe.
I don't think we're doing so badly for an apartment patio.
Perhaps unfortunately, I haven't been doing much of particular interest with the tomatoes. We've eaten at least a half dozen dinners of panzanella; some sandwiches with mayo, tomato, and sharp cheddar cheese; and today we had pasta with the simplest tomato sauce: fresh blanched tomatoes, onion and garlic, olive oil, salt, herbs, and a touch of butter at the end. My favorites may have been the specimens that were sliced and eaten plain, still warm from the sun.
They may only be around, in all their end-of-summer glory, for another month or so, but I'm actually not here to talk about tomatoes. I'm here to talk about a meal that it took me several weeks, no few tears, and a burn scar on my arm to perfect. I'm here to talk about cheese gone bubbly and golden-brown in the oven. I'm here to talk about a mushroom and fontina tart.
Cheese and mushrooms, I'll venture, aren't ever likely to be a bad pair. Years ago, when I was still living in Morocco, I was paging through a borrowed vegetarian cookbook when I saw a recipe for polenta, baked with fontina and topped with mushrooms. In later years, I developed a slight obsession with savory tarts. Chard, beets, tomatoes ... you name it, I'll probably be happy to stick it in a buttery crust.
The first time I made this tart, I planned it days in advance. I read recipes and made notes and made a special trip to the store to get some fontina; I bought mushrooms and scrubbed my kitchen clean.
I should have known early that it wasn't going to work out. As I sliced onions and hummed along to Motown classics, suddenly it came to me: I never made the crust! I abandoned my vegetables, cranked up the oven, and feverishly put together the food processor, shaped my crust, and tossed it in the freezer, and by the time it was ready to go into the oven to blind-bake, it was nearly nine.
Never one to quit, I kept working. My mushrooms were prepped and custard mixed when the par-baked crust came out; the whole thing wasn't out of the oven more than 2 minutes before I popped it back in with its fillings. Then I waited.
And waited. The house was filled with delicious smells and both of us were practically drooling when the timer finally beeped. Perhaps I was starting to bonk and my hands were shaking; perhaps I was just tired, getting ready for dinner at 10 pm. As I took the bubbling, golden tart from the oven, something possessed me to unmold it immediately and without a spatula. As the metal tart ring inevitably slipped and wrapped around my forearm like a bracelet, I yelled, jerked ... and the entire tart fell, face down of course, onto the floor.
I'm not ashamed to admit it. I sat down, surrounded by tart-maggedon, and I cried for a few minutes. Afterward, I got up, iced my arm, helped Mike clean up the mess, and made ramen for dinner.
Tarts were on probation in my house for a few weeks after that. Eventually, though, I was ready to give it another whack, and I'm glad that I did.
As long as you don't wait until 8:30 to start dinner, this tart is totally worth your time. The ingredients may be difficult to find (or a bit expensive) in some places, but they're used in small enough amounts that it's not a wallet-buster. The first time I made it, I used a crumbly tart crust enriched with an egg yolk, but the second time I chose to use an all-butter flaky pastry dough, which was quicker, easier, and better suited to the filling. When making an all-butter crust, I use a method similar to the one on Chez Pim—I use more water and don't roll it nearly as much. While it's blind-baking, the onions and mushrooms have ample time to cook, and while the composed tart is then baking, there's ample time to make a salad—in my case, an incongruous but delicious warm corn salad. Just make sure you unmold it carefully when it's done.
Mushroom and Fontina Tart
You might notice that my pictures look a little bit light on mushrooms; that's because I'm much worse at meal planning (and the shopping that goes along with it) than I would have you believe, and I made the second tart with only about 4.5 ounces of mushrooms
For the pâte brisée:
1 ¼ cups unbleached flour
½ teaspoon salt
4 ounces (1 stick) unsalted butter, well chilled
¼ cup cold water, plus more if needed
For the tart:
½ onion, thinly sliced
1 tablespoon olive oil
3 tablespoons butter, divided
6-8 ounces assorted mushrooms (I used a mixture of shiitake, maitake, and cremini)
2-3 sprigs fresh thyme, or ½ teaspoon dried
salt and pepper to taste
4 ounces fontina, grated
2 eggs
¾ cup milk, preferably whole
pinch salt
Preheat the oven to 375ºF.
To make the crust, mix together the flour and salt in a bowl or on a clean counter or chopping board. Cut the butter into the flour until the mixture resembles very coarse meal. Pour the cold water over the flour and mix until it just holds together; feel free to add more, a teaspoon or so at a time, if necessary. Form the dough into a flattened disk, wrap tightly with plastic wrap, and refrigerator for 30 minutes.
Roll out the dough to 11-12 inches in diameter and transfer to a 10 inch tart pan, gently pressing the crust into the edges; fold the crust under at the edges if it is thin in spots. Trim the edges, cover with foil, and weight with pie weights or some dry beans. Place the tart pan on a baking sheet and place in the oven for 15 minutes. Remove the weights and foil and return to the oven until just golden, 8-10 minutes more.
Meanwhile, set a large skillet over medium high heat with the olive oil and one tablespoon of the butter. Sauté the onion with a bit of salt until softened and just beginning to brown, 5-7 minutes; transfer to a medium bowl. Slice all the mushrooms and sauté in two additions, adding one tablespoon of the butter and seasoning with salt and pepper each time; when cooked, transfer to the bowl with the onion. Add the thyme, stir well, and set aside.
Beat the eggs together with the milk and salt; stir in the cheese, leaving a bit out. Spread the mushroom mixture evenly over the tart crust, then carefully pour the custard-cheese mixture over. Sprinkle the reserved cheese over the top.
Return the tart to the oven and bake 45-60 minutes, until golden brown all over and bubbling; if you prod a toothpick in near the middle you will see that the custard has set. Let cool 5-10 minutes before unmolding and serving. Serve hot or warm.
Serves 6 to 8
Subscribe to:
Posts
(
Atom
)
