Shortly after returning from my trip, I went to the farmer's market to find that summer had finally taken hold: piles of peppers, boxes of beautiful (and horribly overpriced) heirloom tomatoes, great heaps of fragrant basil. On my own little patio, habañeros are beginning to turn orange, tomatoes are ripening almost as fast as we can eat them, and a sunflower kindly planted by one of our local songbirds is swiveling from east to west each day.

I came home with a shock of sweet Italian basil, a big bag of red peppers, and a plan. Particularly in California, bell peppers seem to be forgotten around the summertime. Eggplant are everywhere, towers of corn stack up on tables and in grocery stores, and boxes of watermelon and cantaloupe loom like bodyguards at store entrances. But bell peppers? Eh, you can get those any old time.
True? Perhaps. But deeply colored peppers, small and firm, with sweet and lightly acidic flavor—those are harder to find. Red peppers (or their orange and yellow siblings) are all right raw, I suppose, diced with some red onion and a tangy vinagrette or used as a vehicle for hummus or some other sort of dip, but their flavor deepens when cooked. They pair well with spicy Indian flavors and are delicious blended into a nutty sauce, but they are at their most simple and versatile when roasted.
Every summer, I try to find a big bag of super-ripe red peppers on the cheap. Sometimes they are beginning to wrinkle with age, or they're strangely wrinkled and collapsed on themselves, or even beginning to bruise and turn brown. No matter—a hot, hot oven or grill wipes away all those sins. A bonus? Tuck them away in your freezer, and you can add color to soups and stews, or grill up crusty panini, all winter long.

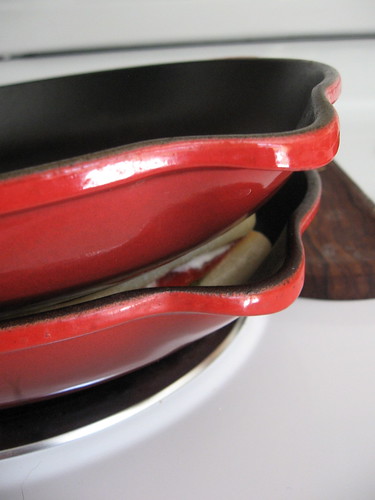
I adore toasted sandwiches. Nearly anyone who is passionate about food would agree that texture and mouthfeel are integral parts of any meal, and for me, any proper sandwich has to have some good crunch. If it doesn't have lettuce, or cucumber, or maybe even some potato chips when the time is right, it's gotta be toasted. (That is not to say that some sandwiches don't require toast and a crunchy filling ... I don't want any soft bread on my BLTs.) A griddle and some melted butter will make a fine toasted sandwich, but the rippled, crusty ridges are what make panini really special. You don't need any special apparatus, although the panini presses look pretty cool; you don't even need one of those special cast-iron grill lids. Any heavy pot that fits into your grill pan or will balance on a flat grill will work fine. I use a 10-inch cast iron skillet that nests into my 10 inch grill pan, but any dish - even a plate weighed down with a bag of beans or a foil-wrapped brick will do.

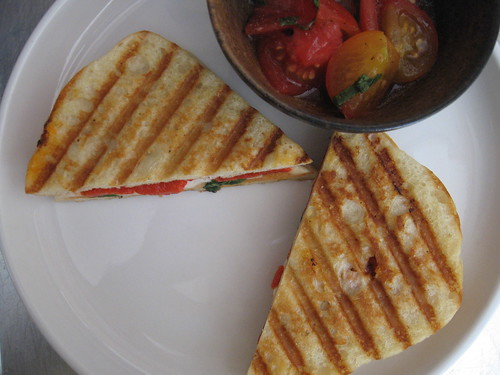
Roasted Red Pepper Panini
To be honest, I usually make these with goat cheese instead of fresh mozzarella (it's less fussy, as the goat cheese doesn't get as gooey when it melts); just sub the goat cheese and spread it a little farther on your sandwich.
4 slices, about ⅜ inch thick, rustic country-style white bread (like a ciabatta loaf), or 2 individual ciabatta rolls
4 ounces fresh mozzarella
roasted red pepper, about one medium pepper total (see below)
8-10 fres basil leaves
salt & pepper
1 tablespoon olive oil
1 tablespoon butter
To make roasted red peppers, preheat your broiler or grill. Rinse red peppers (I can get about a dozen in my oven at once); arrange on a baking sheet and place near the top of the oven or pile them in a single layer on the grill. Cook until the skin is blackened, turning with tongs as needed until tender and mostly blackened all over. Place the peppers in a paper bag or a lidded container and set aside to steam and cool for a few minutes. When cool enough to handle, peel away the skin and remove the stem and seeds; discard all but the flesh. To freeze, you can either set little puddles on a baking sheet, then transfer to a bag when frozen, or stuff them into an ice cube tray and do the same.
To make the panini, heat a heavy, ridged grill pan over medium-high or high heat (because the mozzarella melts quickly, make sure it's higher than you would usually use for a sandwich); have ready an unheated matching skillet or a heat-resistant dish (with weights if needed).
If using individual rolls, cut a thin slice from the top of each roll, then cut crosswise into two ⅜ inch slices. Arrange the bread slices on a plate; if using the rolls, face the cut side down.
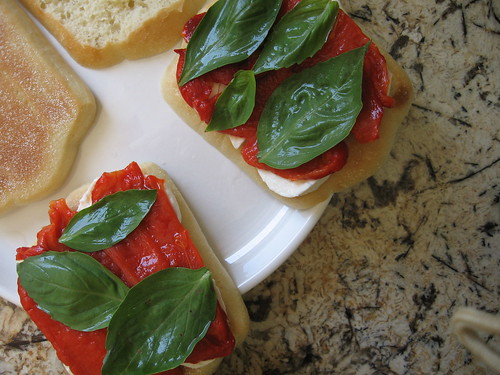
Thinly slice the fresh mozzarella and pat dry with a paper towel; if it is very fresh and juicy, you may want to press a little bit to remove a bit more whey. Arrange over two slices of bread, leaving a half-inch clear around the edges. Pat the red pepper pieces dry as well and arrange over the cheese. Scatter basil leaves over, season with salt and papper, and top each sandwich with the other slices of bread.
Melt the butter in a little bowl and mix it with the oil. Brush about half of the mixture over the tops of the sandwiches, then flip the bread, cheese side up, into the grill pan. Set your weight over the top, pressing down if needed to force the bread into the ridges.
Toast 2-3 minutes, until golden brown and crispy. Remove the weight, brush the tops with the butter mixture, and carefully flip. Note: if your pan was too cool or your fillings too juicy, you may have some pepper- or cheese-juice drip into the pan; if so, don't panic - just hold them over a plate to catch the drips before flipping them.
Press on the toasted side just briefly, then remove the weight to finish cooking. If necessary, use your spatula to poke any errant cheese back into the sandwich.
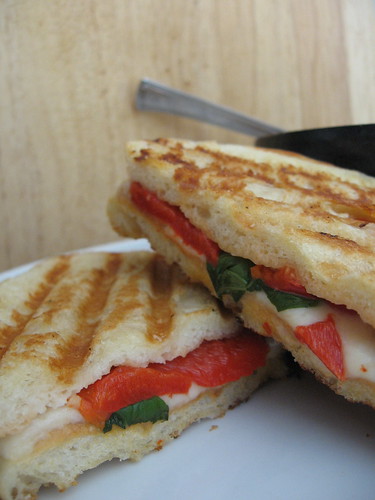
Toast until golden, 2-3 minutes more. Remove to a cutting board to firm up for 1-2 minutes, then cut and serve.
Makes 2 sandwiches

No comments :
Post a Comment